")
How to personalize Customer Accounts page to boost retention
Your repeat online customers can get frustrated if you’re not making it easy for them to find and track the products they are interested in – such as offering them an easy way to access their browsing history, wishlists, or cart items. Moreover, if you do not update them about the changes in the products they are interested in (such as price drops, restocks, or discounts) you’re making it even harder for them to make a purchase decision. They will have to search for their favorites again and look for any updates. It is a tedious and time-consuming process, which most of your repeat customers will be unwilling to go through and that means missed opportunities for you.
Personalizing the Customer Accounts page helps repeat customers find all the products that they’ve expressed interest in. It allows them to see all the products they have interacted with before (including items they’ve wishlisted, browsed, saved from the cart or signed up for a restock alert). This helps customers shop more easily by helping them pick up where they left off, in turn helping online stores increase repeat purchases and build customer loyalty.
Wishlist Plus allows you to easily add all this context to the Customer Accounts page on Shopify. Follow the steps below to easily add the various shopping sections the customer accounts page. You can also add these sections to any page of your store with our pre-set options and code free setup.
Setting up the Customer Accounts Page
Note: Before starting with setup please ensure that:
- The Wishlist Plus app is enabled from your Shopify theme editor
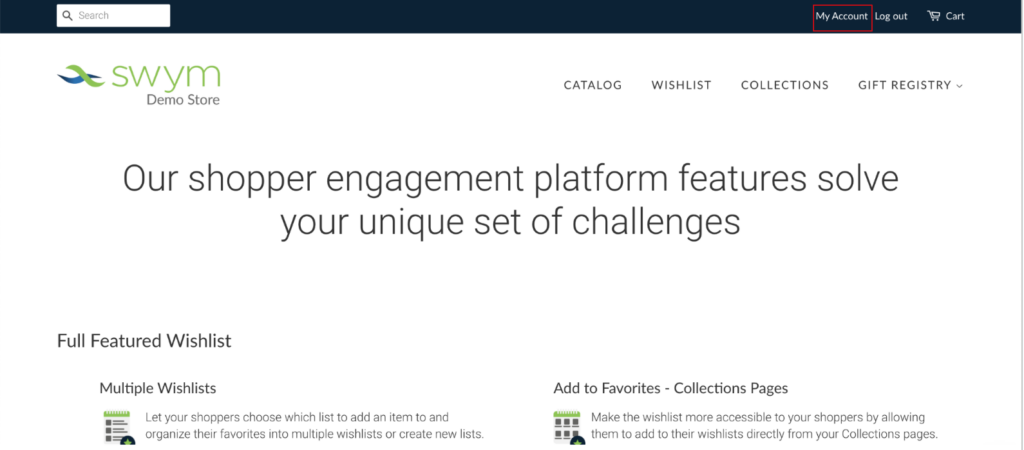
- Your Shopify Customer Accounts page is accessible to the shopper and is added to your store header. Please follow these instructions to allow shoppers to access their Customer Accounts page if this is not already available. This is an important step that will allow your shoppers to navigate to this page. Here’s an example:
Once you’ve got this set up, follow the steps below after logging in to your Swym Admin, to customize the Customer Accounts page
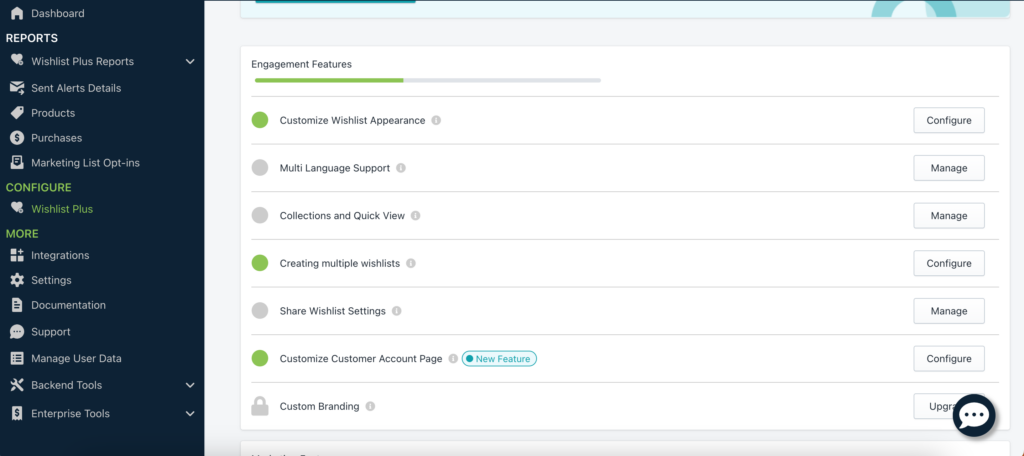
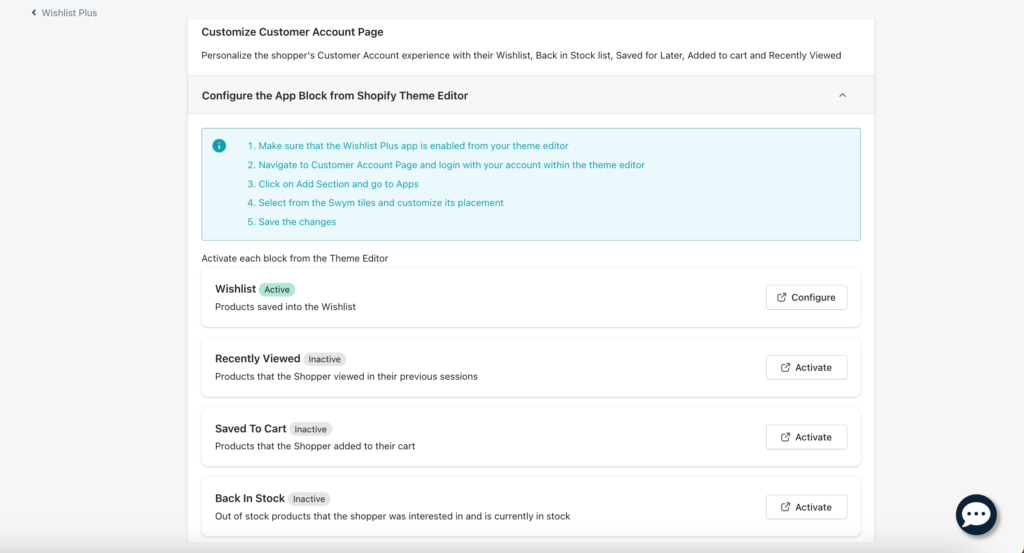
Step 1: Navigate to the Swym Admin > Wishlist Plus under the ‘Configure’ section. This should open up a screen with the Configuration settings. Here, under the engagement features find the ‘Customize Customer Accounts Page’ option and click on ‘Configure’ against it
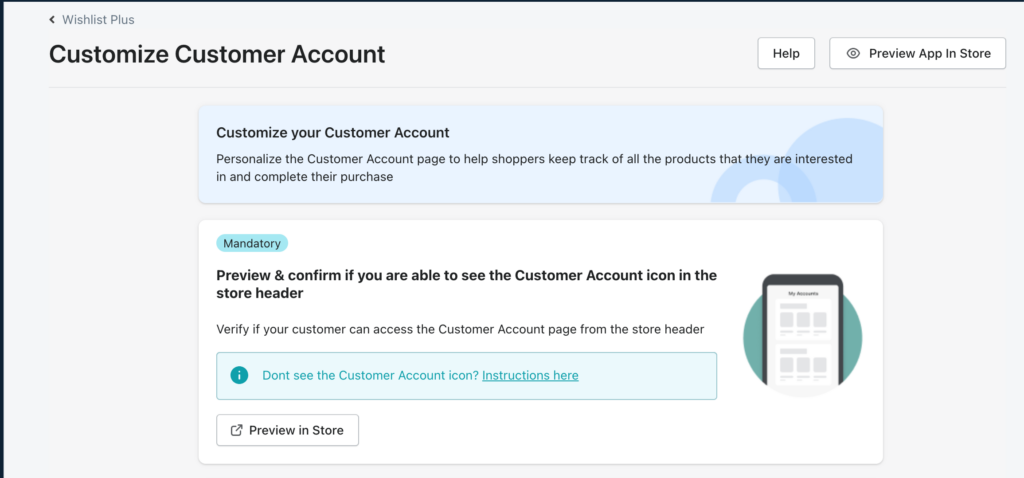
Step 2: Verify if the Customer Accounts page is accessible to the shopper and is added to your store header.
Step 3: Once you make sure that Customer Accounts page is accessible to your shoppers, you can start customizing the Accounts page with shopper activity. Currently, we support showcasing their Wishlist in their account page when they log in, products that they recently viewed, products that are saved to cart and all the out of stock products that the shopper has subscribed to in case you’re using Swym Back in Stock App.
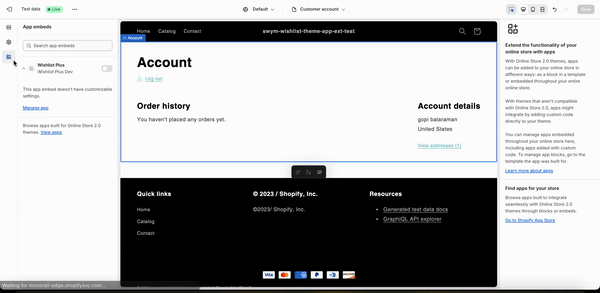
Each of these types of products can be added to the Customer Accounts page through Shopify Theme editor in the form of an App Block. To add the Wishlist App Block, click on the Activate button on the Swym Admin. This will redirect you to Shopify Theme Editor.
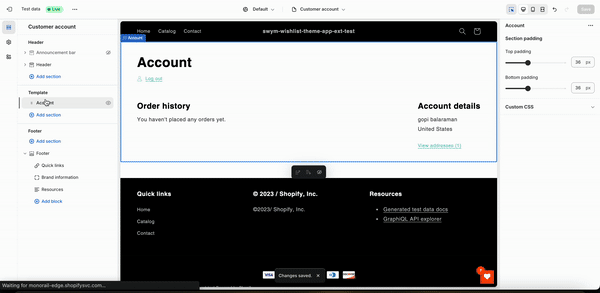
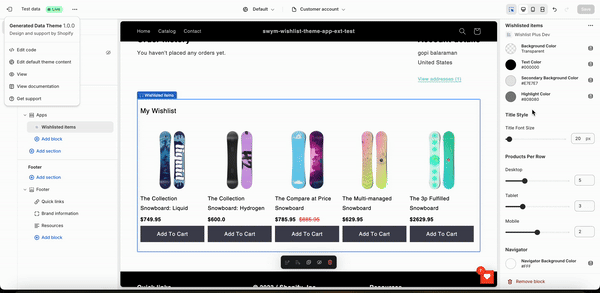
Step 4: Clicking on ‘Activate’ in the previous step will take you to the ‘Customer Account Page’ template in the theme editor. Next, in a new window, visit your store and sign in just like a shopper would, with a username and password. Once logged in, refresh the Shopify Theme Editor window. Then click on “App Blocks” and choose “Wishlist Items” for Wishlist, “Recently Viewed” for Recently Viewed Products, “Saved to Cart” for products that have been added to Cart and “Back In Stock” for products that the shopper has subscribed to and has come back in stock. You can then choose the placement for the App Block within the page
The App Block has the following customisation options:
- Font size & color
- Button style (radius, alignment)
- Background color
- Product Title, Price and button
- Number of products to show on desktop, mobile, tablet
- Number of products to scroll on different screen size
The App Block can also be translated into multiple languages, please contact us on support@swymcorp.com if you need any change in the strings.
Once you’re happy with the changes, click on Save, and preview it on your store to make sure that your changes reflect on the site.
FAQs
Does this work for a Vintage Shopify theme?
We don’t have support for a self serve experience for the Vintage theme yet. However you can use our Javascript APIs to build a custom experience on the accounts page.
Does this work with Shopify’s New Customer Accounts?
No, the current support is only for Classic Customer Accounts.
Does this work on other pages?
Yes, these App blocks can be used on other pages apart from the Customer Accounts Page.
Is this available for BigCommerce?
This is the theme app extension and is only for Shopify. We are working on supporting BigCommerce
Can I enable this in the dev theme?
You can enable this on the dev theme as well by following the steps below:
- On the Shopify theme editor of a development theme make sure Wishlist Plus is enabled in the App embeds section
- Navigate to Customer Accounts section and login
- Add section “Wishlist Items” from Apps tap on the Customer Accounts page
- Save
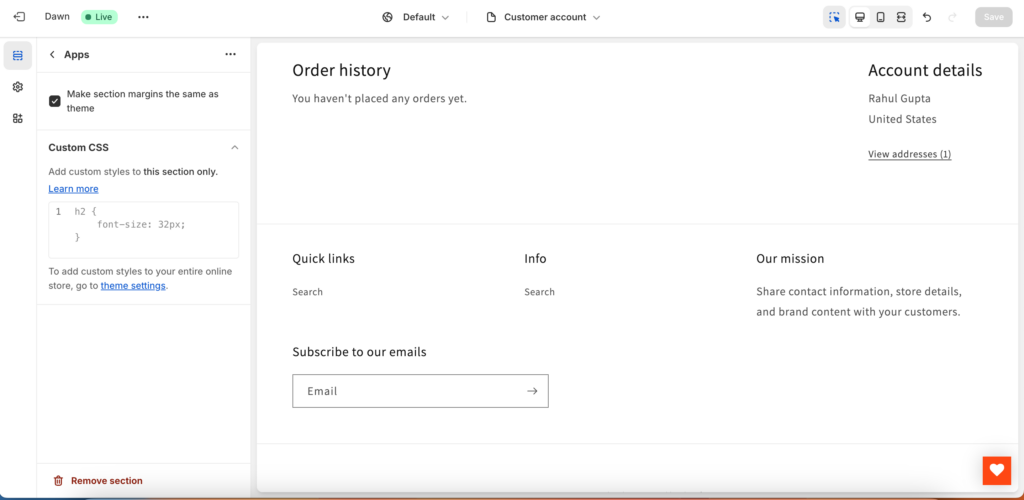
How can I customize this apart from the options provided?
You can make changes to the CSS directly by adding the style into the Custom CSS section within Apps inside the theme editor.
How does the attribution work?
Any purchases made in the session after clicking on any product tiles on the Customer Accounts oage is attributed as Swym Revenue