")
How to enable the Guest Email Capture popup?
As per a Braze analytics survey conducted between November 2019 and February 2021, 86% of users were anonymous and 96% of these users don’t receive any form of marketing outreach. With Swym’s Guest Email Capture popup, you can tap into this market and improve your conversions, and ultimately revenue. The best part is, the feature is free to use and it comes by default.
Read on to learn how to enable Guest Email Capture popup on your store.
Step 1:
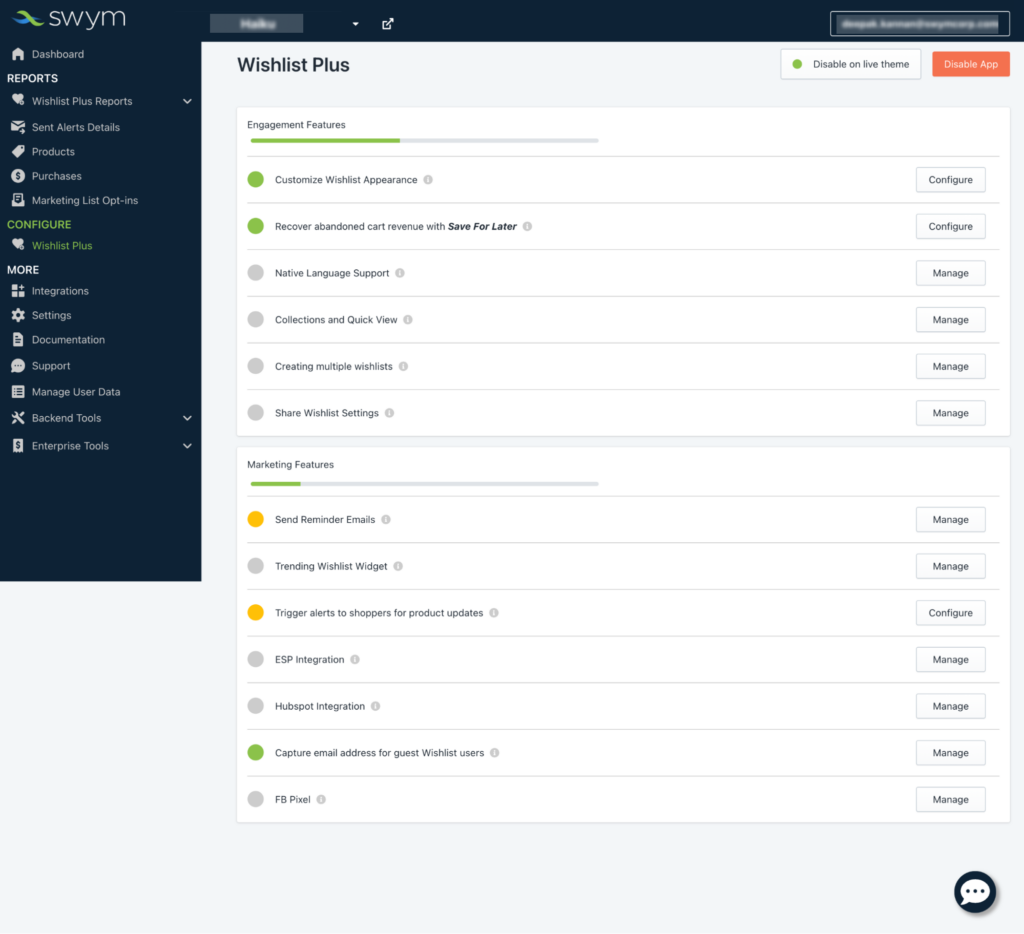
Log in to your Swym admin account and navigate to the ‘Wishlist Plus’ option under the ‘CONFIGURE’ section on the left sidebar.
1.1:
To get started on the Guest Email Capture, click the ‘Manage’ button next to the ‘Capture email address for guest Wishlist users’ option under the ‘Marketing Features’ section.
Step 2:
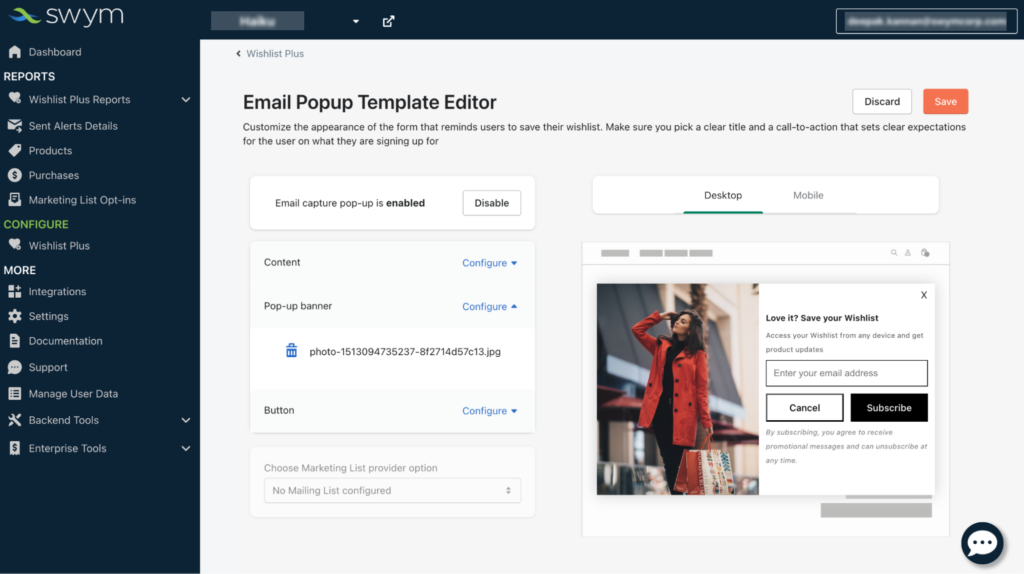
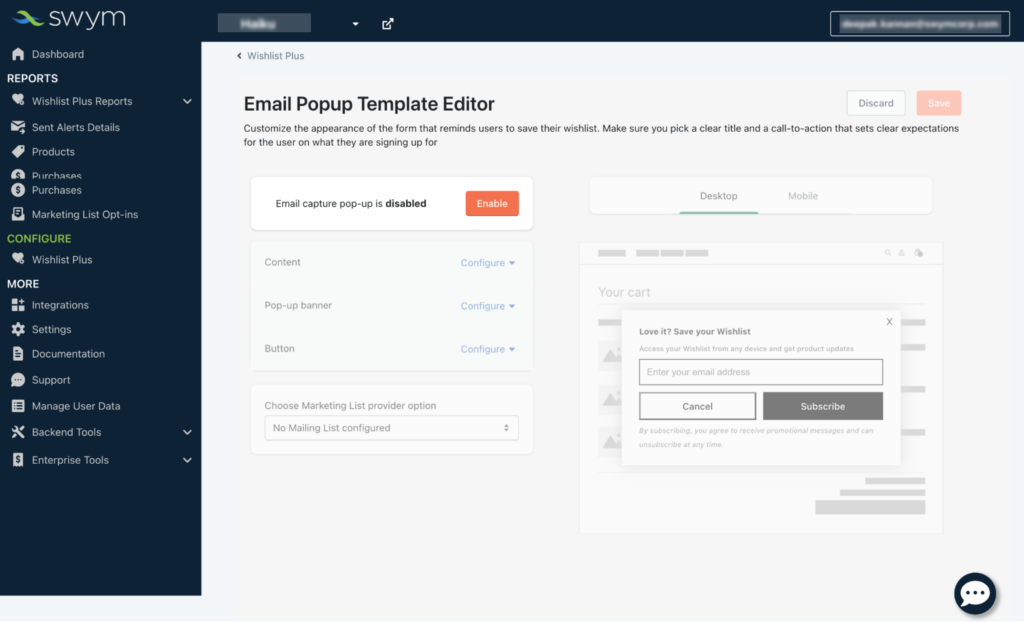
Once you are inside the ‘Email Popup Template Editor’ page, by default, the Guest Email Capture popup is disabled. Click on Enable to make it live on the store. You can customize the popup after enabling it on your store.
Step 3:
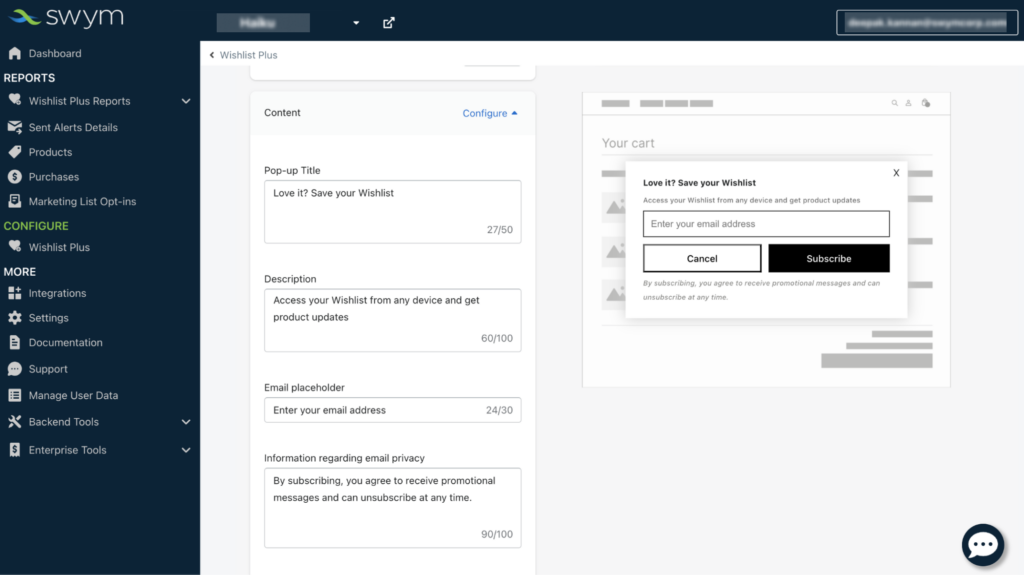
Set up the content, the pop-up banner, and the button for Guest Email Capture.
Let’s start with defining the content. The character limit for each of these sections is displayed inside the text box. Use the preview on the top to view how the changes would look on your store.
Step 4:
Enter the pop-up title. This would be the heading for your popup and would appear at the top of the popup.
4.1:
In the description box, type the text that you want to appear just below the popup title. This can be the explanation of what you are trying to do with capturing the shopper’s email address.
4.2:
Quickly fill in the email placeholder text and information regarding the privacy policy.
Step 5:
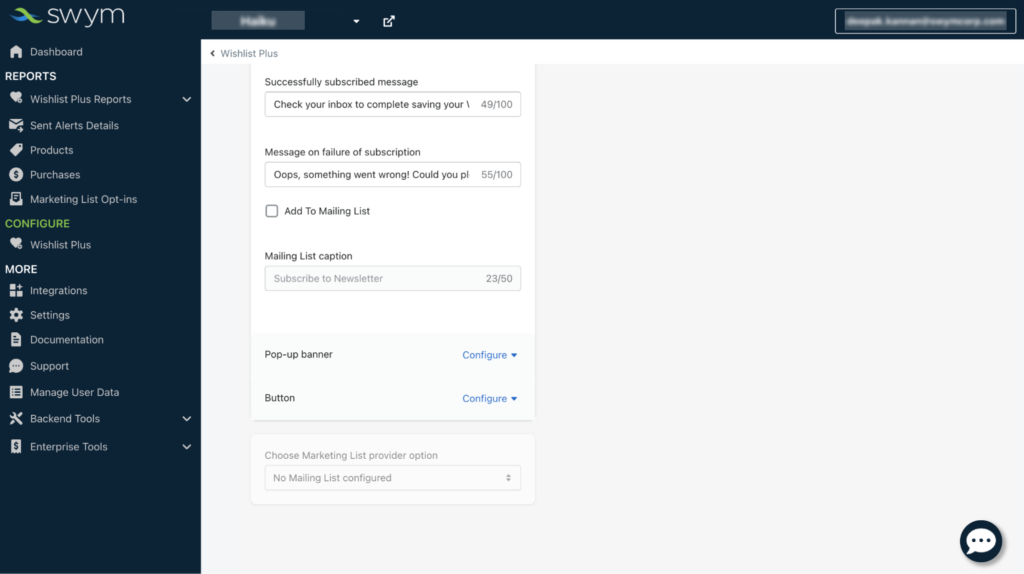
Enter the texts that should show up when someone successfully subscribes to the popup and when there is an issue while subscribing by using the ‘Successfully subscribed message’ and ‘Message on failure of subscription’ text boxes.
Step 6:
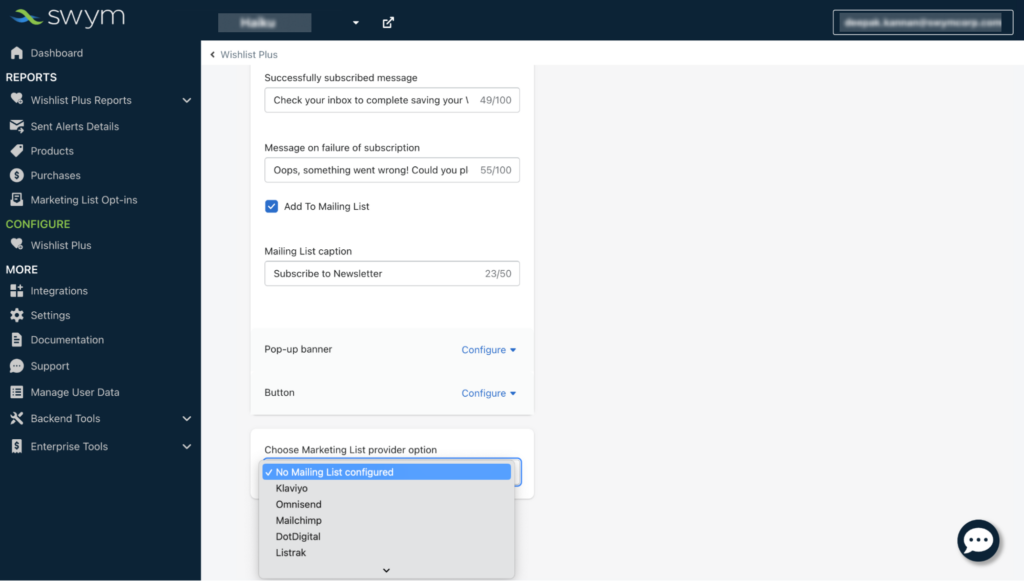
If you already have a marketing list ready that’s integrated with any of the ESPs, then click on the ‘Add To Mailing List’ checkbox and define what the shoppers would receive by filling in the ‘Mailing List caption’, think Newsletters.
By checking ‘Add To Mailing List’, you are by default adding the shopper to your mailing list.
6.1:
Now, choose the ESP from the ‘Choose Marketing List provider option’ dropdown. This is applicable only if you have checked the ‘Add To Mailing List’ box.
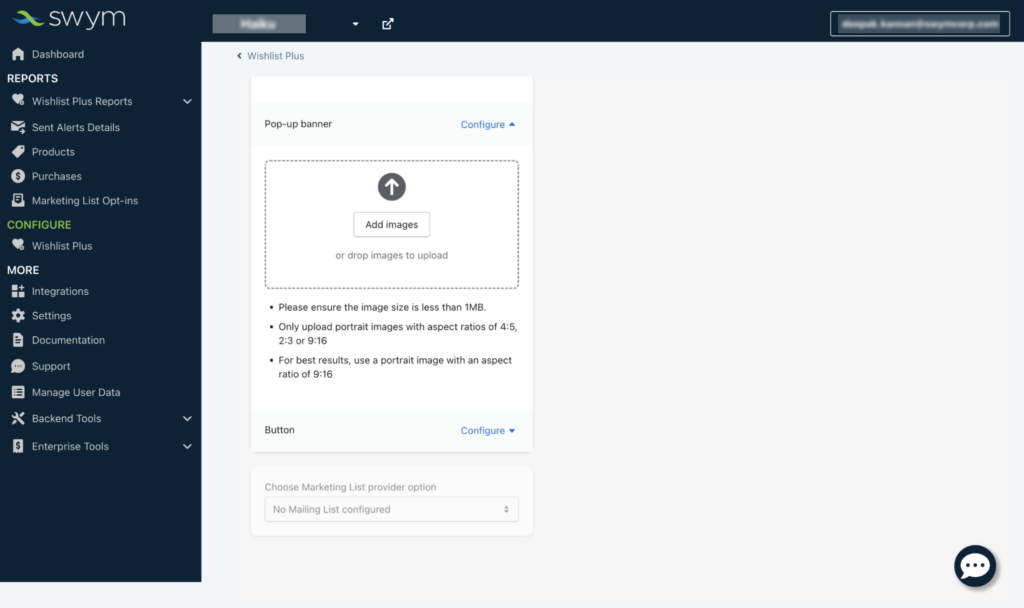
Step 7:
To set up the image for the Popup banner, click on Configure. Use the ‘Add image’ button to upload the image from your computer (jpg or jpeg format) or just drag and drop.
The size and aspect ratio guidelines are also listed.
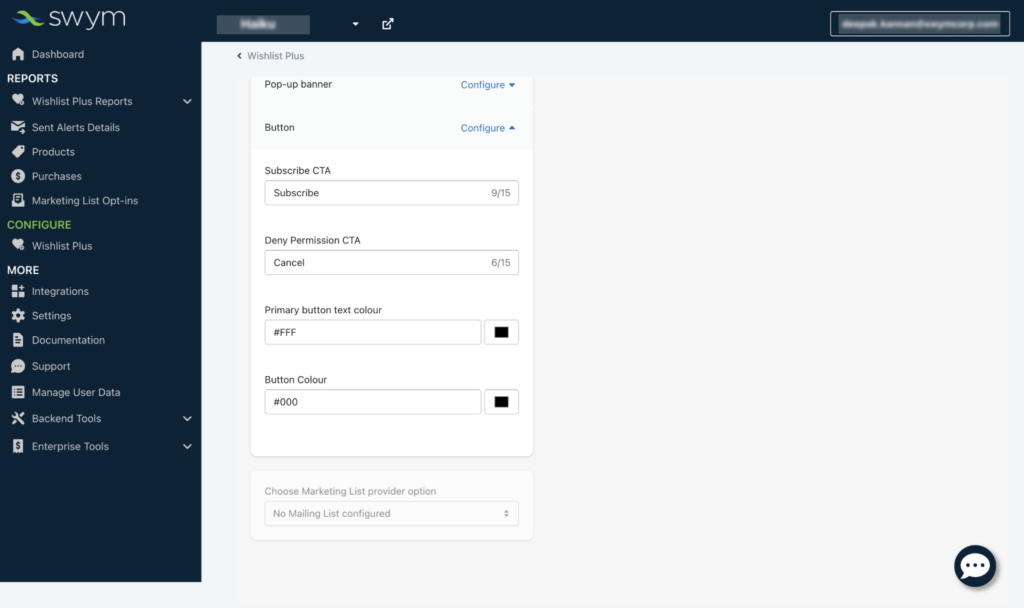
Step 8:
To define the buttons for the popup, click on Configure next to Button.
8.1:
Enter the primary and secondary CTA action button names by using the ‘Subscribe CTA’ and ‘Deny Permission CTA’ text boxes.
8.2:
Next define the ‘Primary button text colour’ and ‘Button colour’ for the CTAs. By default, this is applicable to the primary CTA, which is the affirmative CTA on the right. And, the secondary CTA on the left is vice versa.
Step 9:
If you are satisfied with the changes, click on ‘Save’ on the top right or click on ‘Discard’ and start over.