")
How to customize your gift registry
Swym Gift Lists and Registries can be fully customized to match the voice and tone of your store’s brand. Here are some ways you can tailor the gift registry experience to match your brand:
- Add a list of event types for which your customers would create gift registries at your store. This can be traditional ones like a wedding or baby registry or something unconventional like a celebrity gift list.
- Modify the text, color, and formatting of all the default gift registry pages and forms so the visuals are consistent with your Shopify store and the messaging is relevant to your shoppers.
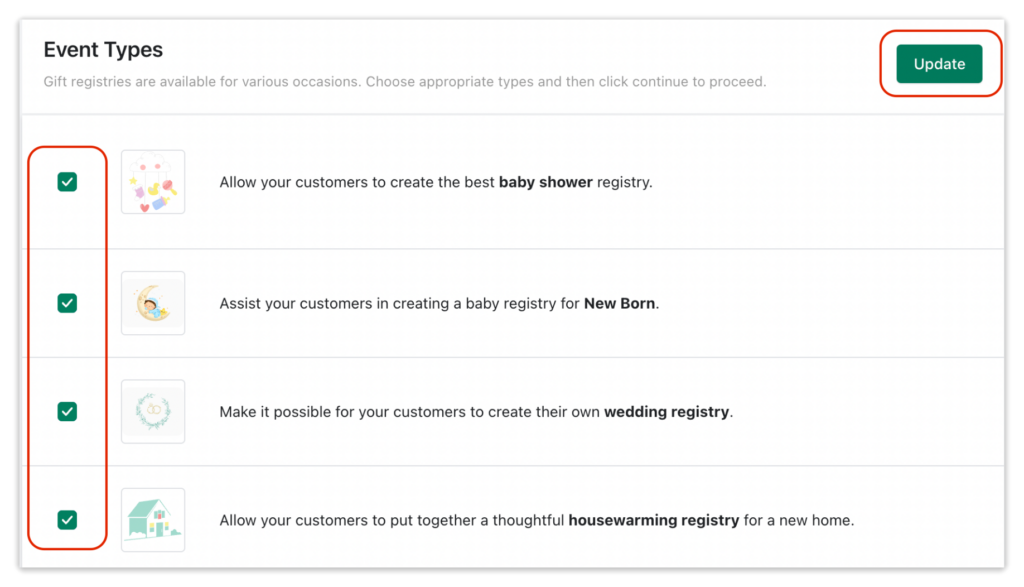
Adding event types to your gift registry
Choose which event or registry types should be visible to shoppers when they create a gift list or registry in your store.
Step 1:
Go to admin.shopify.com and log into your Shopify store.
Step 2:
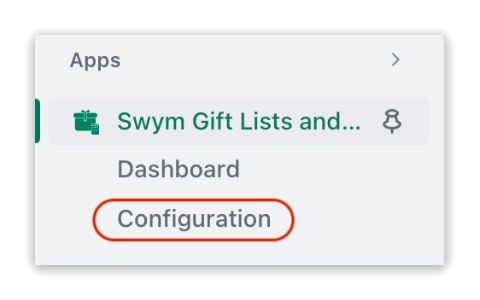
Select Swym Gift Lists and Registries from the list of apps you’ve installed.
Step 3:
Click the Configuration tab.

Step 4:
Navigate to the Event Types tab. A list of the default event types will be displayed.

Step 5:
Select the event types you want to display on your store front and click Update.
Note: Please write to us at support@swymcorp.com if you’d like to add custom event types to your store.
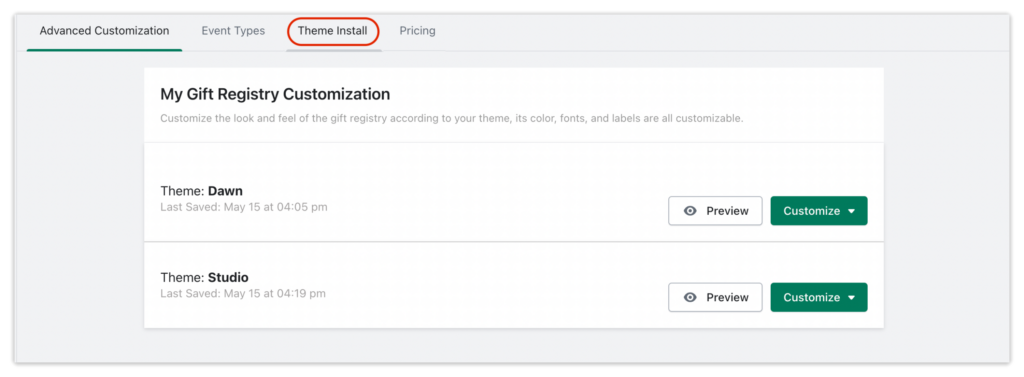
Customizing the gift registry pages
Swym Gift Lists and Registries provides you with five default pages for each action in the gift registry and you can customize the font, formatting, and strings of all the pages.
(Learn more about the default pages in Swym Gift Lists and Registries.)
Apart from these pages, you can also customize the “Create an Account” and “Login” that will be displayed when a shopper who is not-logged-into your store tries to create a gift registry or add a product to a gift registry.
Step 1:
Go to admin.shopify.com.
Step 2:
Select Swym Gift Lists and Registries from the list of apps you’ve installed.
Step 3:
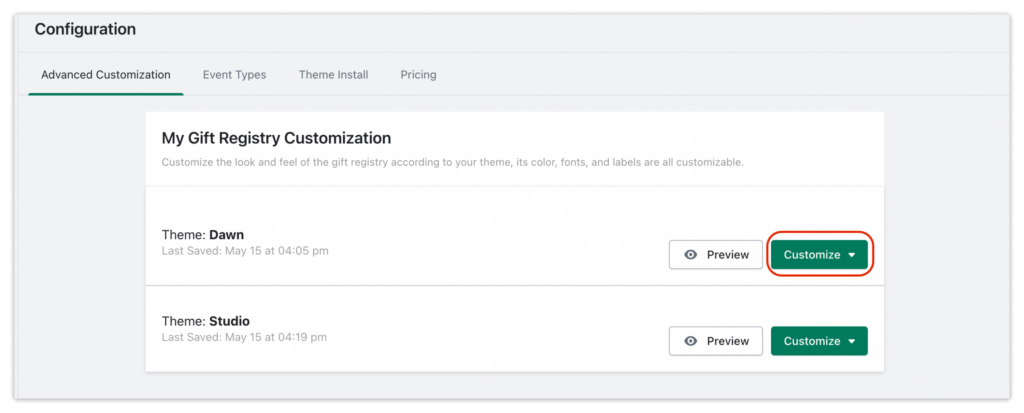
Click the Configuration tab. The Advanced Customizations tab will be displayed.

Step 4:
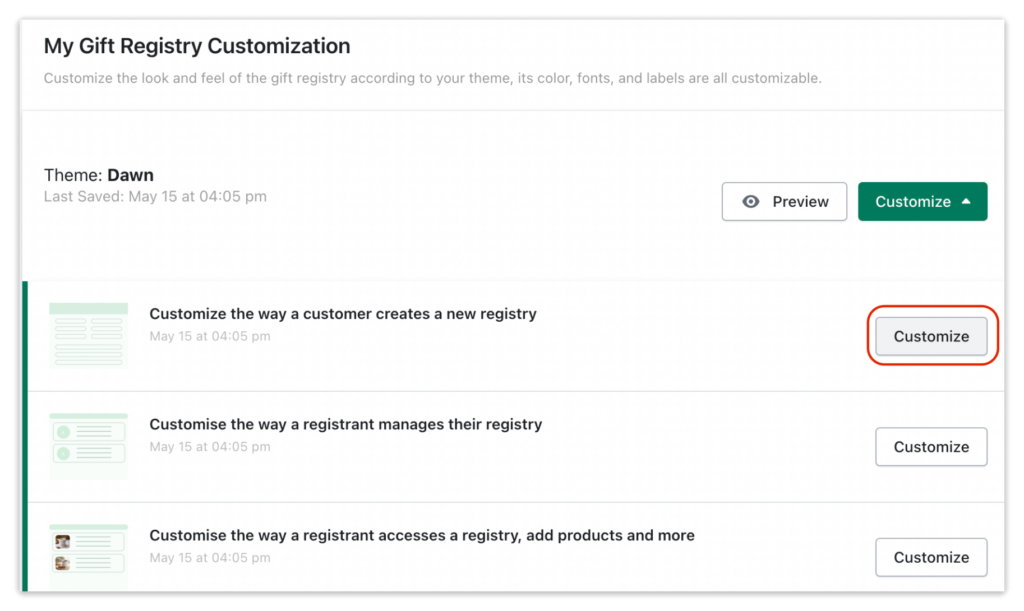
Click the Customize button next to the theme for which you’d like to customize the forms. A list of pages available for the gift registry will be displayed.
Step 5:
Click the Customize button next to the page you’d like to customize. You will be taken to that page in Shopify’s theme editor.
Step 6:
Go to the Swym Registry Form option under Templates in the left pane.

Step 7:
Click Theme Settings.
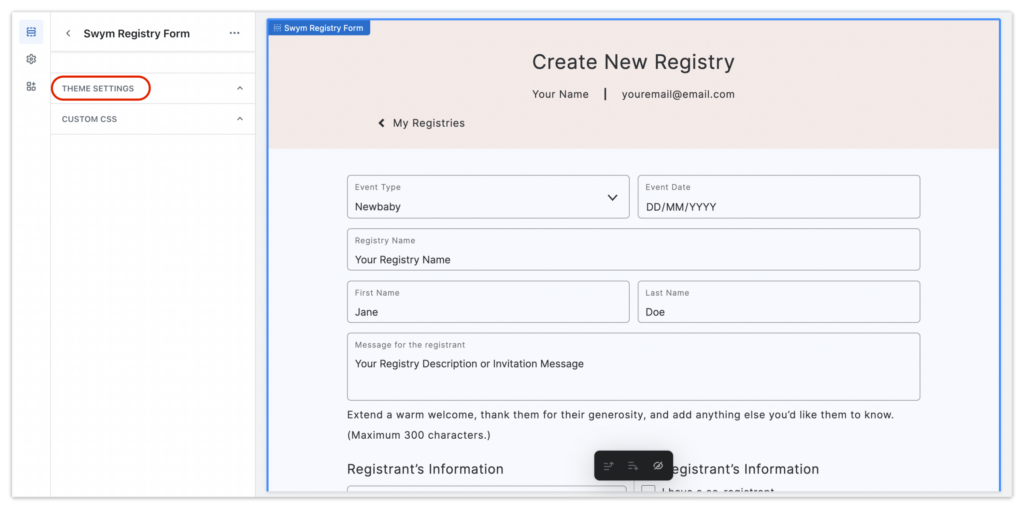
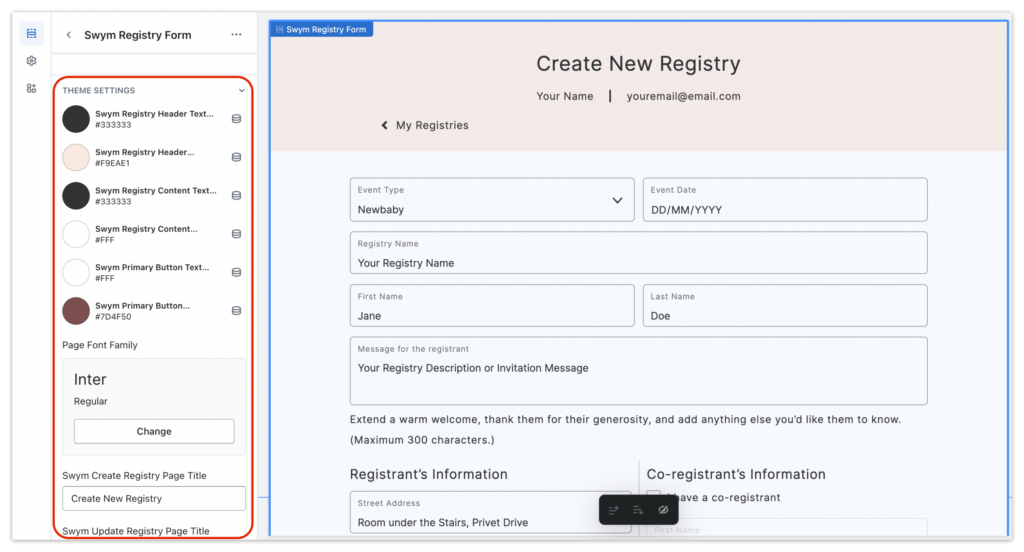
Step 8:
Use the formatting options displayed to change the font, color, and text displayed on the page.
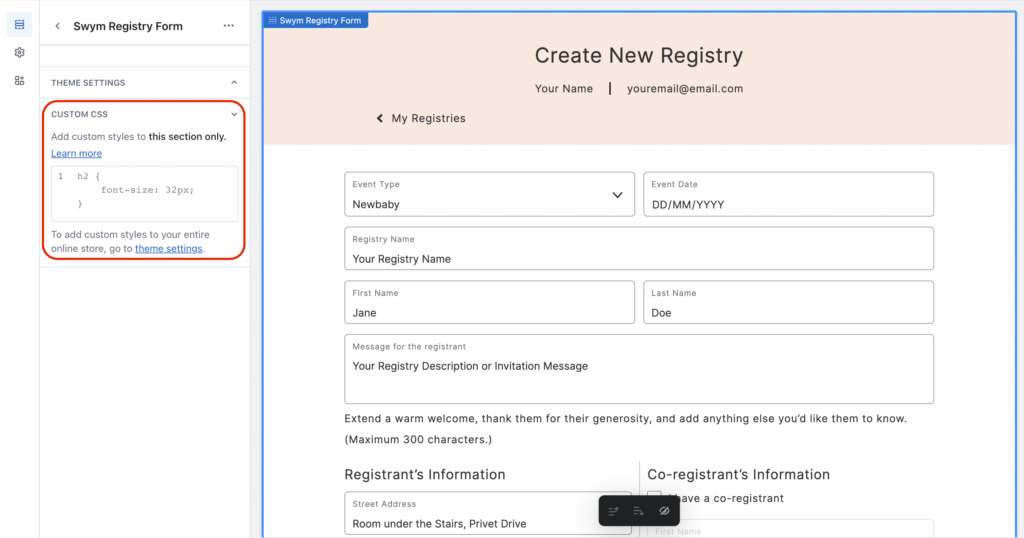
Step 9: Optional: Click Custom CSS below Theme Settings if you’d like to add custom formatting styles to the page.
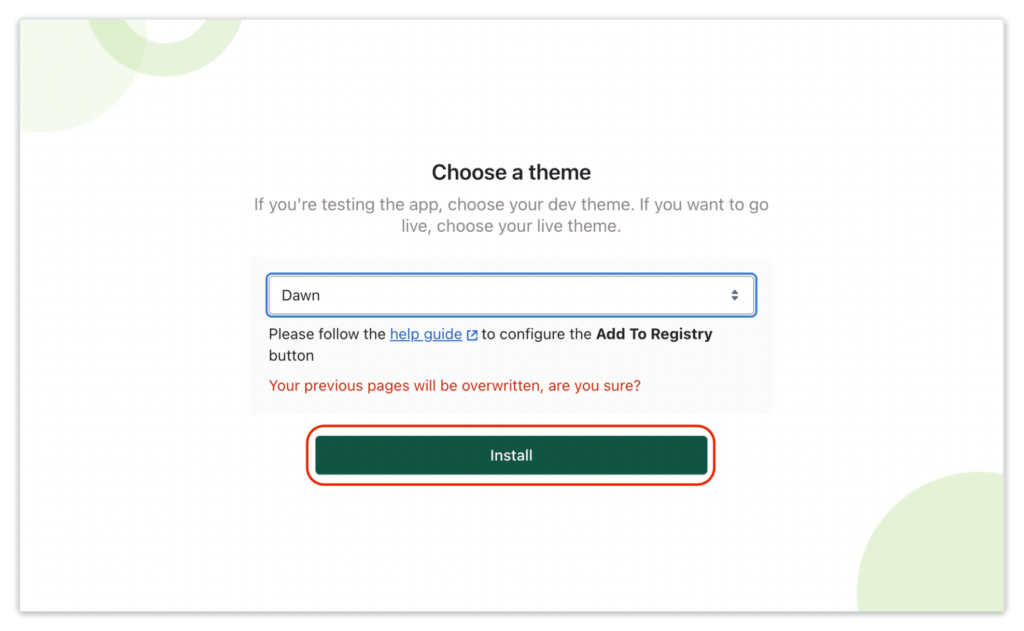
Installing Swym Gift Lists and Registries on a different theme
If you’re testing a different theme for your store, you can follow the below steps to install Swym Gift Lists and Registries to that theme. Please note that customizations made in one theme will not be reflected in another theme.
Step 1:
Go to admin.shopify.com.
Step 2:
Select Swym Gift Lists and Registries from the list of apps you’ve installed.
Step 3:
Click the Configuration tab.
Step 4:
Navigate to the Theme Install tab.
Step 5:
Choose a theme from the Select Theme textbox.
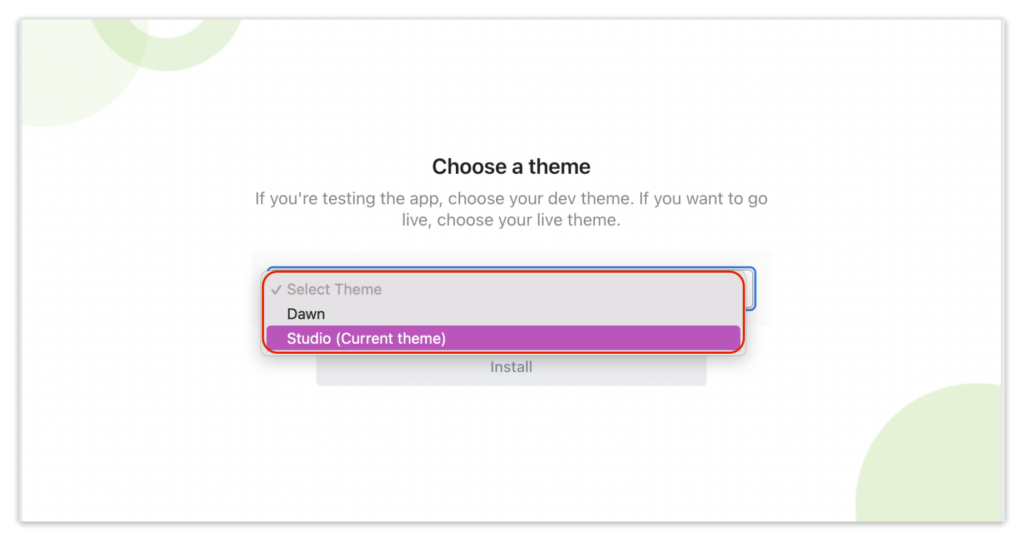
Step 6:
Click the Install button to install Swym Gift Lists and Registries in that theme.