")
Search Knowledge Base by Keyword
Install & Configure
Get Started
In today’s competitive online marketplace, consumers often need multiple touchpoints with your brand before converting into customers. They may explore your products, compare them with competitors, and return later to finalize their purchase.
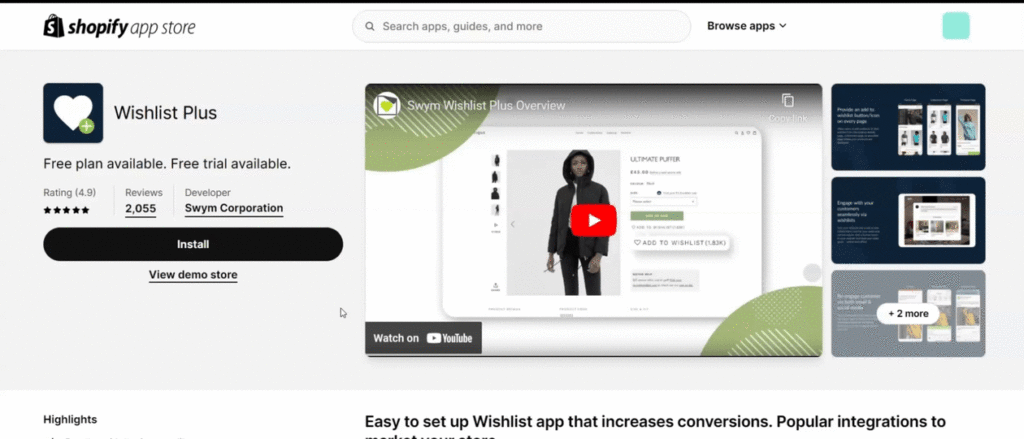
With a vast catalogue, it can be challenging for shoppers to remember the items that caught their interest. Swym Wishlist Plus solves this problem by allowing customers to curate personalized wishlists, accessible across all devices when logged in. This ensures a seamless shopping experience, letting them easily revisit and purchase items they’ve previously shown interest in.
Setting up the Wishlist Plus app on your Shopify Store is straightforward and requires no coding. Follow our quick guide to get started.
Install the App
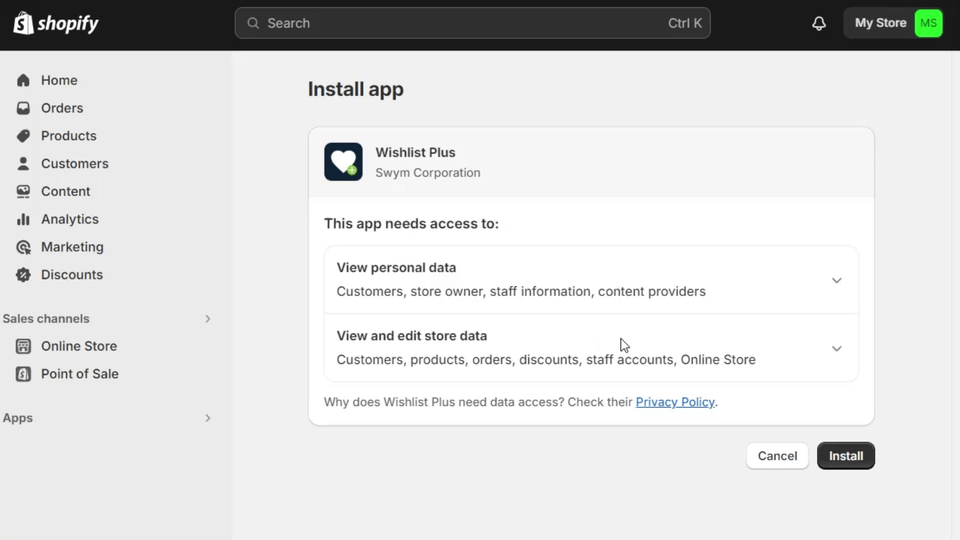
- Begin by installing the Wishlist Plus app from the Shopify App Store. You can either search for ‘Wishlist Plus’ by Swym Corporation or click here for direct access.
- If not logged In already, Choose your Shopify account and the online store where you want to install the Wishlist App.
- You will be redirected to your Shopify Admin page. Here, confirm the installation by clicking the “Install app” button.
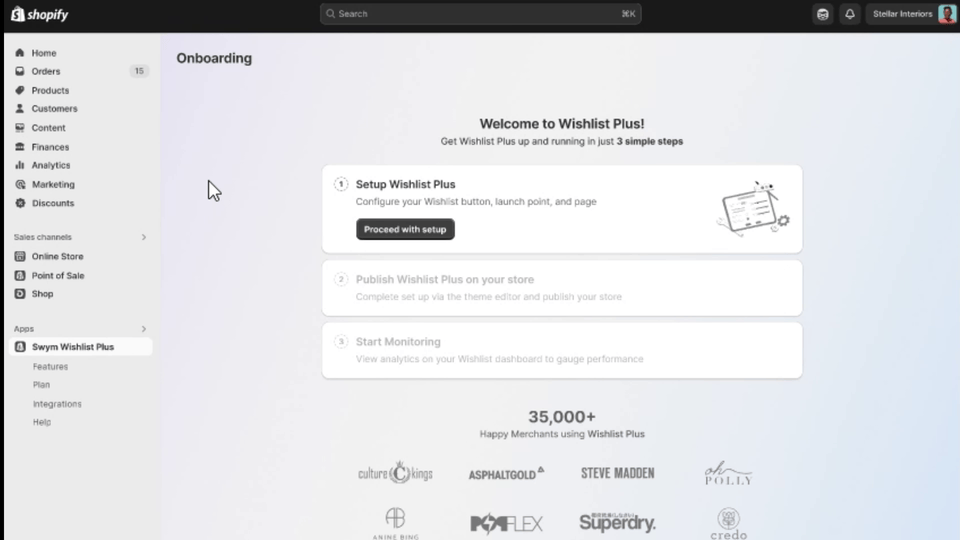
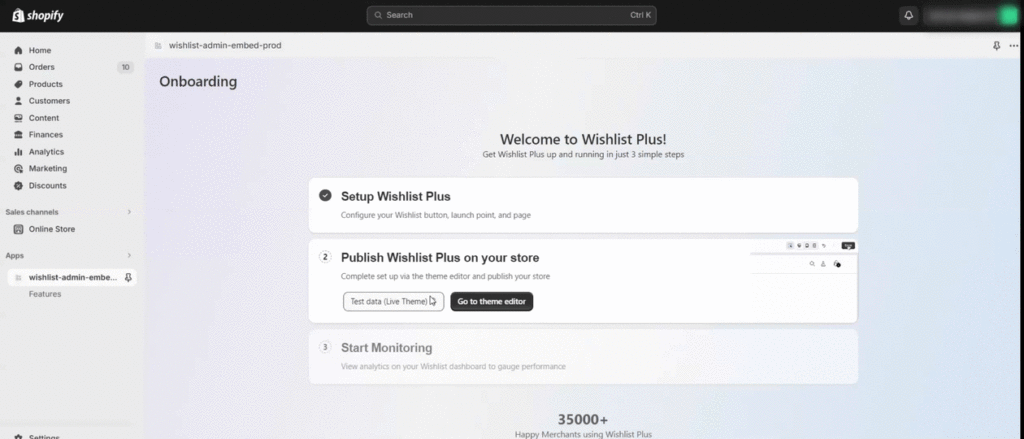
Wishlist Plus Setup
This is a simple 3 step setup where you will choose
- How Shoppers will add their favorite product to Wishlist from product page.
- How Shoppers will access the Wishlisted products
- How Shoppers can add their Wishlisted items to cart.
- Click “Proceed with Setup” to being.
Step 1 : Wishlist Plus Button Setup
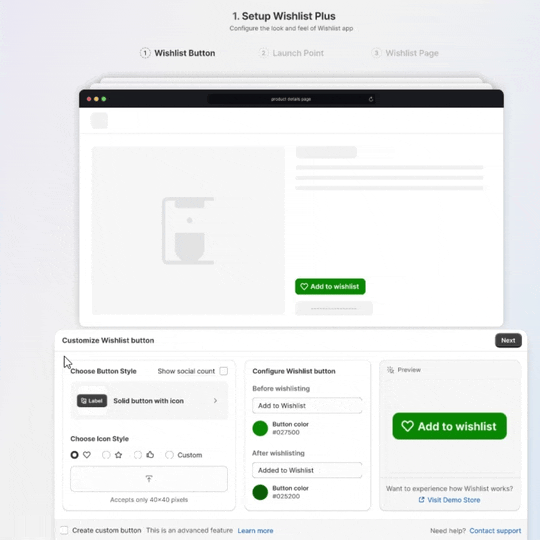
- We offer four distinct button styles for you to choose from.
- Feel free to experiment with different styles and visualize your selection in both the Illustrator above and the preview section on the right.
- For styles that include an icon, you have the option to select from the available styles or upload your own icon, which should be 40×40 px.
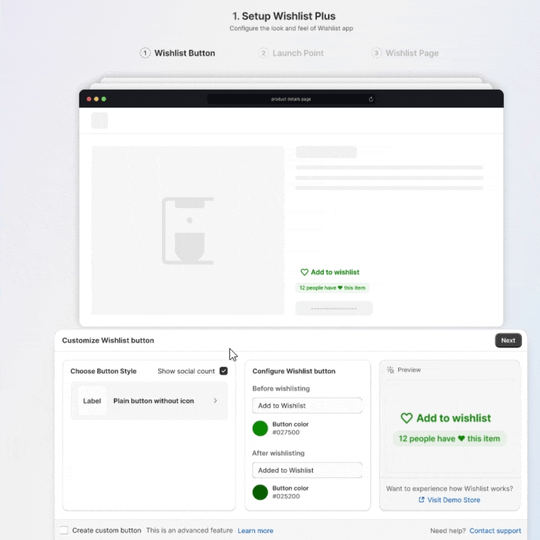
- Enabling the “Show social count” option will display the number of shoppers who have added that product to their Wishlist, like below.
- The final configuration step for the button setup involves defining the button text and color for two states:
- Before Clicked: Specify the button’s name and color before it is clicked.
- After Wishlisted: Specify the button’s name and color after it has been added to the Wishlist.
To personalize the button placement, enable the “Custom Button” checkbox. Click on “Learn More” to find out how to enable a customized Wishlist button on your store.
Step 2 : Wishlist Plus Launch Point Setup
The launch point is where shoppers can access their Wishlisted item and we offer 3 different Launch points
2.1 Launch Point Floating Button
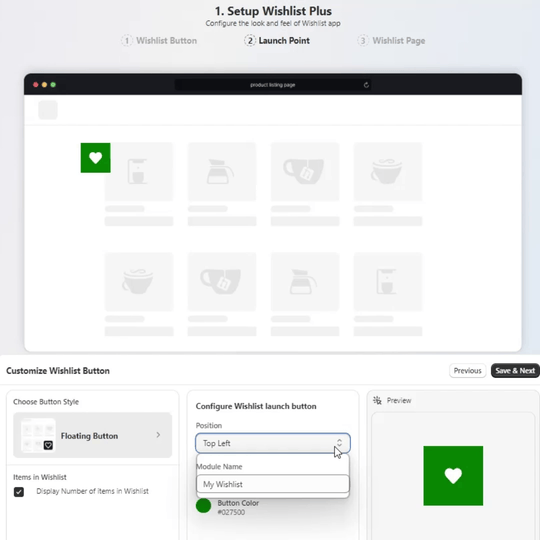
- Position & Color: Select the position and Color of the floating button that best suits your store’s theme.
- Module Name: Enter the module name. When shoppers click the floating button, this name will appear as the heading for the Wishlist.
- Items in Wishlist: Enable the “Items in Wishlist” checkbox to allow shoppers to see how many items are in their Wishlist.
2.2 Launch Point on Navigation Menu
Navigation refers to the top right handle with menus such as Home, Categories etc. In a Mobile view this menu is accessible from tapping the three lines over the top right.
- To enable your launch point in the navigation menu, follow these steps:
- From the current page setup, click on “Main Navigation.”This will open your Online Store’s navigation page.
- Click on “Main Menu” in the Menu section, then select “Add Menu Items.”
- Give the menu item a name and paste
#swym-wishlistin the link section. - Click “Add,” followed by “Save Menu.”
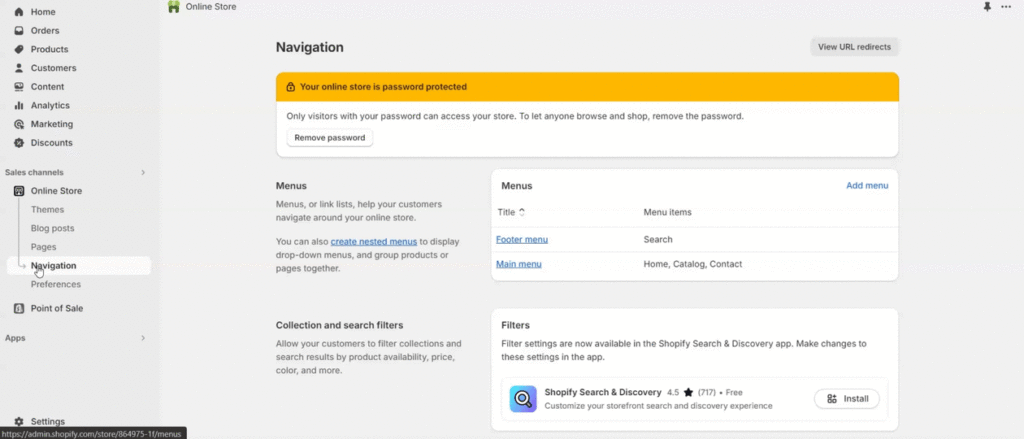
Once saved, click on Wishlist Plus from your Shopify Admin’s App section to get back to the setup.
2.3 Launch Point on Header Menu
Header Menu refers to the top right handles which typically has the search and cart icons. Launch pointer on header menu will create a “Heart Icon” in the Header menu section.
- To enable your launch point in the navigation menu, follow these steps:
- From the current page setup, click on “Main Navigation” hyperlink.
- This will open your Online Store’s navigation page.
- Click on “Footer Menu” in the Menu section, then select “Add Menu Items.”
- Give the menu item a name and paste
#swym-wishlistin the link section. - Click “Add,” followed by “Save Menu.”
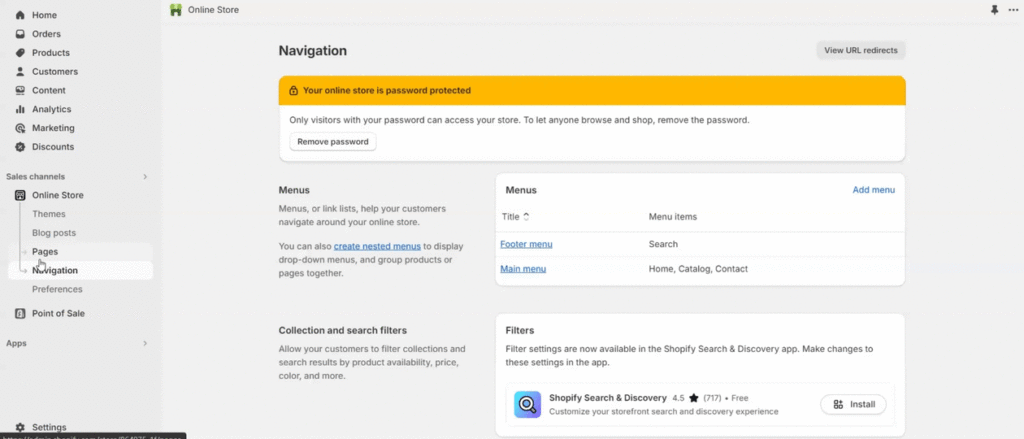
If you have added #swym-wishlist to both the header and footer menus, the feature will not work. Ensure the tag is added only where the configuration is set as per the Wishlist Setup page.
Once saved, click on “Wishlist Plus” in the App section of your Shopify Admin to return to the setup.
Step 3 : Wishlist Plus Page Setup
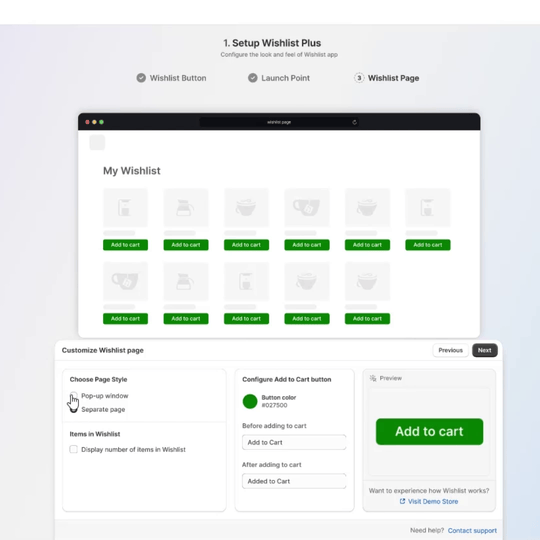
- The page setup represents how your shoppers can view their Wishlisted items and add them directly to the cart.
- We offer two page setups:
- Pop-up Window
- Separate Page
- You can customize the “Add to Cart” button by selecting its color and specifying the button’s text before and after it is clicked.
- Click “Next” to complete your Wishlist configuration setup. The page will redirect you to the Onboarding screen automatically.
Go Live
Publish Your App in Theme Editor
- Select the Theme: Choose the theme from the dropdown. You can either directly publish your app to the live theme or publish it in draft mode to ensure everything looks good.
- Choose a Plan: Select a plan that best suits your business needs. Features for each plan are listed. Click on ‘Choose Plan’ and complete your payment.
Wishlist Plus offers a range of pricing plans to suit different needs, from a Free plan for basic usage to an Enterprise plan for advanced features and high volume. Below is a comparisons of each plan and what it includes:
| Feature | Free | Starter | Pro | Premium | Enterprise Starter 1 |
|---|---|---|---|---|---|
| Share wishlists | |||||
| Create multiple wishlists | |||||
| Collections and Quickview | |||||
| Manual trigger alerts | |||||
| Automated emails | |||||
| Collect shopper and guest info | |||||
| Back in stock alerts | |||||
| Variant level alerts | |||||
| Multilingual support | |||||
| Customize customer accounts | |||||
| Detailed report and analytics | |||||
| Pre-ordering functionality | |||||
| Customize email templates | |||||
| Product recommendations using AI | |||||
| 24×5 support | |||||
| One-hour response time | |||||
| Shopify point-of-sale support | |||||
| Dedicated account manager |
Experience the premium features with a 30-day free trial
- For more volume, customizations, and advanced integrations, consider the Enterprise Plans which include premium hosting infrastructure, 24×5 customer support, full suite of data integrations, and a dedicated Customer Success Manager. Contact support for more details.
- Enable in Theme Editor: You will be redirected to the “Theme Editor” once the plan is selected. Enable the Wishlist Plus toggle and click “Save.”
Congratulations! You have successfully enabled your shoppers to add their favorite products to their Wishlist!