")
MARKETING PLAYBOOKS
Sending Wishlist Price Drop Emails via Omnisend
When shoppers add products to their wishlist, they’re making it clear that they are considering purchasing it. Our job as marketers is to look for excuses to remind them about the product, and hopefully nudging them toward purchasing. One of the best nudges possible is to let them know the product now costs less.
“Remember that product you were looking at? It now costs less!” With Wishlist Plus and your Omnisend account it is incredibly easy to set up this high-performance event-triggered campaign to run under full automation.
Prerequisites
- Wishlist Plus Starter Plan or above
- Omnisend Email Account
- Swym-Omnisend integration enabled
How To Implement
1. Enable Wishlist Price Drop Event
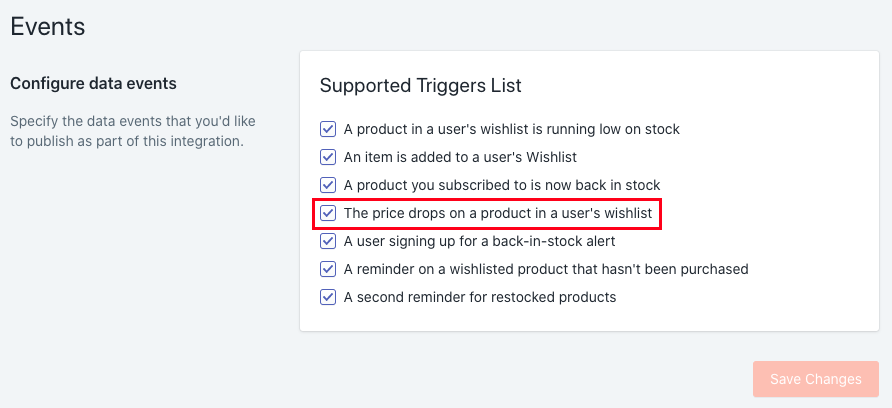
Before you get started, you need to make sure you’ve enabled the wishlist price drop event within Swym Admin. To confirm, once you’ve logged in to Swym Admin, navigate to Integrations via the left nav. Make sure that the checkbox next to “The price drops on a product in a user’s wishlist” is checked.
There is no time delay built into the integration logic, so expect to see price drop events show up in Omnisend shortly after each price change.
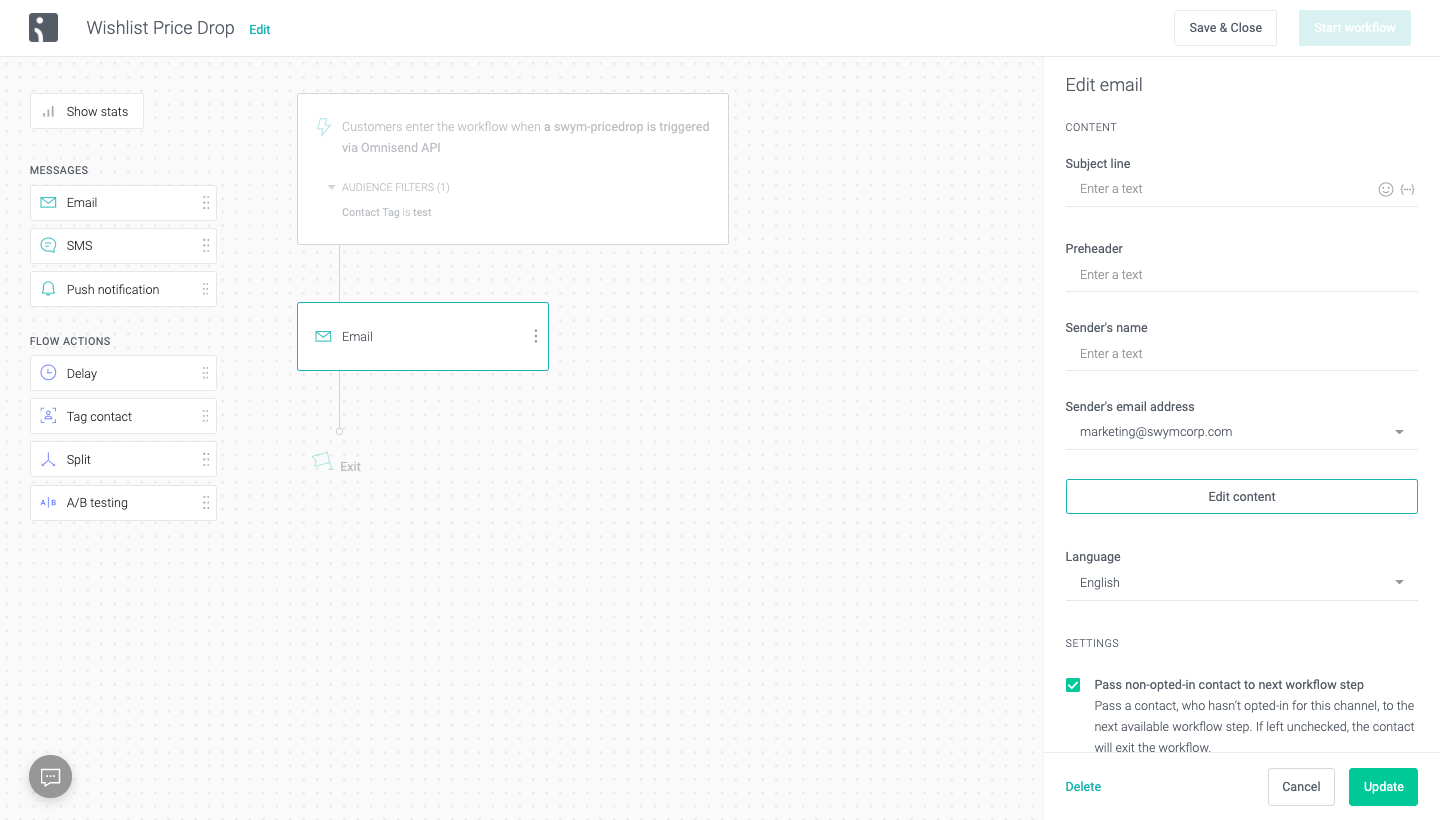
2. Create Omnisend Automation and Select Trigger
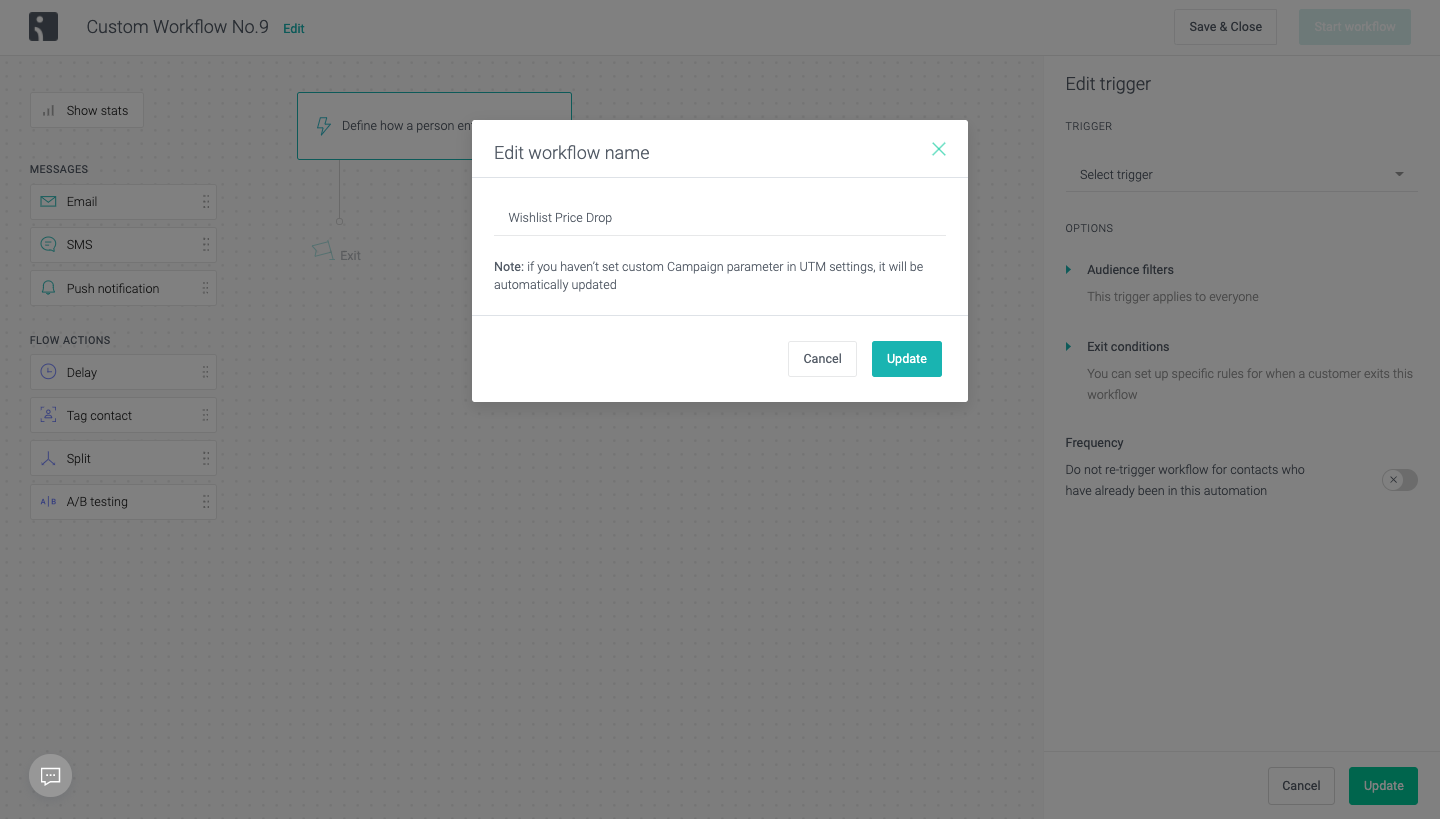
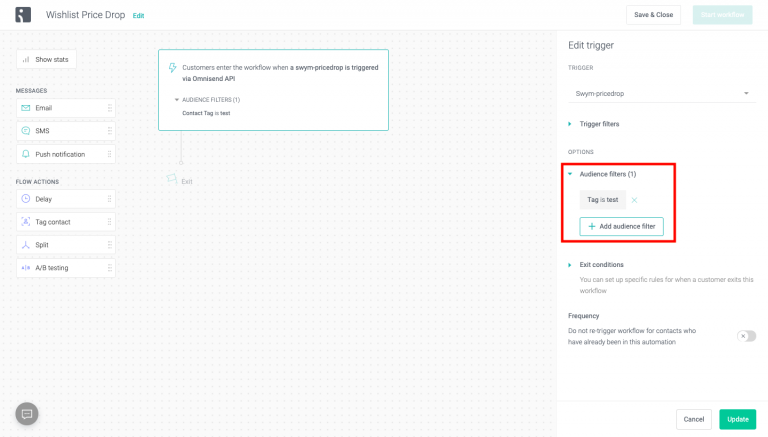
Next you’ll need to set the trigger for this workflow. Choose “Swym-pricedrop” from the dropdown on the right.

Tip: if you're not seeing "Swym-pricedrop" in your dropdown you probably haven't lowered the price on a product since you enabled the event in Swym Admin. Omnisend will not display flow triggers until they've received at least one event.
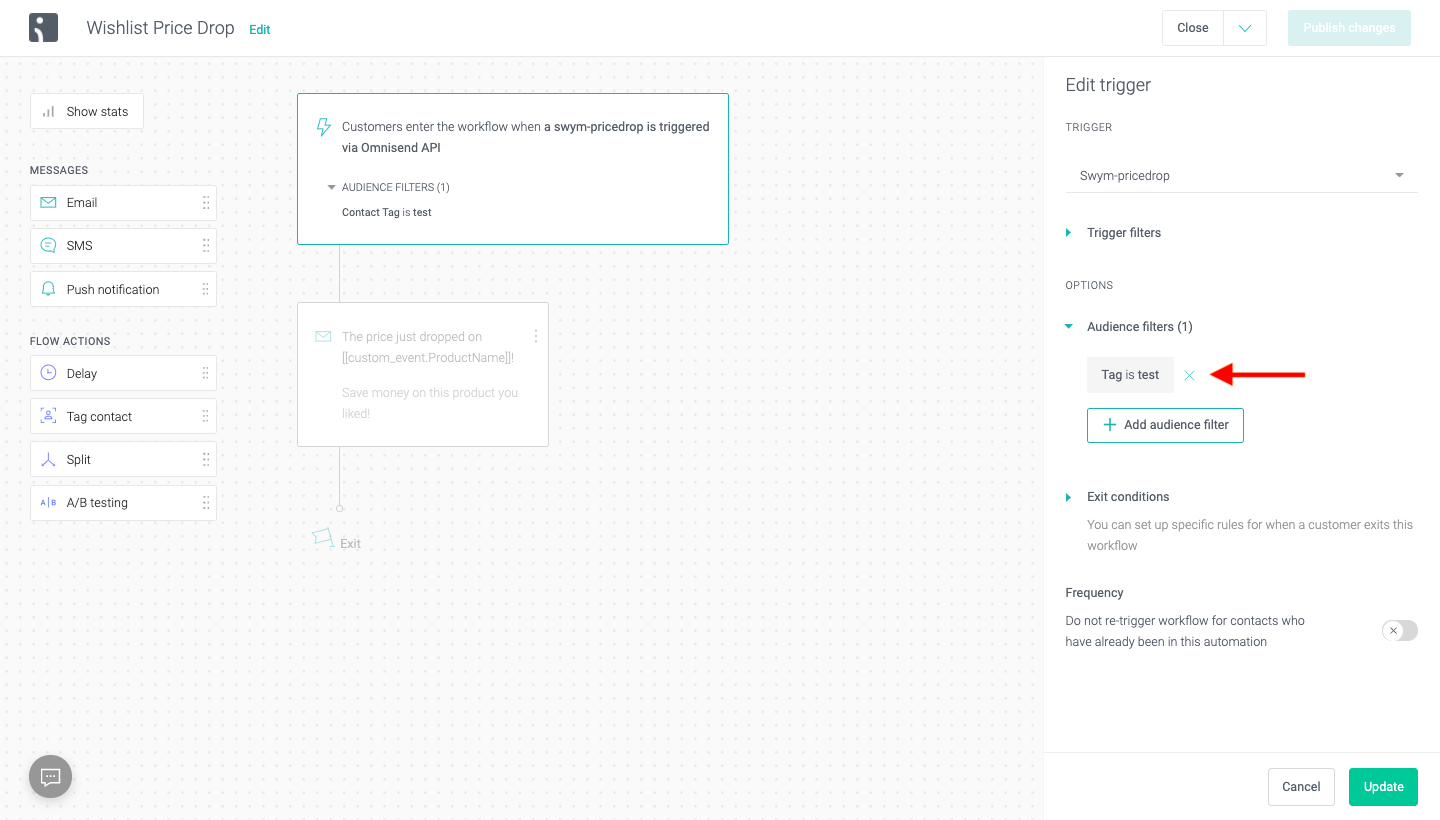
Next, we’re going to add an Audience filter, which we’ll use during development for this workflow. We’ll remove it later once we’re ready to make this workflow live. In this case we added a Tag to our test customer, as outlined in this Omnisend help article.
Because the timing of this event isn’t driven by an action taken by the shopper, there’s no benefit to adding a time delay before the email is sent.
Next add an email to your flow, this is will be your price drop message.
3. Create Your Email Template
The next thing we’ll do is build an email template that consumes the price drop data passed from Swym to create our triggered email campaign.
Here are the event-level data elements included with the event:
| Data Element | |||
|---|---|---|---|
| Event | |||
| Event Time | |||
| Product ID | |||
| Product Name | |||
| Current Price | |||
| Original Price | |||
| Quantity | |||
| Brand | |||
| Category | |||
| Variant ID | |||
| Variant Info | |||
| Variant SKU | |||
| Product URL | |||
| Image URL |
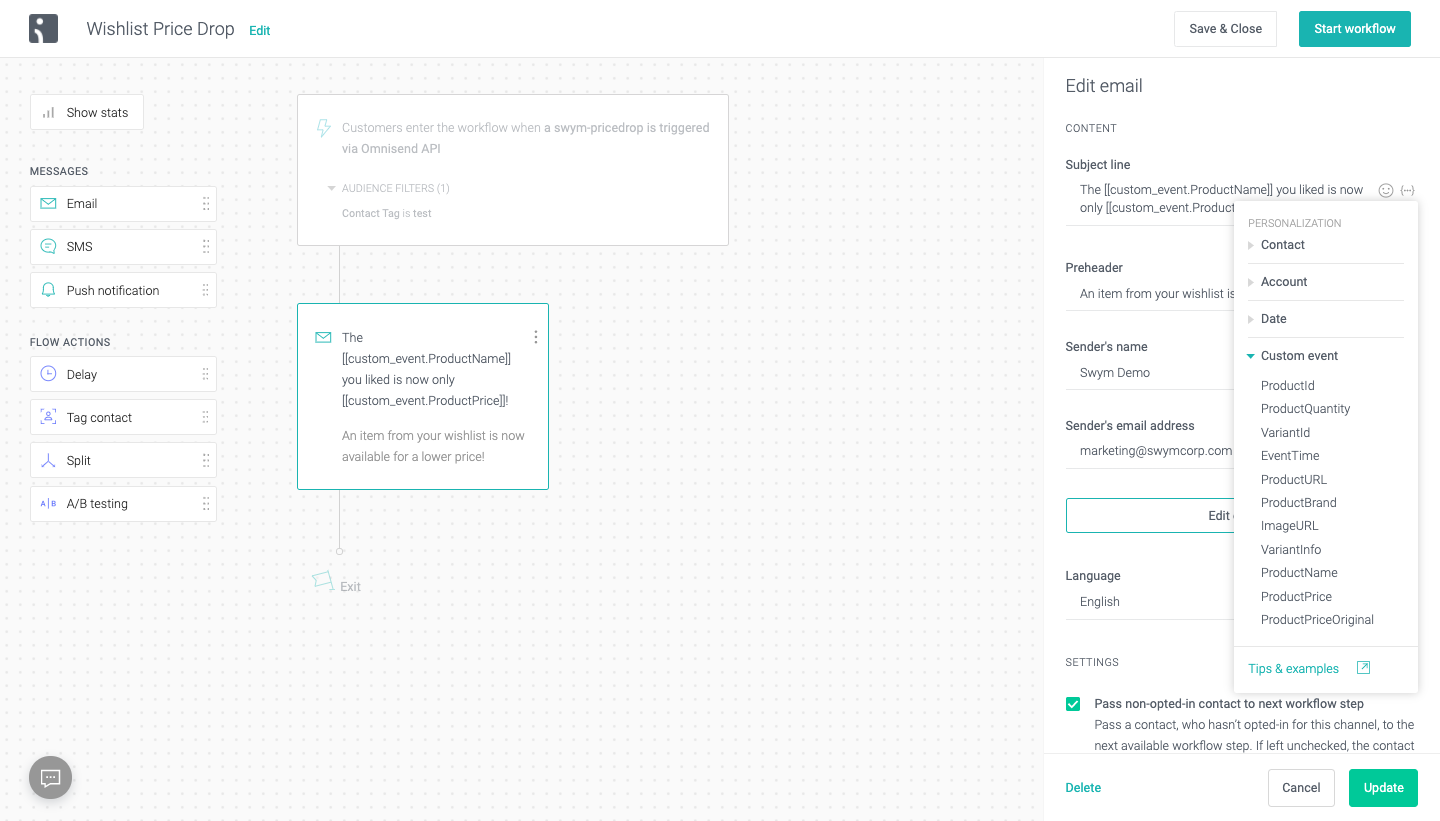
Fill out the subject line, preheader, sender’s name and make sure you’re happy with the sender’s email address. Note that you will be able to use data elements from the Swym-pricedrop event to personalize the subject and preheader text. Then click the “Edit content” button to edit the email.
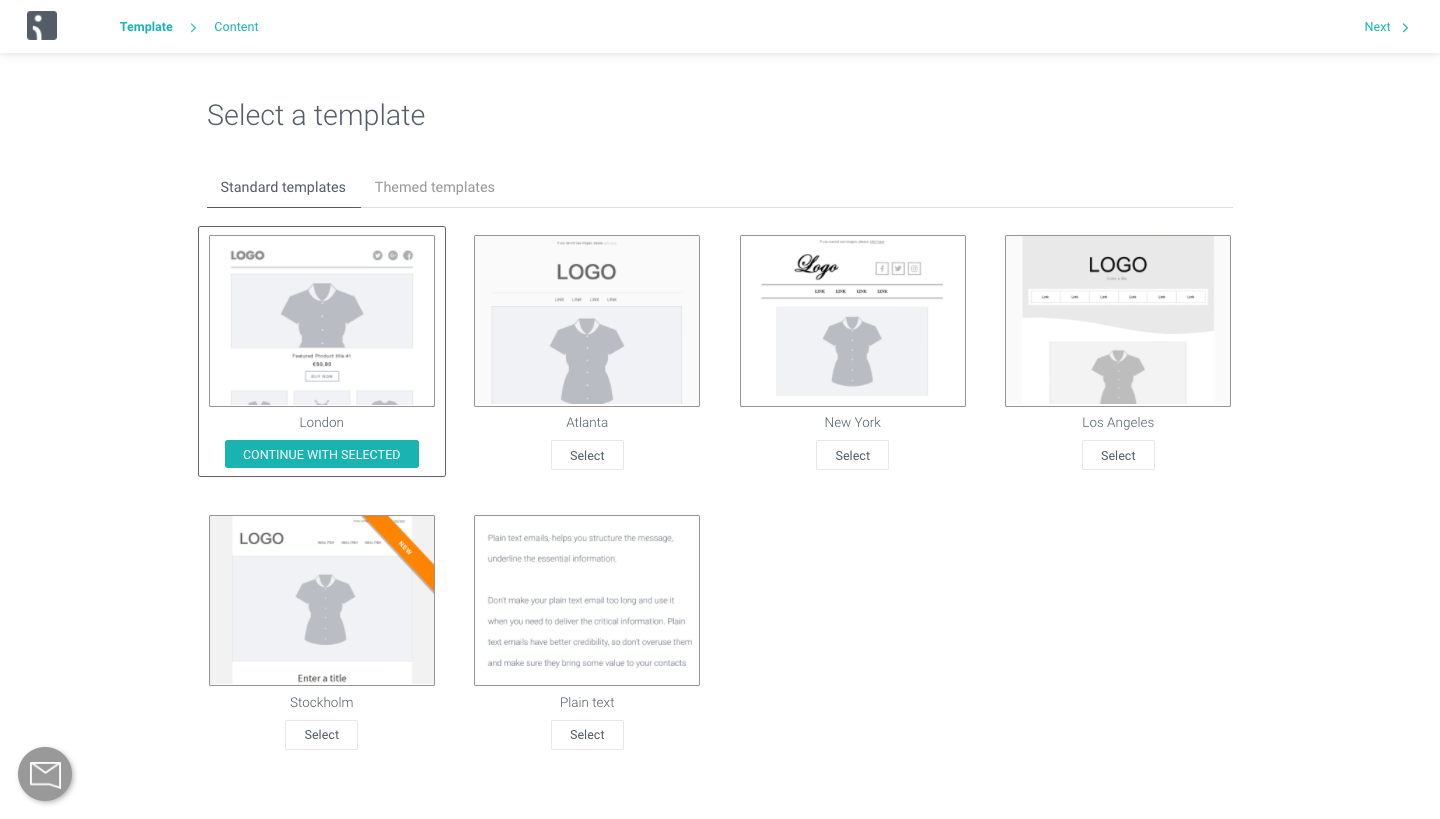
Omnisend has multiple standard templates for you to choose from. For this exercise, we’ll be editing the London template to create a simple price drop alert email.
Once the template is open, you can add your logo to the top if you like or remove the image block. You can also remove existing blocks or choose to add from other available blocks. We’ll next add a HTML block for the main message content. We’ll use html to pull in data from the Swym-pricedrop event.

Here is the html we used for our simple email template:
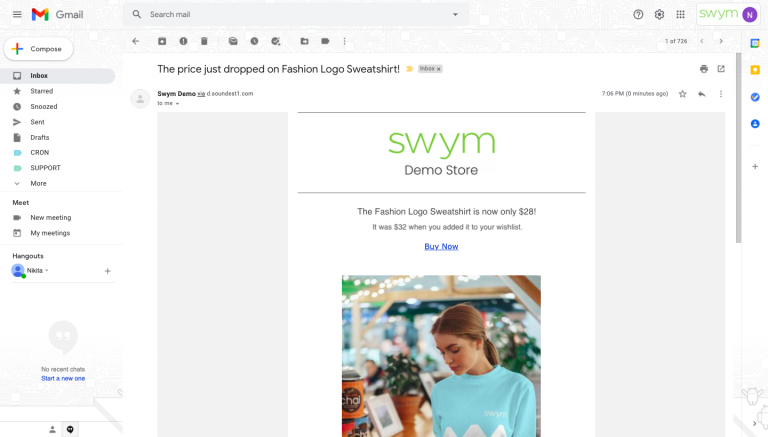
<p style="text-align: center">The [[event.ProductName]] you were interested in is now back in stock! </p>
<p style="text-align: center"><img height="250" src="[[event.ImageURL]]" width="400"/></p> <p style="text-align: center">
<a href="[[event.ProductURL]]">[[event.ProductName]]</a></p"
4. Preview the Message
Once you are satisfied with your template and have it saved, you will need to preview it to make sure everything is working as expected. While you can preview the style of your email on the Omnisend platform, you will need to trigger the action from your store and send an email to yourself to see the final output of the automation. Follow the steps given below to do this.
- Make sure that you have an Audience filter added to this automation. This will ensure that the emails do not yet go out to your customer, when you make the automation live.

- Click on start workflow to make the automation live so as to trigger the action.

- Trigger the price drop event manually by wishlisting a product on your store under the test email ID.
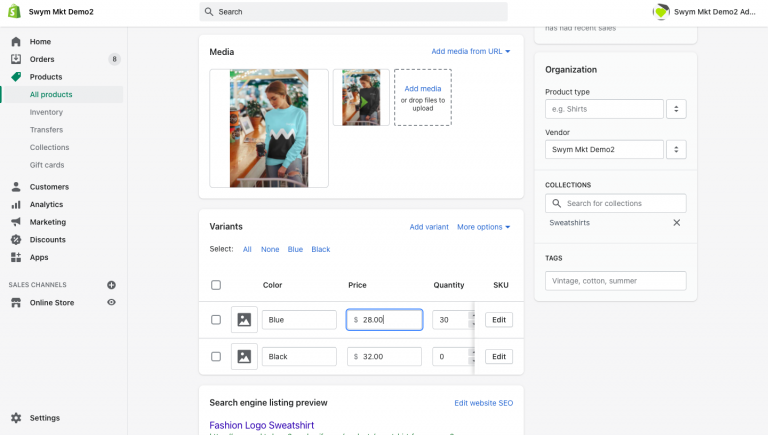
- On the Shopify Dashboard, lower the price of the same product that you wishlisted.
- This should immediately trigger the event on Omnisend, and send the price drop email to the test audience.
5. Remove the Audience filter
When you’re satisfied with your testing, the last step is to remove the Audience filter by simply clicking on the cross. With this, your Omnisend integration is live and your emails should start flowing to your customers!