")
MARKETING PLAYBOOKS
Sending Wishlist Back in Stock Emails via Klaviyo
The products your shoppers add to their wishlists tend to be your best products. As we all unfortunately know, it’s your best products that tend to sell out first. Once the products come back in stock again, you have a great triggered marketing opportunity.
Prerequisites
- Wishlist Plus Pro Plan or above
- Klaviyo Email Account
- Swym-Klaviyo integration enabled
How To Implement
1. Enable Back in Stock Event
Before you get started, you need to make sure you’ve enabled the wishlist back in stock event within Swym Admin. To confirm, once you’ve logged in to Swym Admin, navigate to Integrations via the left nav.
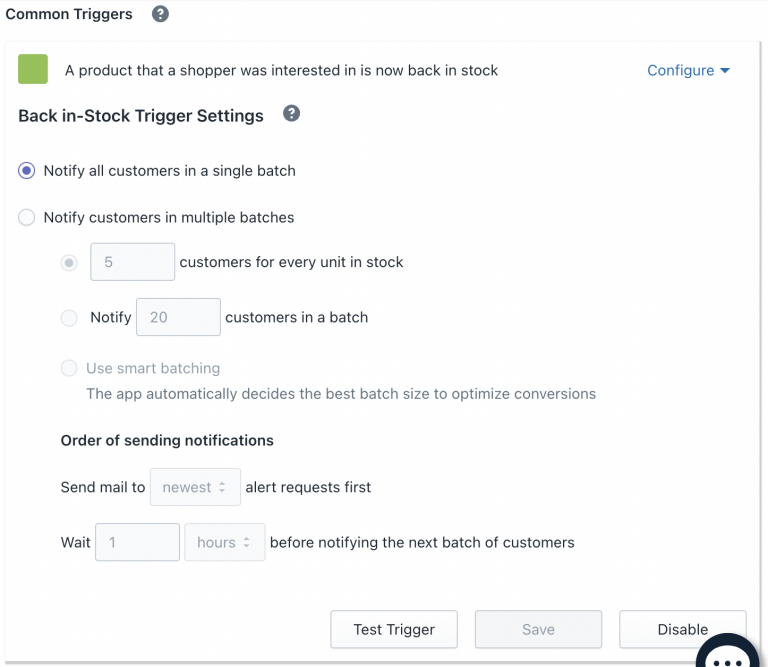
Select Klaviyo to view the configuration settings. Click Configure next to “A product that a shopper was interested in is now back in stock”.

Select whether to notify all customers in a single batch or specify the notification according to customized batch settings as shown below. The batch sending feature requires a Premium plan or greater.
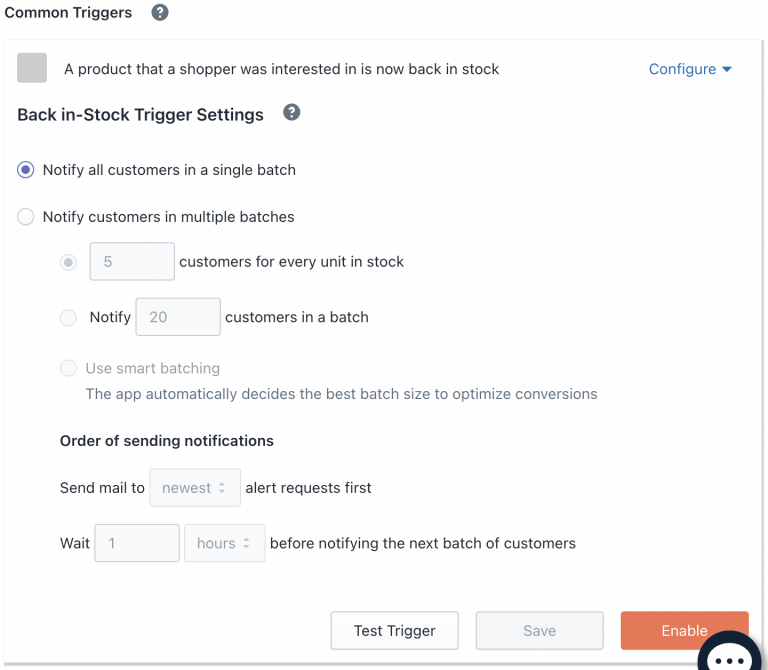
You can select the number of customers to notify for every unit in stock and also the number of customers that can be notified within a particular batch.
One can also customize the mails sent according to the newest or oldest requests that come up, along with the time delay between each batch of customers to be notified.
Once enabled, Swym will send an event to Klaviyo each time a product on a customer’s wishlist is back in stock.
A test trigger feature is also available that enables you to simulate Wishlist and Back in Stock events instantly, letting you check if the event triggers work as intended. Upon clicking the test trigger you will be prompted by a pop-up to enter an email address.
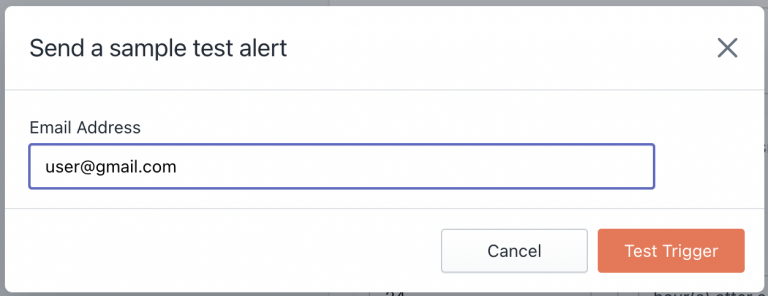
You can check if the test trigger has been sent by checking the same on Klaviyo which we will discuss in the next step.
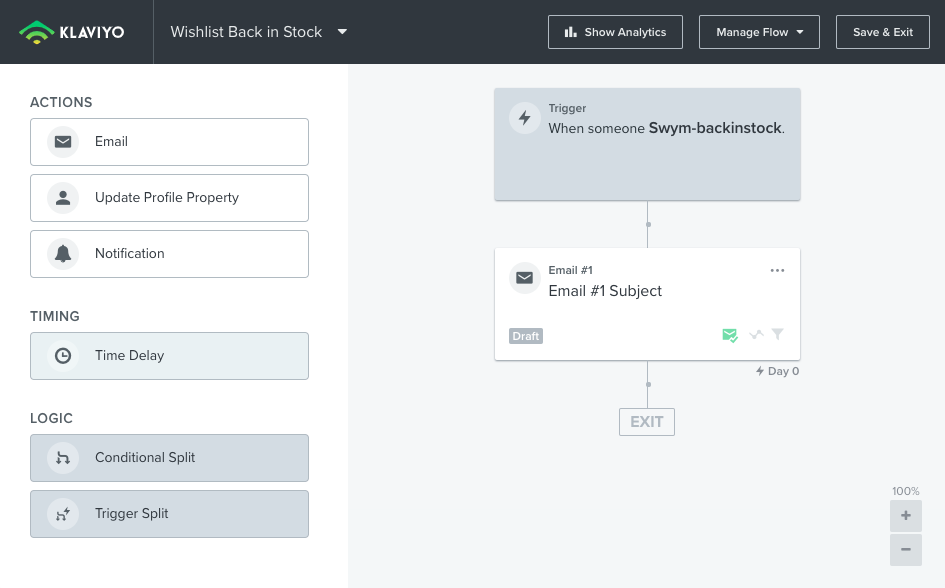
2. Create Klaviyo Flow and Select Trigger
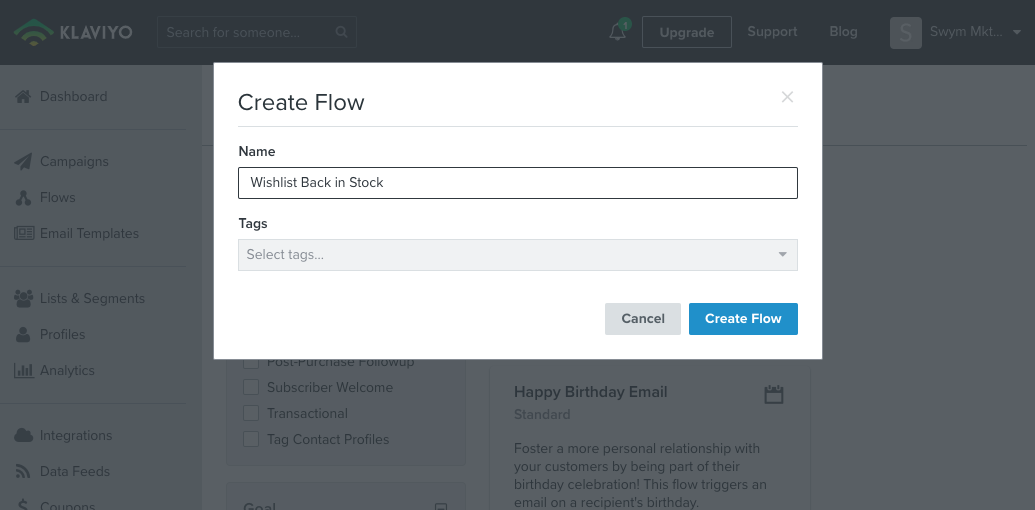
In Klaviyo, navigate to the Flows page and select “Create from Scratch”. In this example, we’re going to call this flow “Wishlist Back in Stock”.
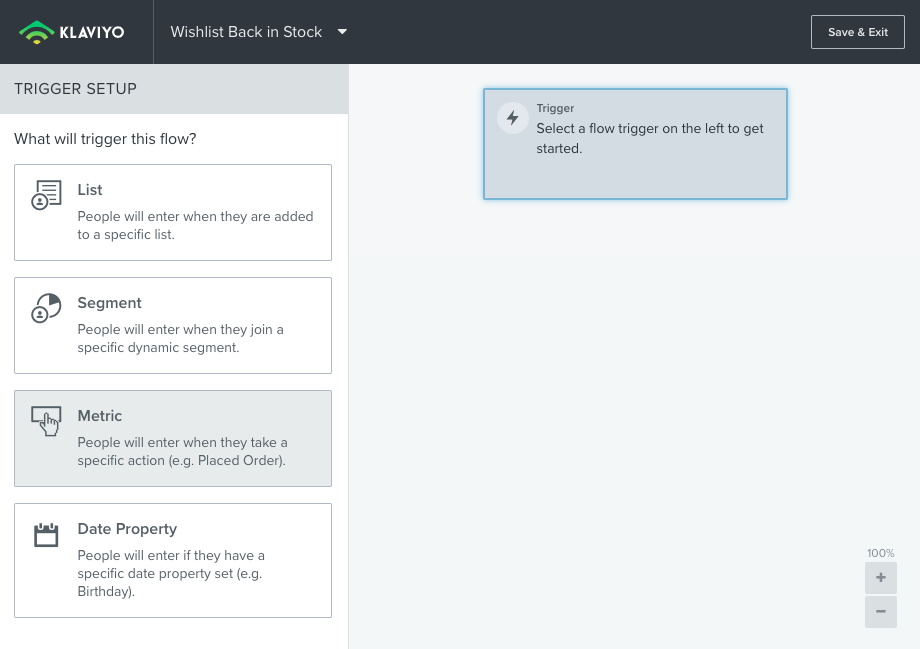
Next you’ll need to set the trigger for this flow. Choose “Metric” from the choices on the left.
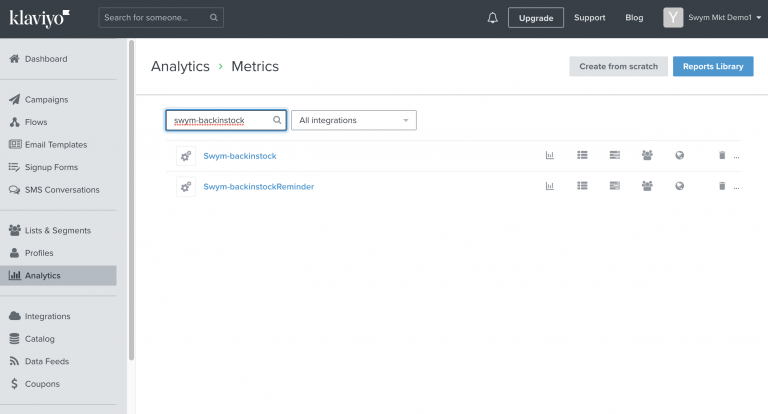
Choose “Swym-backinstock” from the Metric dropdown. You can optionally filter based on any of the attributes passed (outlined in the next section) with this event or to only apply to certain groups of people.

If you’re not seeing “Swym-backinstock” in your dropdown you probably haven’t had a wishlisted product come back in stock since you enabled the Klaviyo integration in Swym. Klaviyo will not display flow triggers until they’ve received at least one event. In this scenario, you can make use of our Test Trigger feature as discussed earlier.
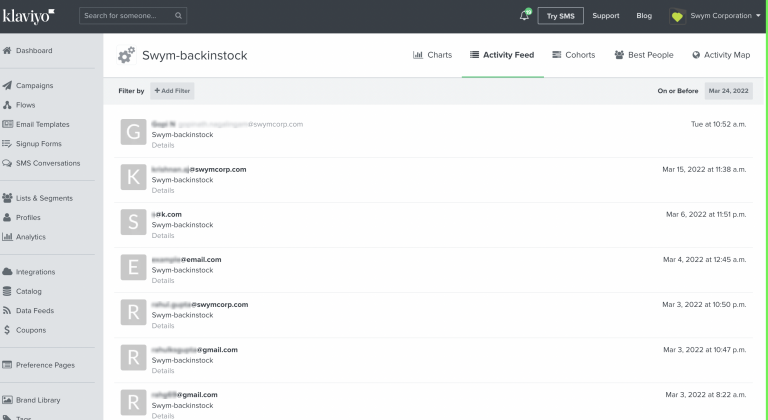
After sending a test alert you can check it in Klaviyo under Analytics>Metrics>Swym-backinstock>Activity Feed.
In the Activity Feed, you will find the email address from which the sample alert was sent and the time at which it was sent.
Because the timing of this event isn’t driven by an action taken by the shopper, there’s likely no benefit to adding a time delay before the email is sent.
Next add an email to your flow, this is will be your back in stock message.
3. Create Your Email Template
The next thing we’ll do is build an email template that consumes the back in stock event data passed from Swym to create our triggered email campaign.
Here are the event-level data elements included with the event:
| Data Element | |||
|---|---|---|---|
| Event | |||
| Event Time | |||
| Product ID | |||
| Product Name | |||
| Price | |||
| Quantity | |||
| Brand | |||
| Category | |||
| Variant ID | |||
| Variant Info | |||
| Variant SKU | |||
| Product URL | |||
| Image URL | |||
| State | addToSfl → Source of this event is SaveForLater |
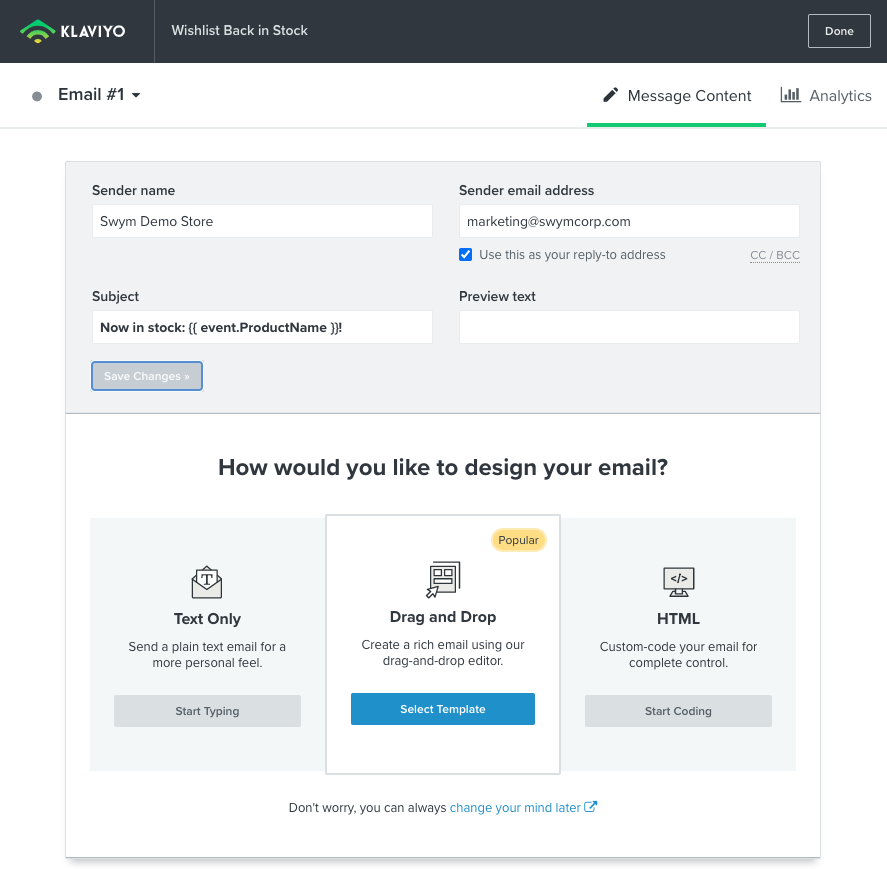
Select the email object you added to to your flow, and click the “Configure Content” button in the left panel.
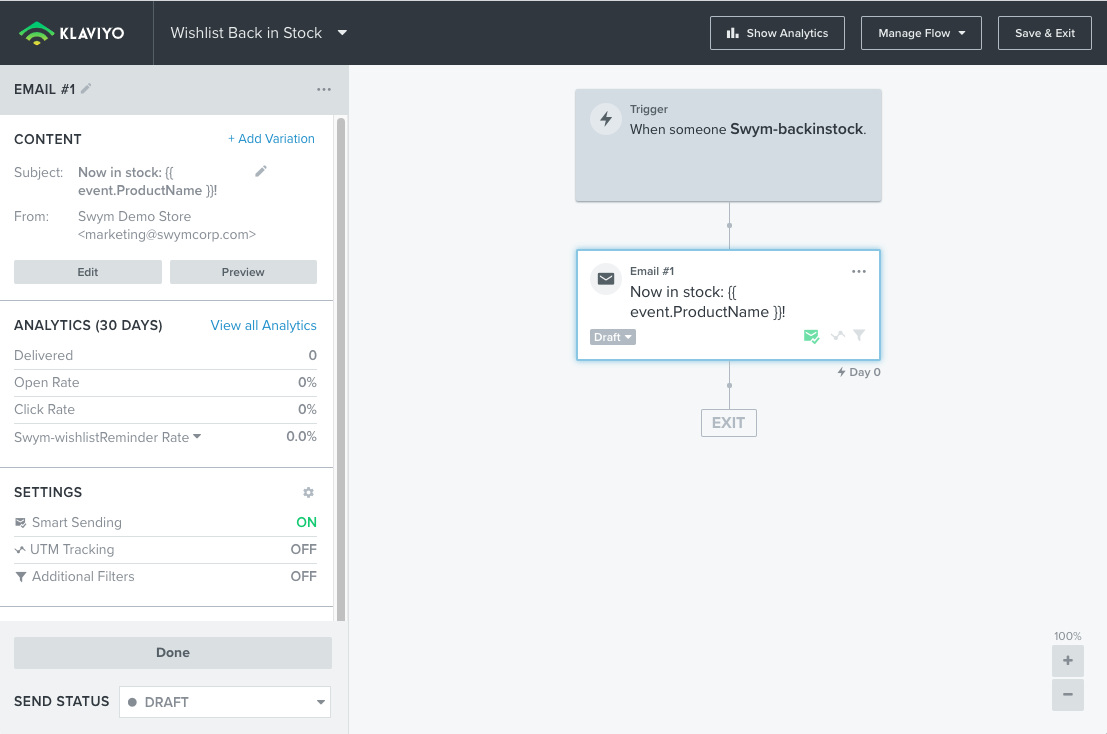
If you’ve been using Klaviyo for a while you probably already have your own templates set. For this exercise we’re going to choose the drag and drop method, and then select the “1 Column” template from the Basic tab. We updated the Subject to include the name of the product, which we pulled in dynamically using {{ event.ProductName }}.
Once the “1 Column” template is open you can add your logo to the top if you like or remove the image block. We’ll use the placeholder text block to for the main message content. For this example we’ll keep things simple, centering everything and using html to pull in data from the Swym-lowstock event.
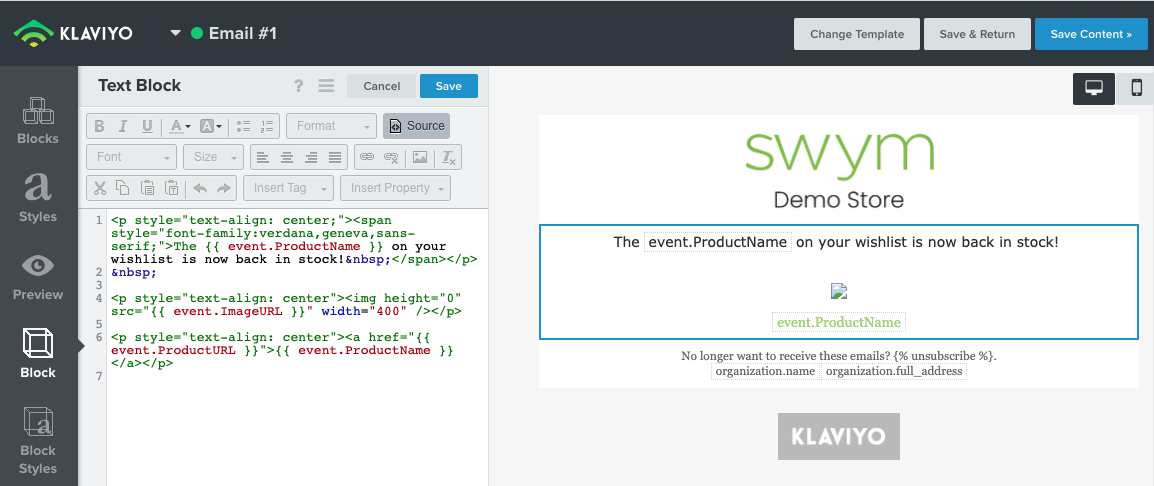
Here’s the html we used for our simple template:
<p style=”text-align: center;font-family:verdana,geneva,sans-serif;”>The {{ event.ProductName }} on your wishlist is now back in stock! </p> <p style=”text-align: center”><img height=”0″ src=”{{ event.ImageURL }}” width=”400″ /></p> <p style=”text-align: center”><a href=”{{ event.ProductURL }}”>{{ event.ProductName }}</a></p>
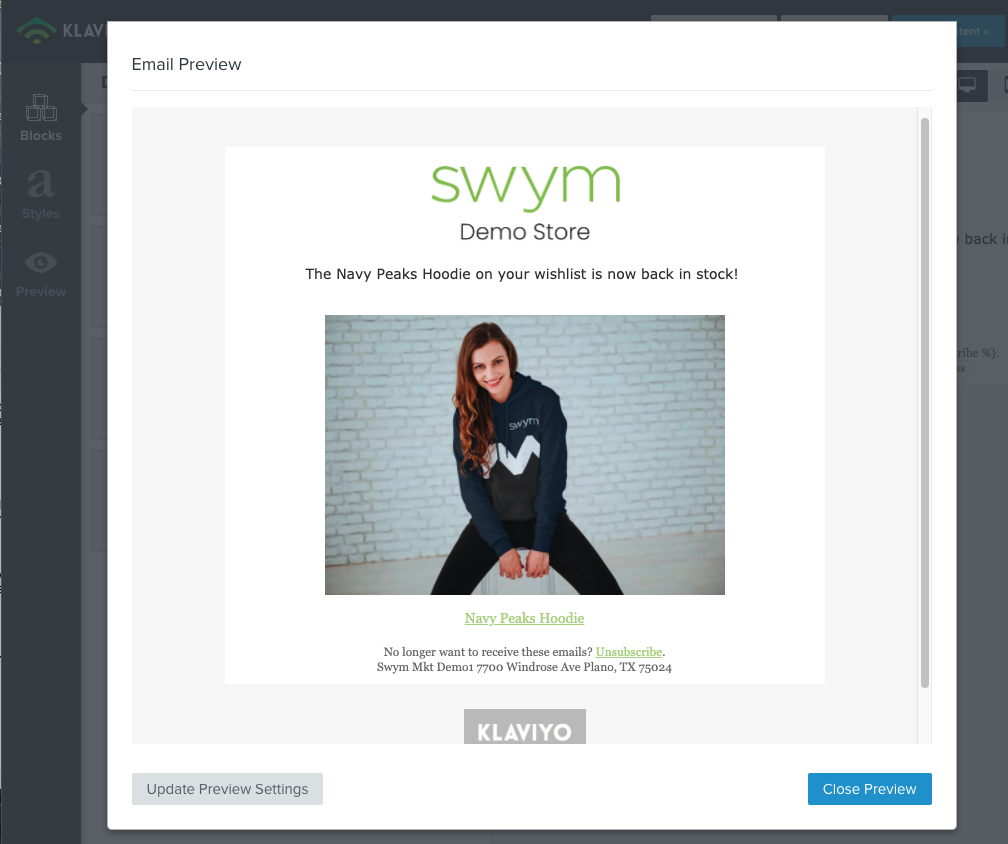
4. Preview the Message
Once you are satisfied with your template and have saved it off you can preview it to make sure everything is working as expected. Klaviyo lets you choose real example events that have flowed over for the preview, so the previews should expose any issues you might be experiencing.
We like to preview first in Klaviyo to make sure everything is working and then check it out in a real inbox. Here’s what our preview looked like:
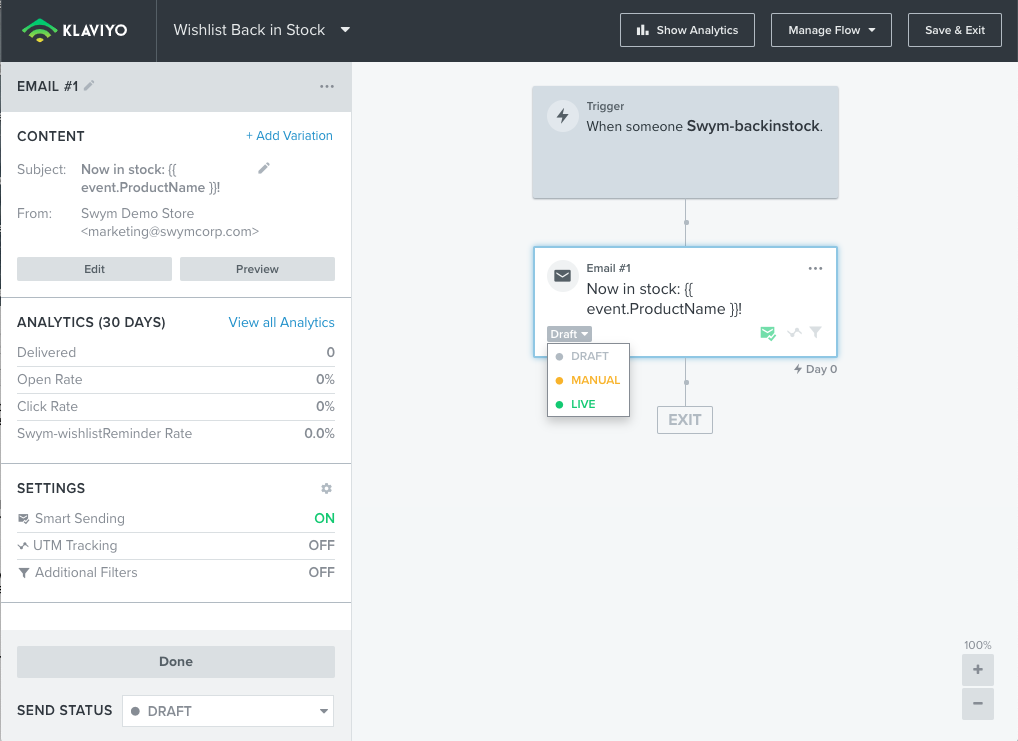
5. Set Your Email Status to "Live"
When you’re satisfied with your testing the last step is to set your email status from “draft” to “live”. Once that switch is flipped your emails should start flowing!