")
MARKETING PLAYBOOKS
Sending Add to Wishlist Emails via Sendlane
Prerequisites
- Wishlist Plus Pro Plan or above
- Sendlane Email Account
- Sendlane<>Swym integration enabled
How To Implement
1. Enable Item Added to Wishlist
Before proceeding, it is important to ensure that “an item added to a shopper’s Wishlist” event has been enabled within Swym Admin. To confirm this, after logging in to Swym Admin, navigate to Integrations>Sendlane>Configure. Go on to, locate the Wishlist Plus trigger labelled “An item is added to a shopper’s Wishlist” and proceed by clicking on Checkbox.
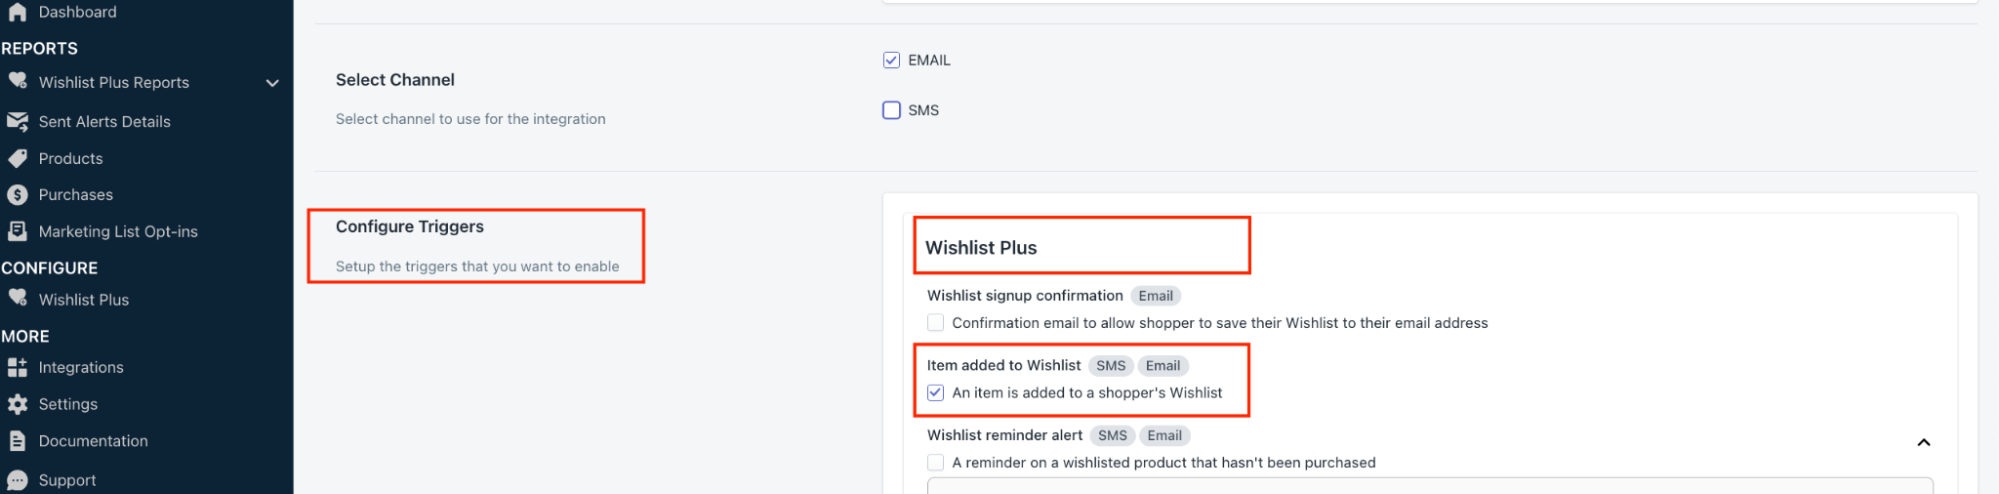
To confirm that this feature is working as expected, you can test the trigger from the ‘Send a Test Event’ section, which you can find by scrolling down after saving the trigger. Simply input the email address, choose the “Add to Wishlist alert” trigger, and then click on “Send Test trigger” and a test trigger of the event will be sent to Sendlane. Once a trigger has been activated within a Sendlane automation, it will result in an action (activities that take place once a trigger has been activated). One example of such an action is an SMS/ Email to a designated contact, as set by you, i.e. the merchant.
Correspondingly, when a shopper adds a product on the store-front to their wishlist, and assuming that they have already shared their email contact with the store, an added to wishlist email alert will be sent out through Sendlane to the Shopper, straightaway, based on this Swym event.
2. Create a Sendlane Automation (Flow) and Select a Trigger
- The custom events registered for Sendlane<>Swym integration are the ones used as triggers for Sendlane automations.
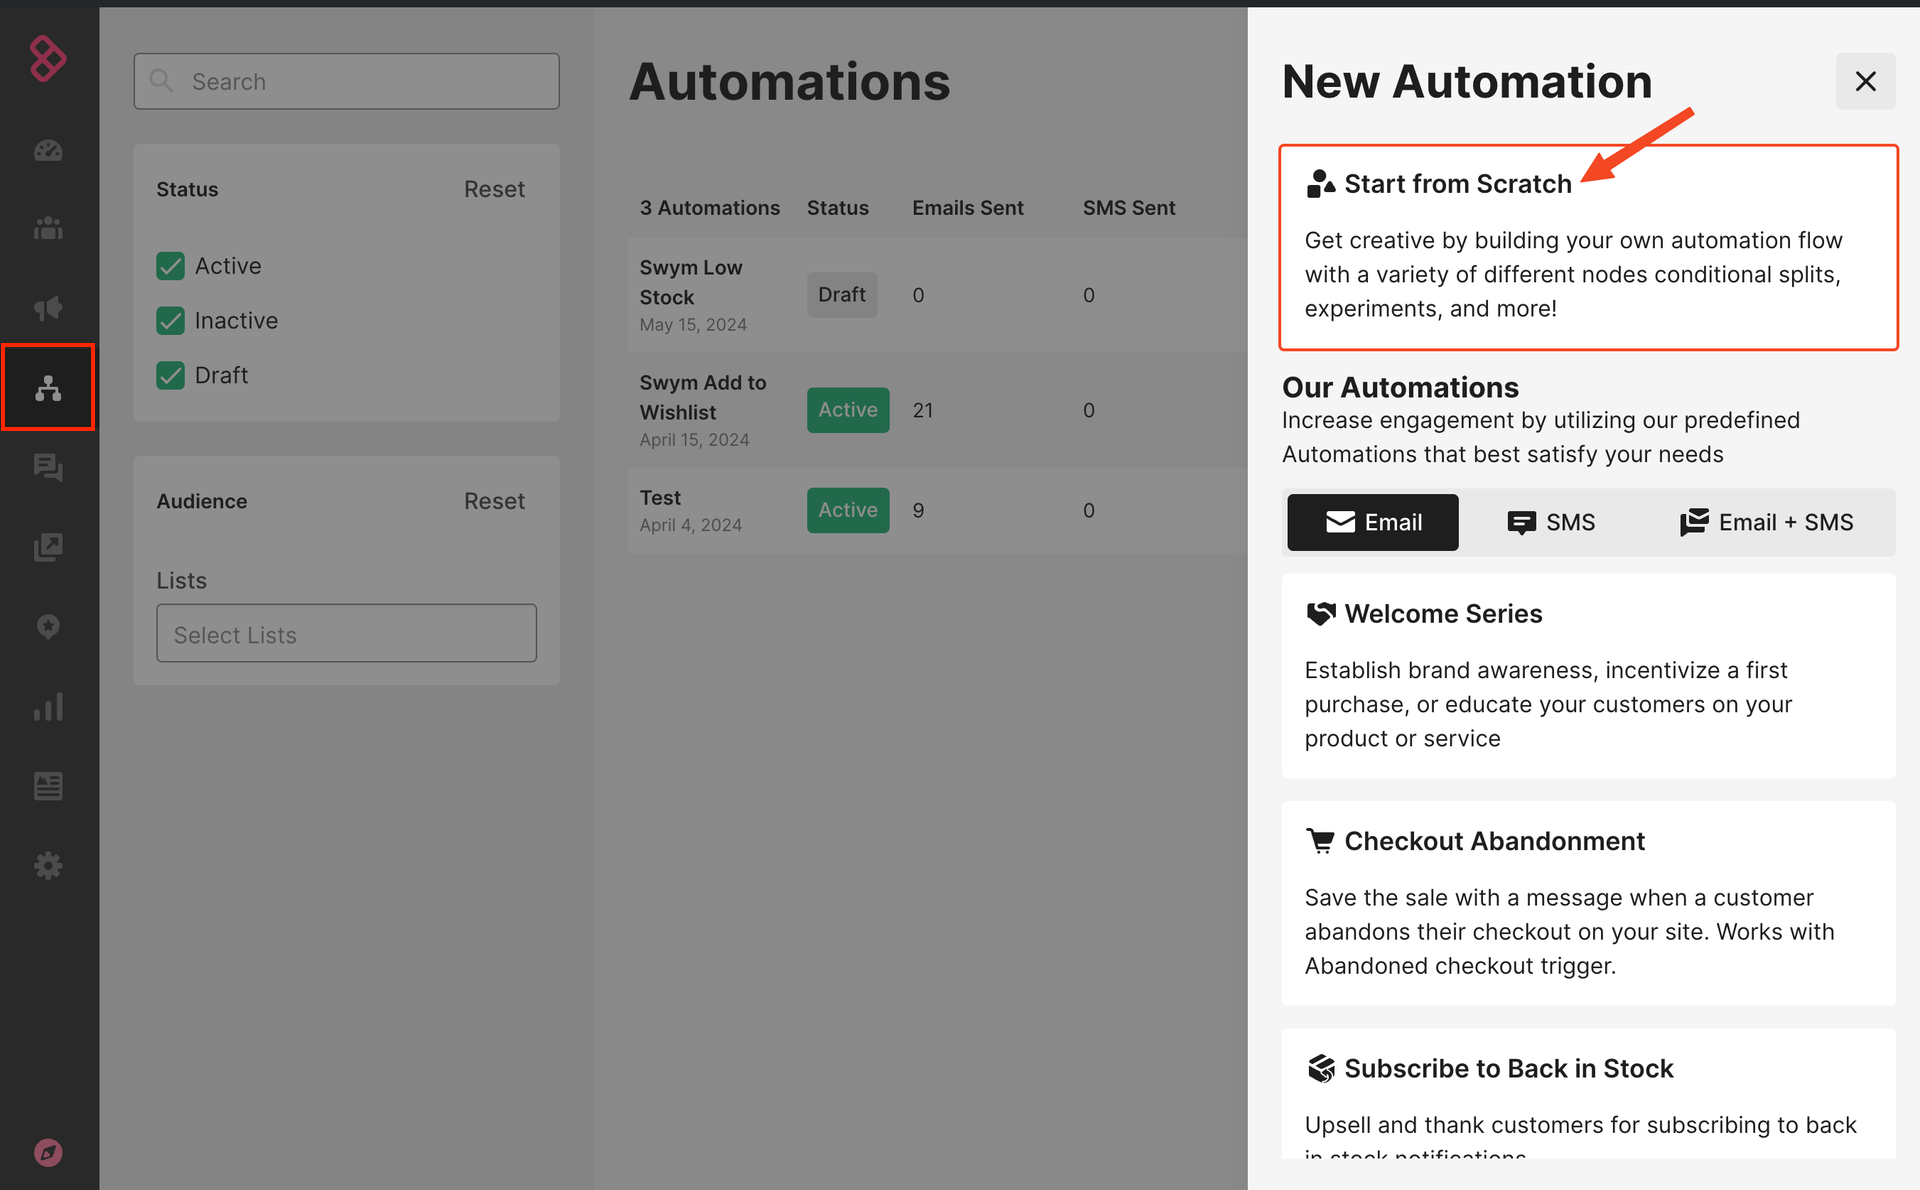
- Select Automations > New Automations > Start from the Scratch. Let’s say you want to set up an Automation for an email message. Choose a name for the automation (say “MaggiePOC” in this case)
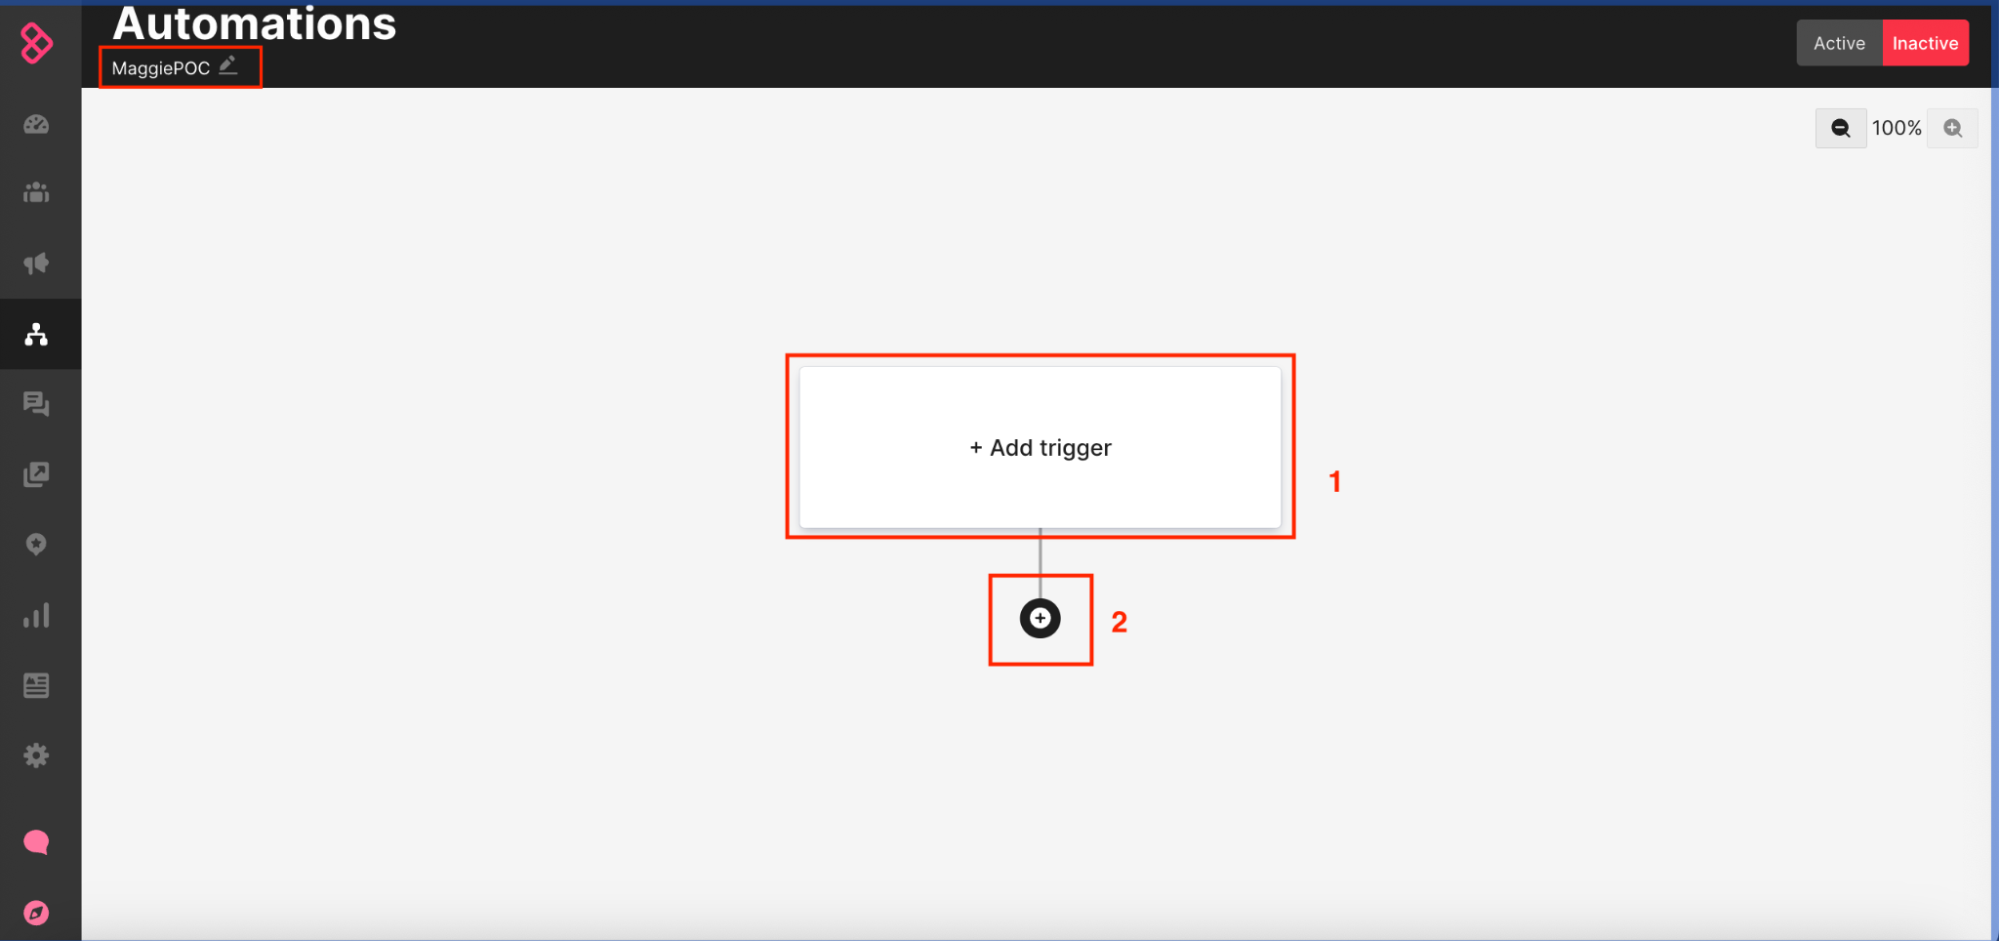
- Next, the screen shown below will be presented. Click on “Add Trigger
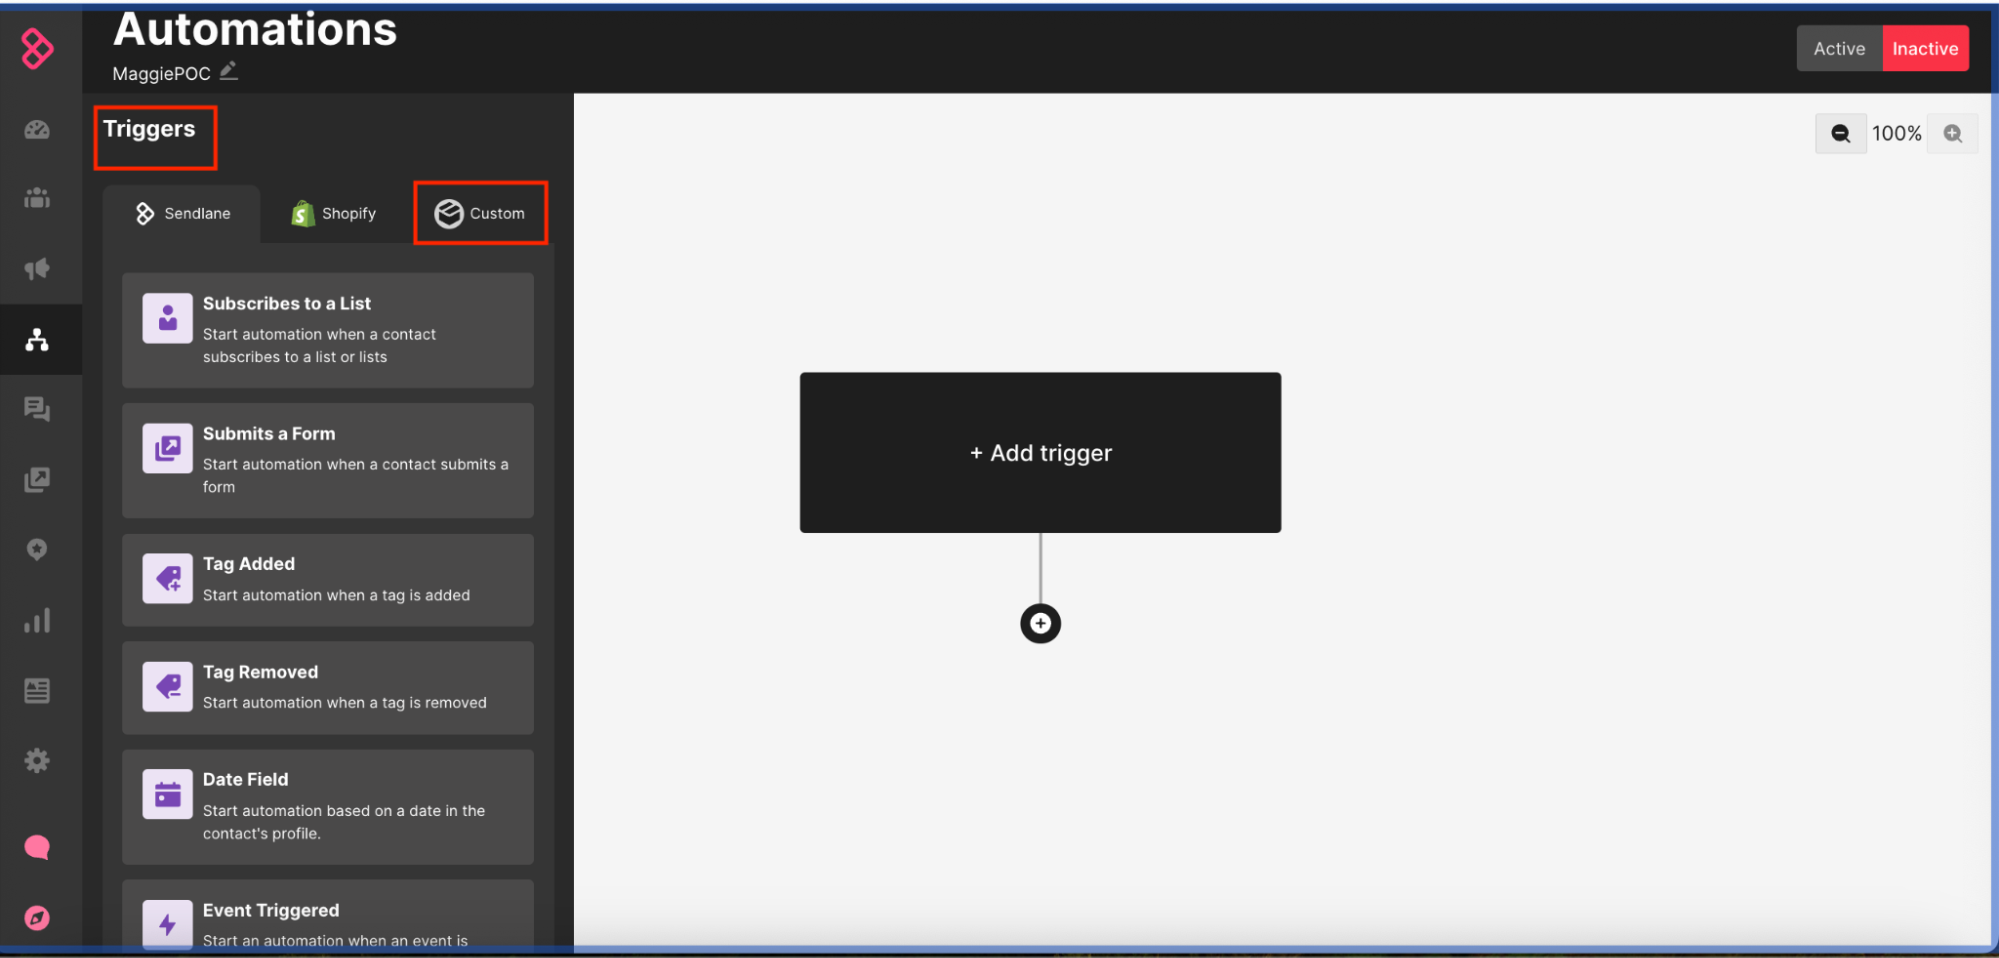
- Select a trigger. Select “Custom”, and scroll down till you see & select “Custom Event”.
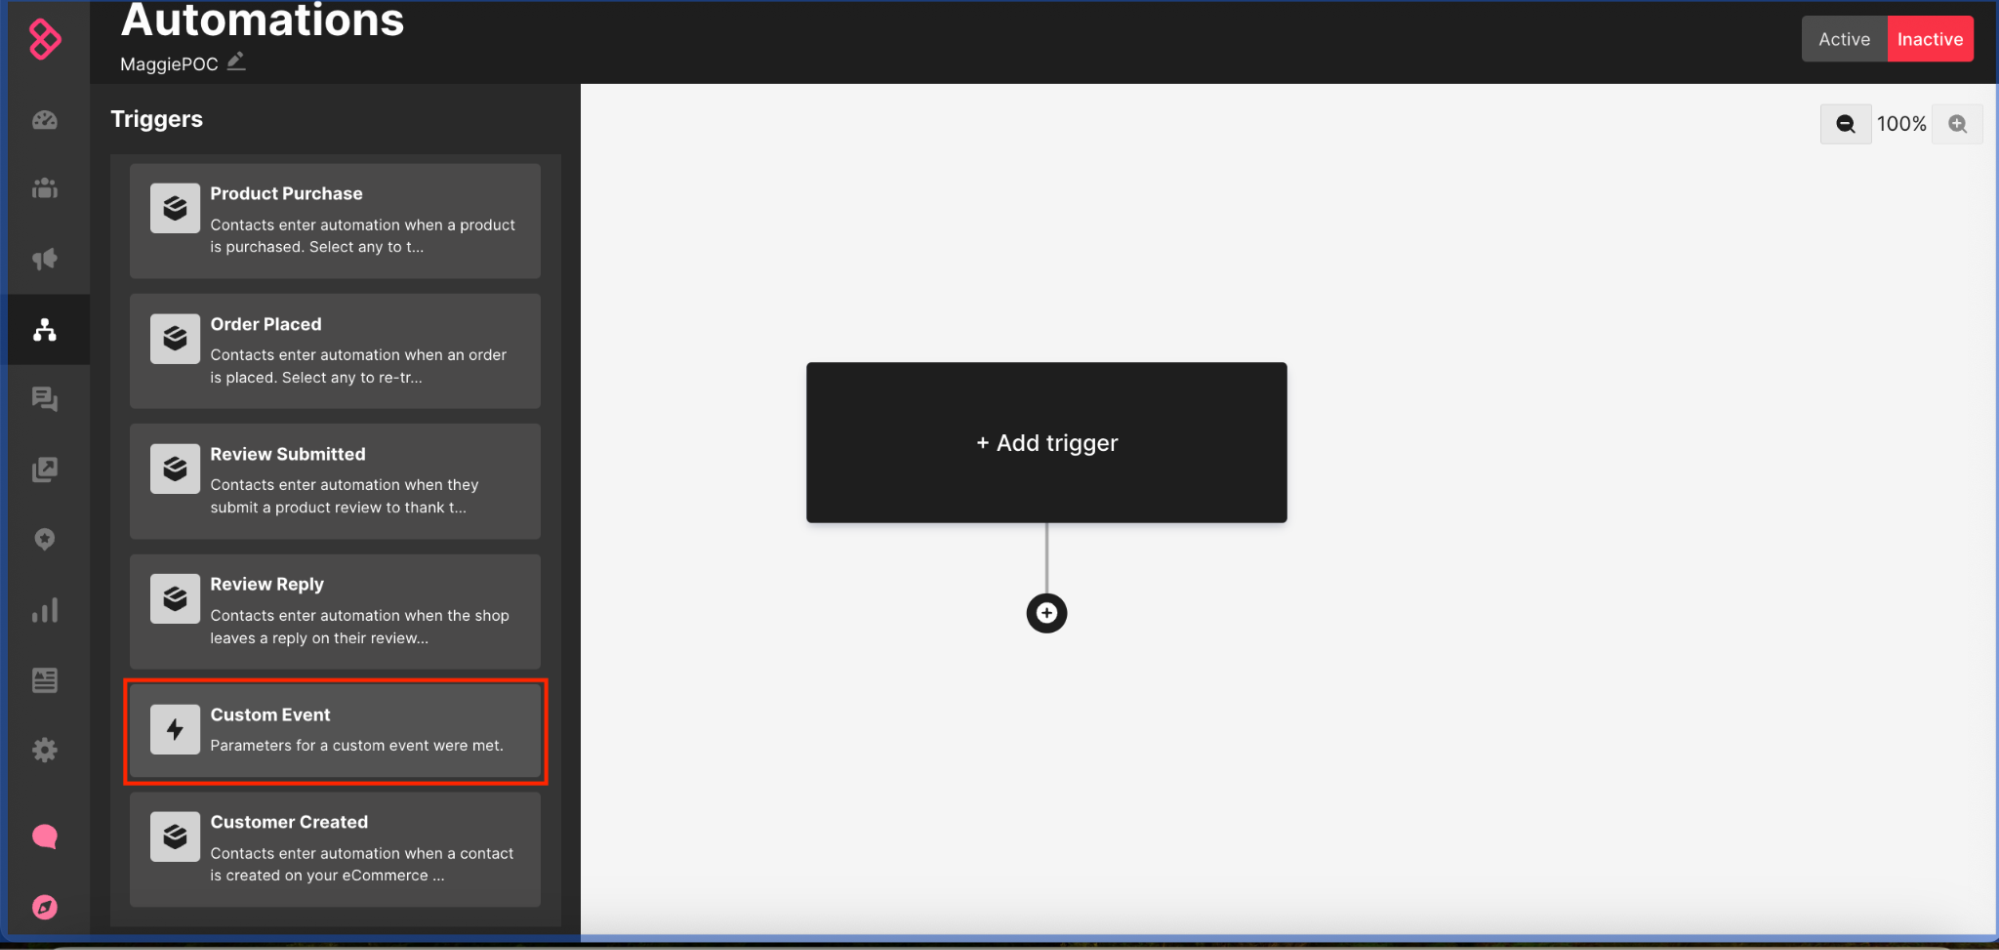
- A custom event tile gets added to the “map”, and a configuration panel opens up.
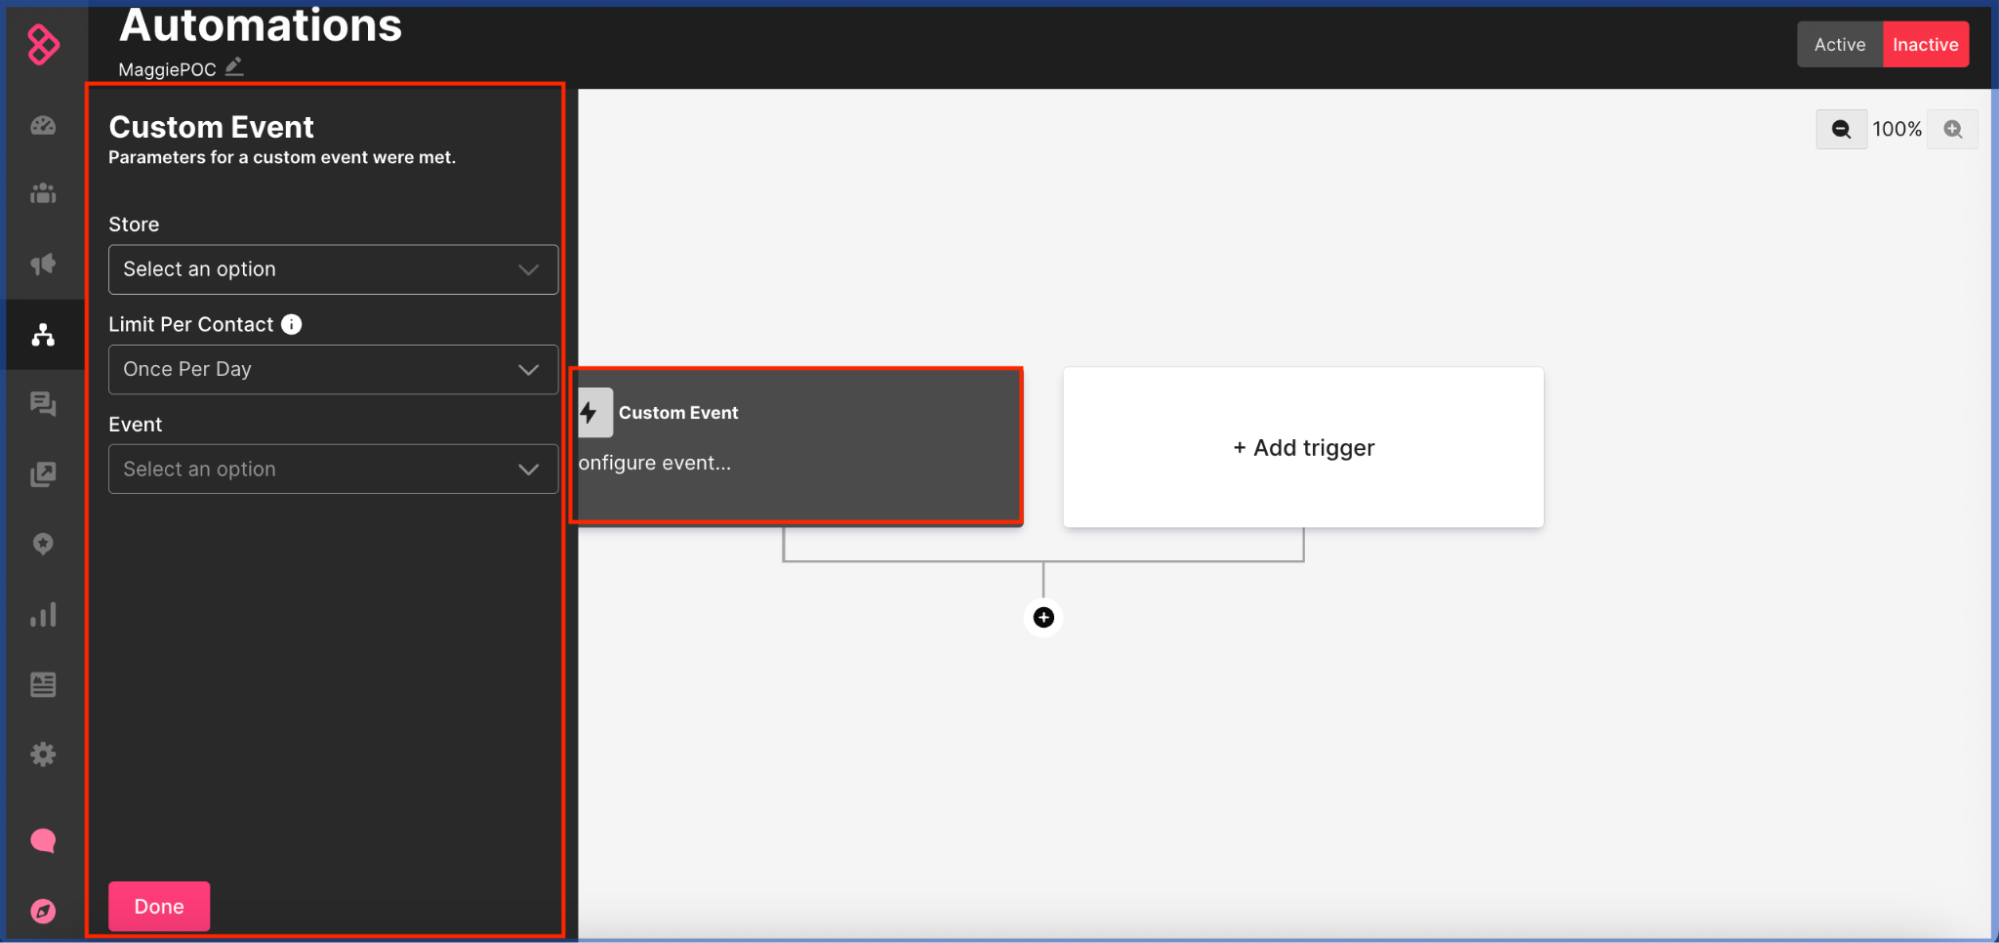
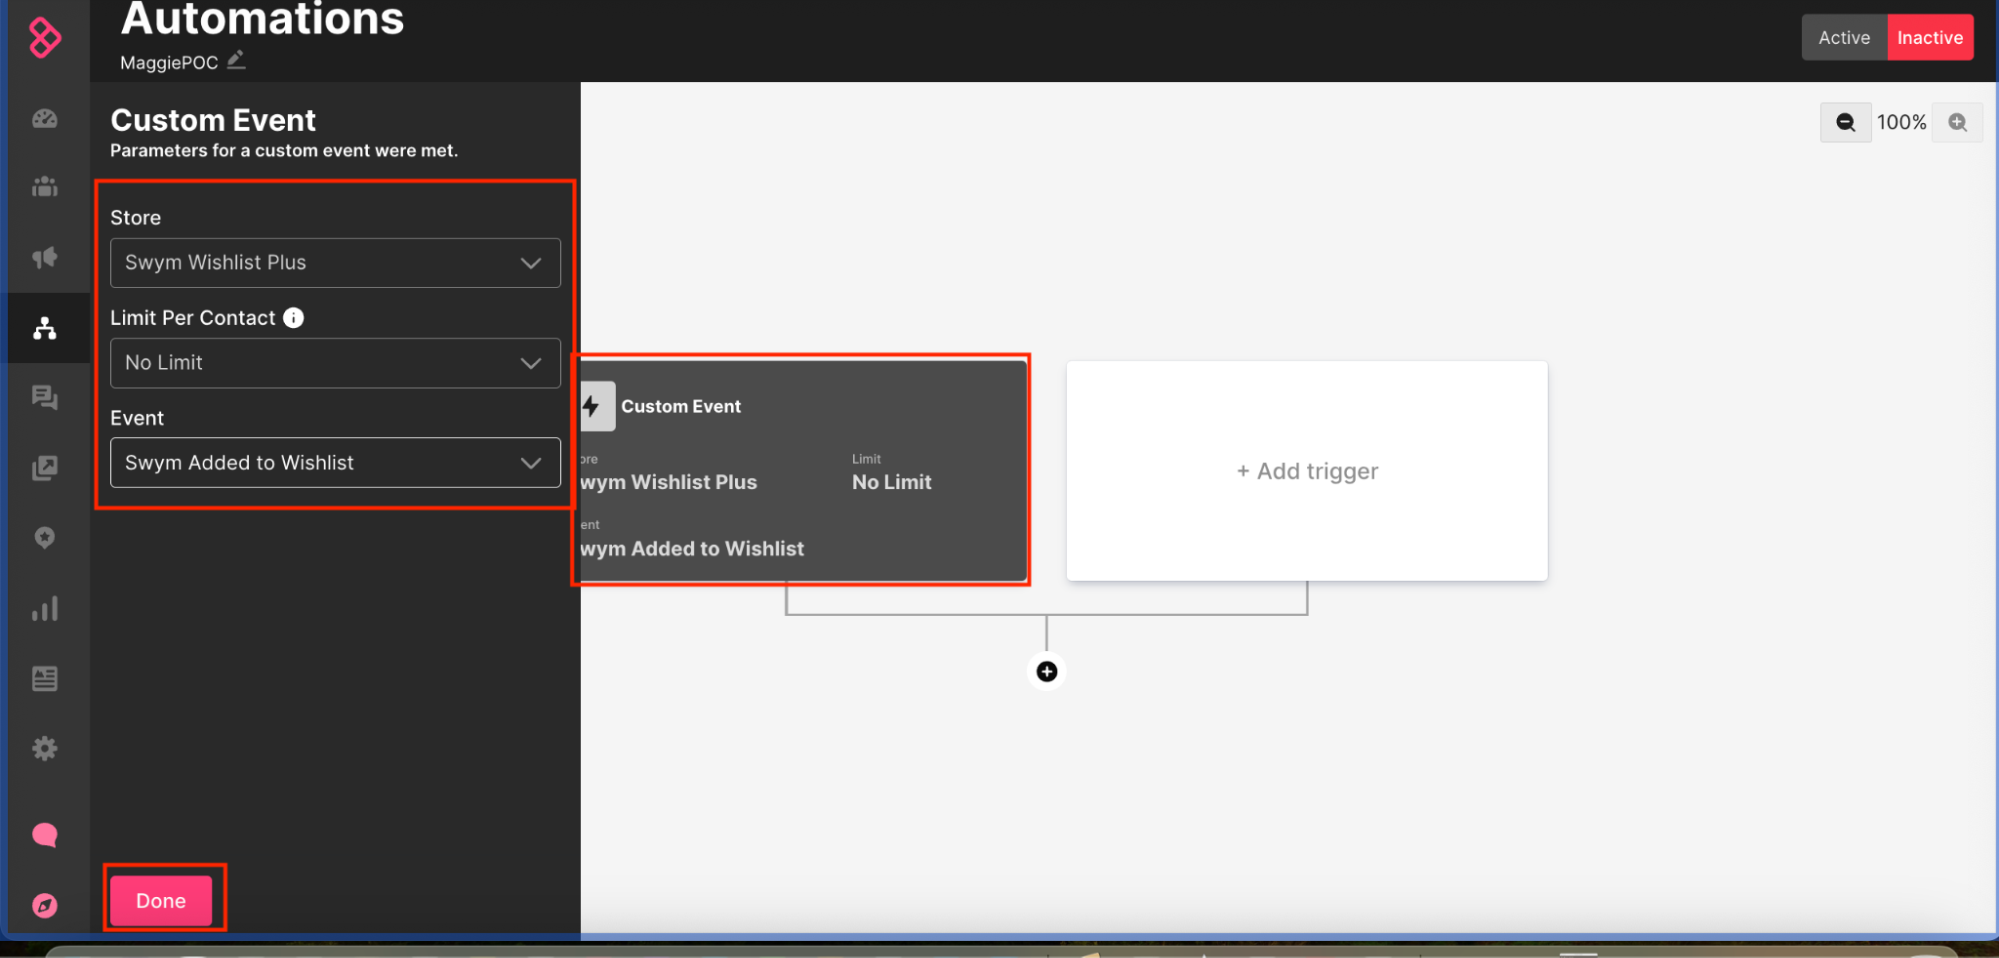
- You may configure the custom event as required, using the choices presented by the drop-down for the “store”, the limit” and the event per se.For the purpose of this example we have selected “Swym Added to Wishlist”, as the trigger/ custom event. Notice the custom event tile in the map, which gets populated with values selected. Click on “Done”, when satisfied.
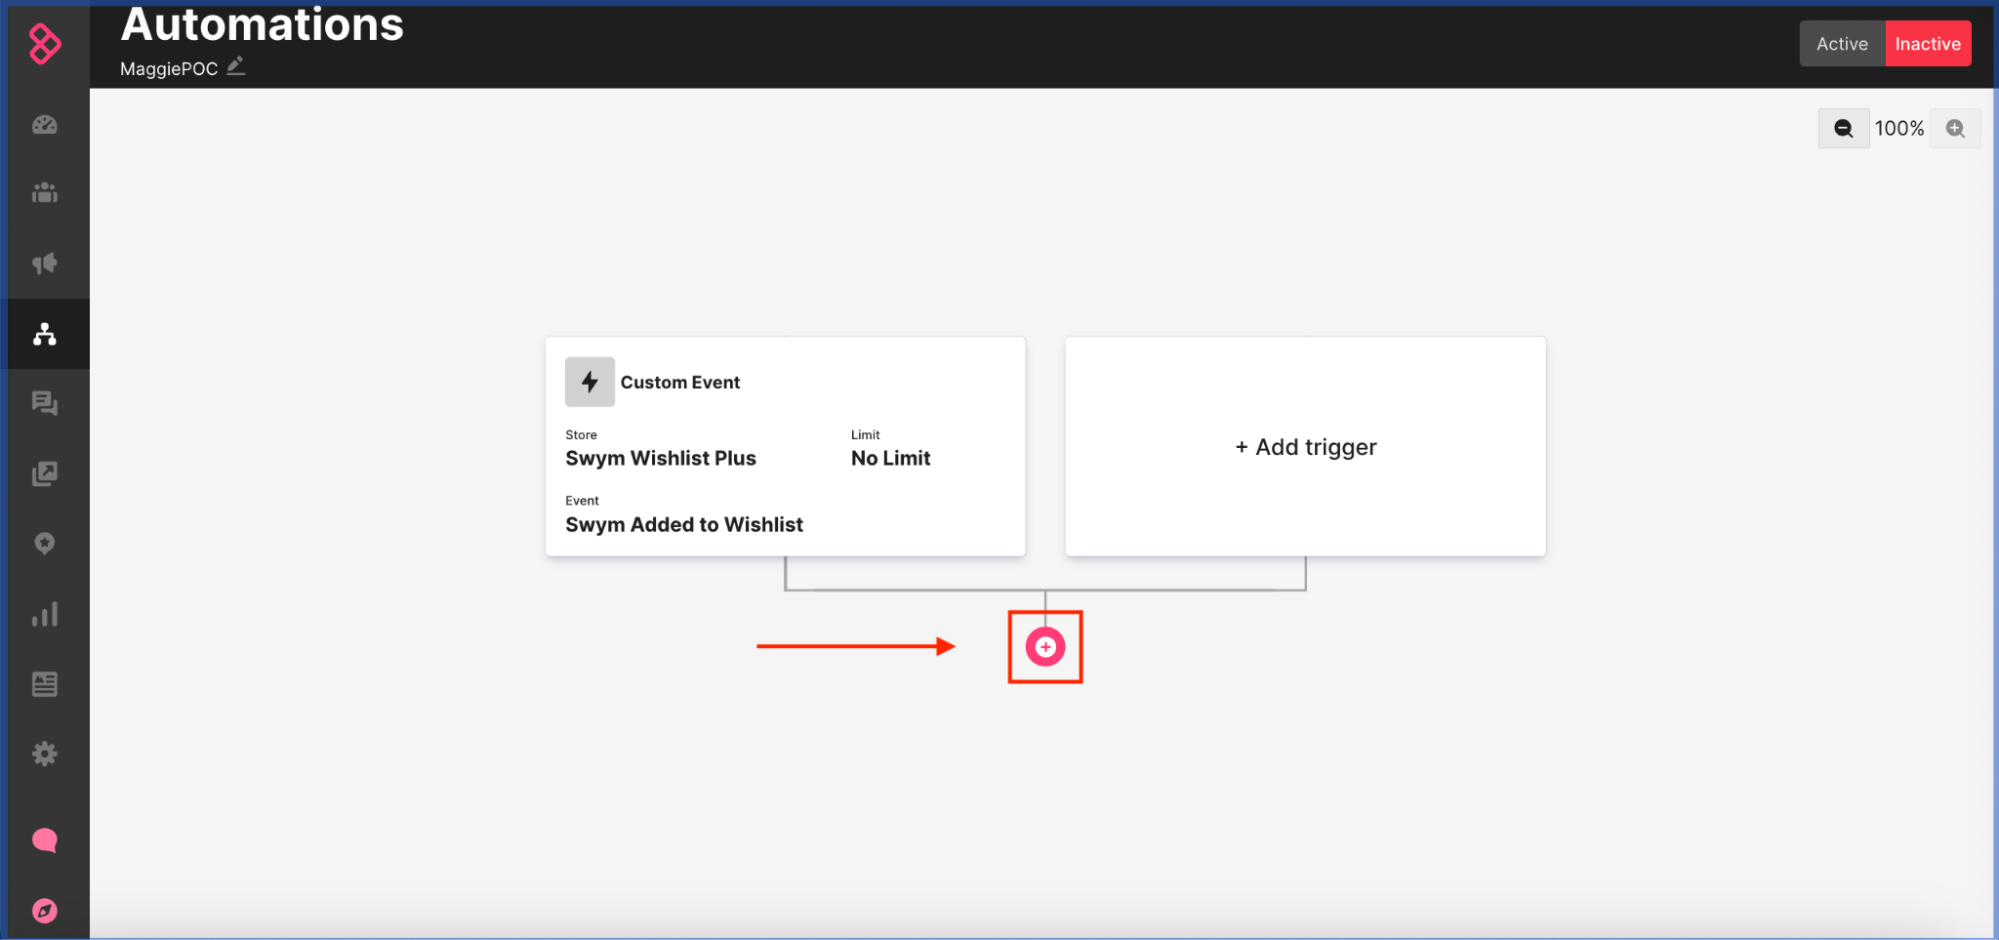
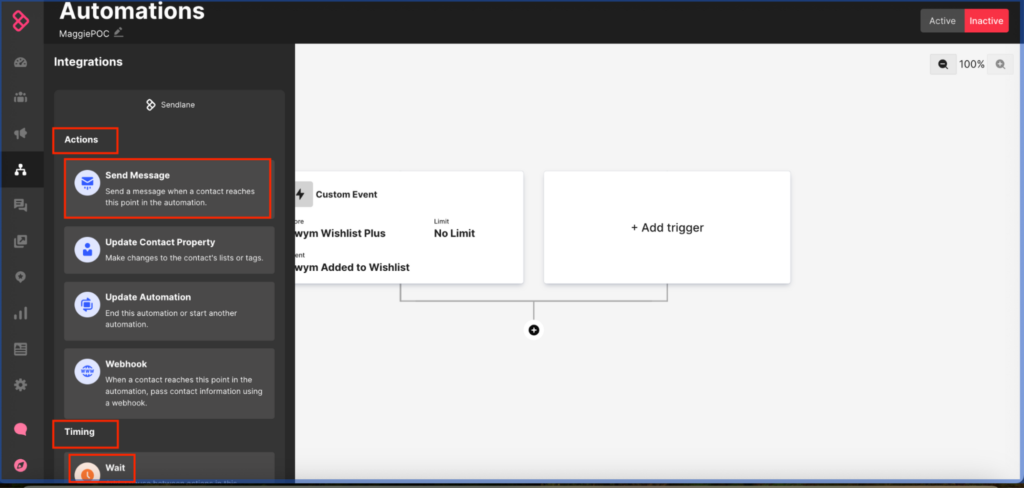
- The screen shown below is presented. Next, click on the “Plus” sign on the “map” to add an Action or a Timing block
- An “Action-cum-Timing” panel opens up on the LHS. You could choose “Send Message” (Actions> Send Messages); or/ and set up the Automation timing & logic by inserting Timing> Wait, as required.
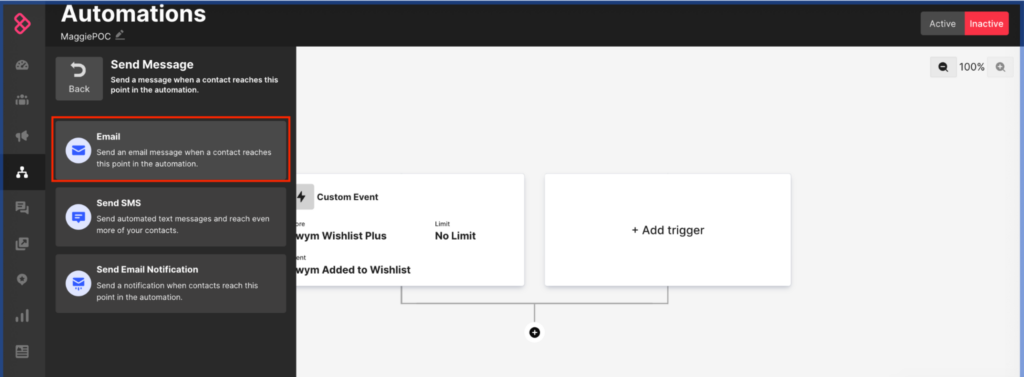
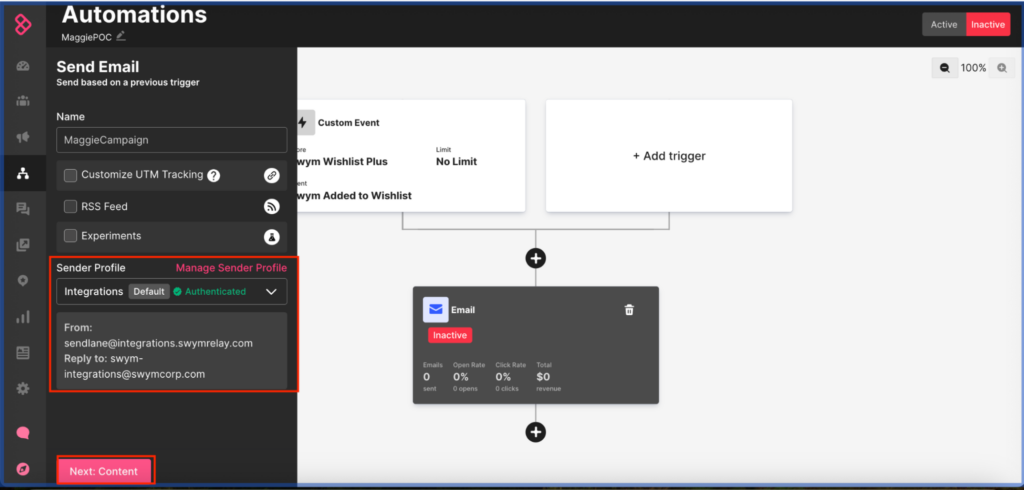
- Proceeding further, let’s say you select “Send Email”.
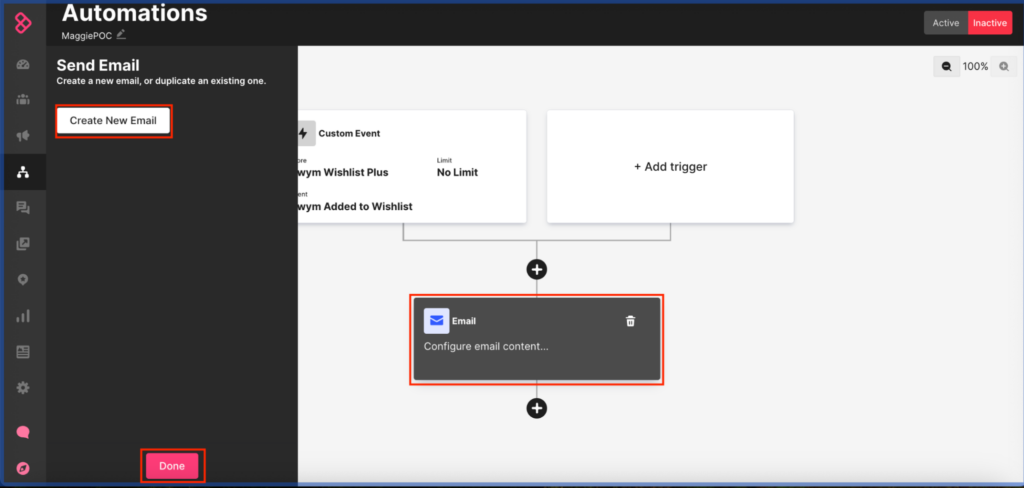
- Click on Create New Email.
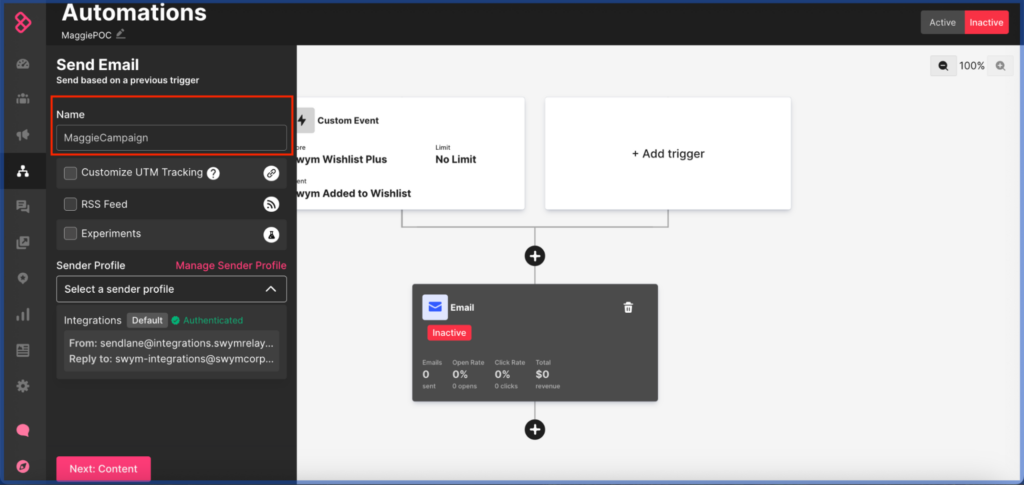
- Next, configure the email, as shown below. For the purposes of this example the email has been named “MaggieCampaign”. Continue with the configuration as appropriate to your context. Next, select a relevant sender profile. Finally, move on to the email content.
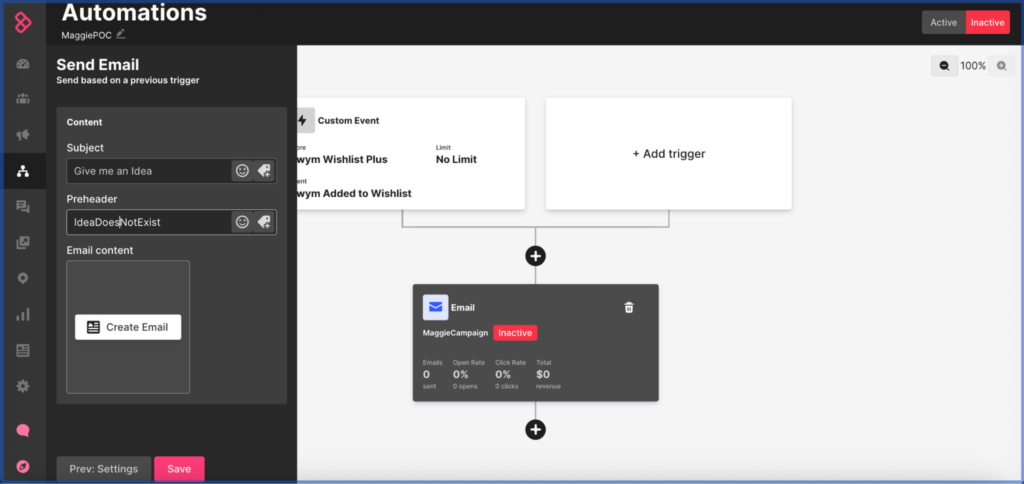
- After picking the subject and a pre-header, you may create the email content by picking its design from available templates or by custom designing it.
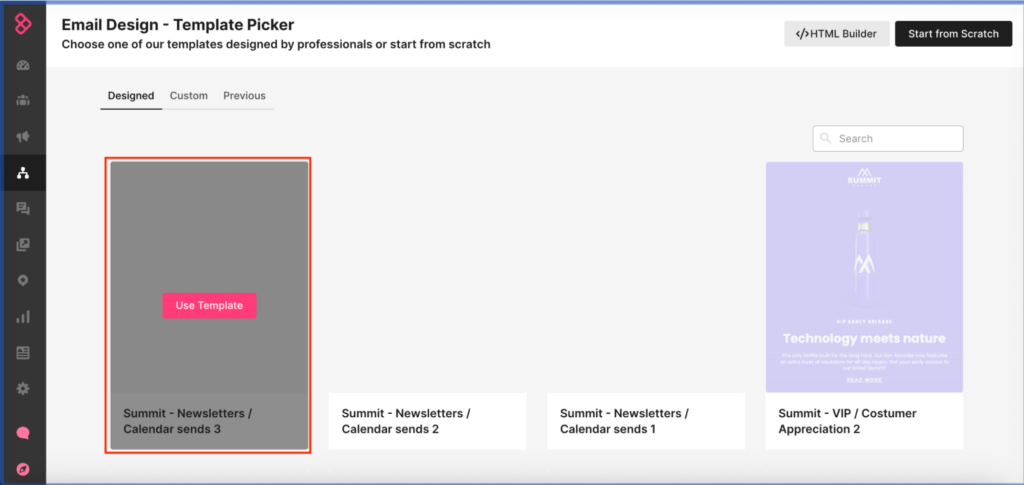
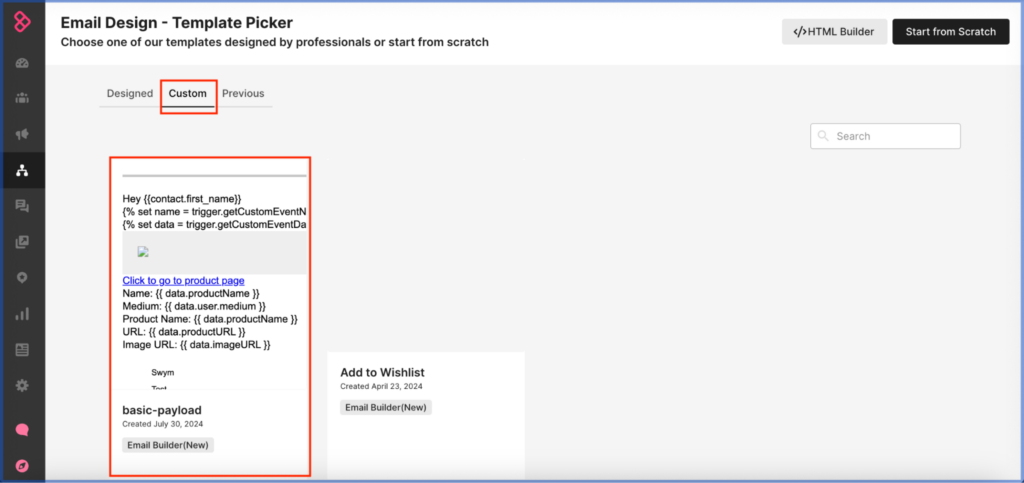
- For this example, we have picked a custom design template and chosen a basic payload.
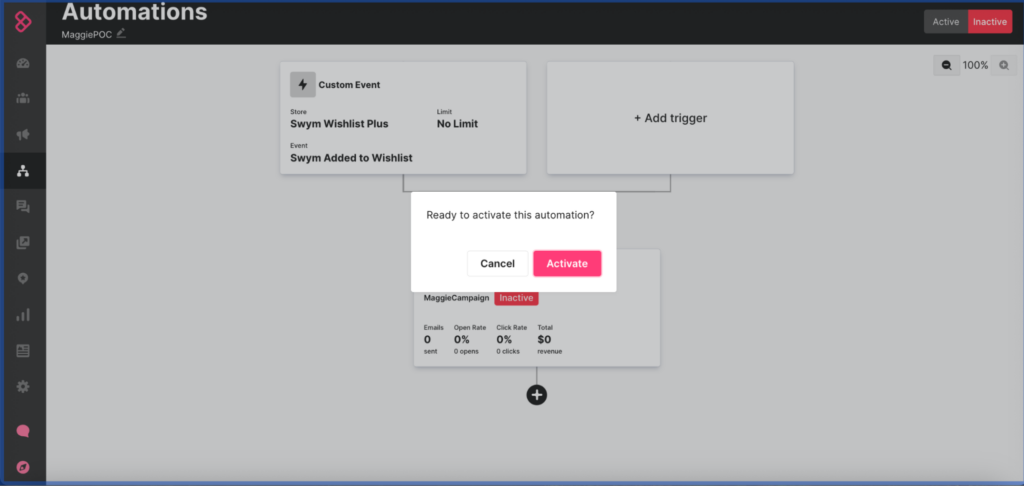
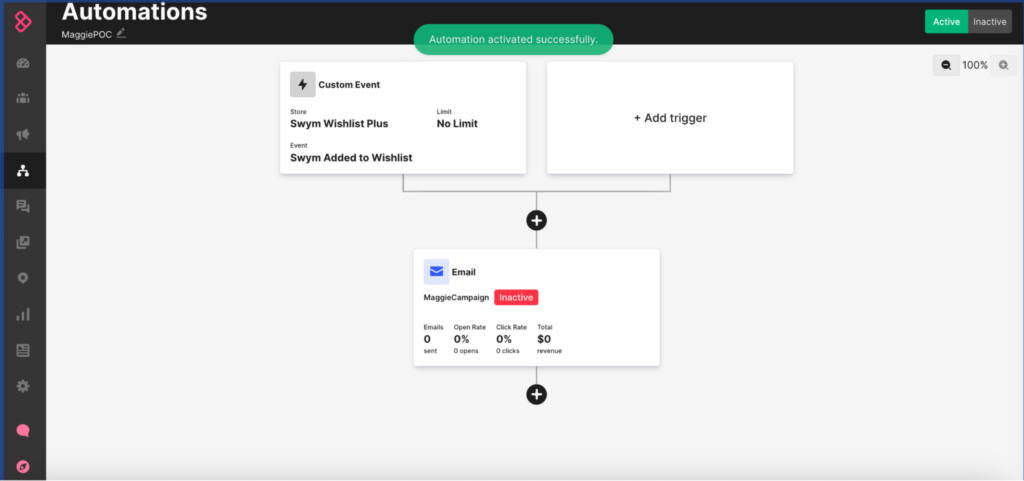
- Save and Continue, when you are ready; and Activate your email and the Automation in any comfortable sequence/ order.
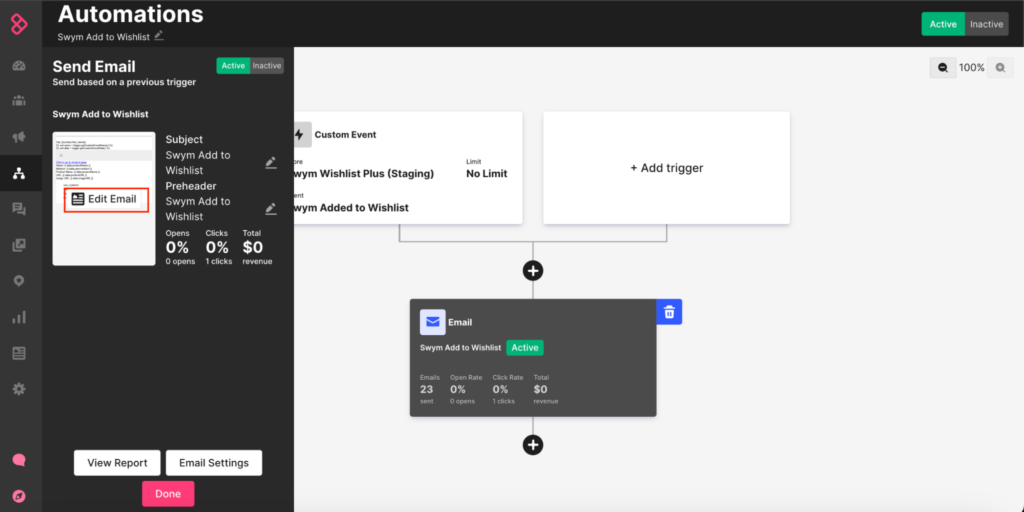
- You also have the option of editing your Email content till you are satisfied. If you were to choose Edit Email… you can then preview exactly how the email will show up at the recipient’s end, and you can also send a test trigger from within Sendlane to see if the basic automation is in place. See below for pointers. Finally, don’t forget to save before you continue.
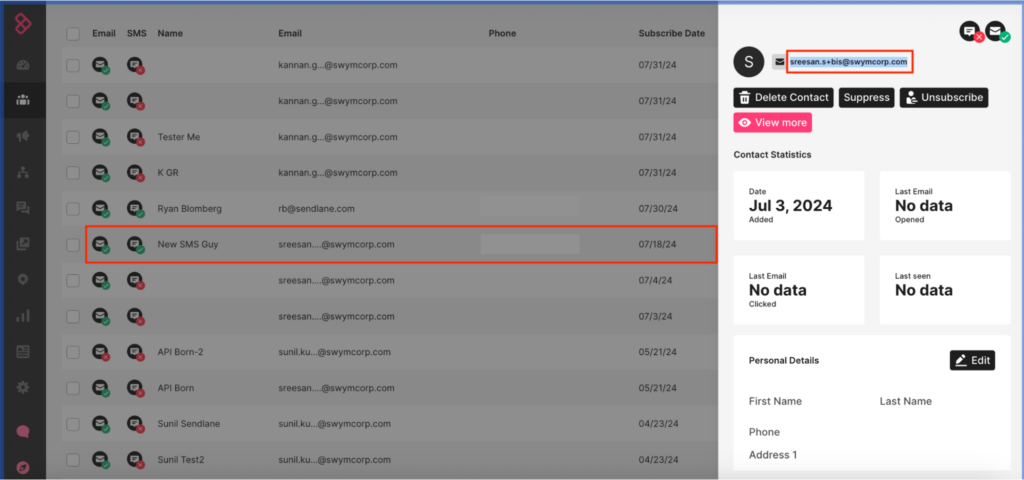
- Do verify that the destination email id is already added to the Contacts tab of the Audience section of Sendlane. Else, you may add it even now, for automated handling in subsequent iterations.
- Go to Swym Admin Dashboard, and having selected the right trigger (“Added to Wishlist” in this example) and filled out the selected email id, click on send test trigger – this time from within Swym Admin Panel, to simulate sending of email based on Swym events/ triggers.
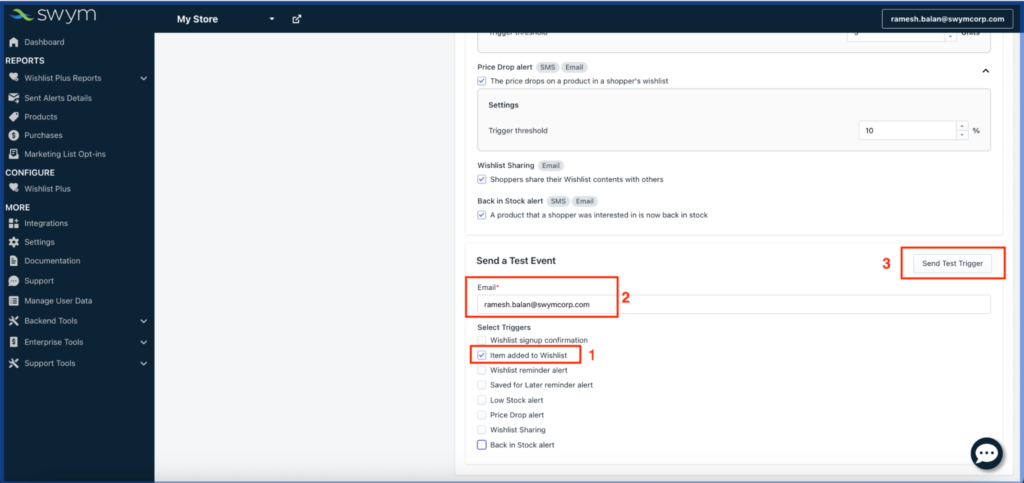
- Check if you receive the triggered email in the designated mailbox, and satisfy yourself.
Marketing Messages: Using Merge Tags for Quickly Setting Up Automations
- You will recollect that with the Swym<>Sendalane integration, you have the capability to re-engage shoppers in an effective manner with personalised alerts on the products that are of interest to them based on dynamic content generated from the shopper intent captured by Swym.
- Setting up of automations in Sendlane is a crucial link to be able to hit up shoppers with more engaging and relevant promotional content, to ultimately drive better results in terms of shopper conversion, from your email/ SMS campaigns.
- Please note that different email/ SMS service providers have their own formats and methods for using merge tags. So in this final section we dwell on the how-to of drafting content for a marketing message (Email/ SMS) by leveraging merge tags effectively in a Sendlane-specific context.
- You need to start with a declaration, as shown below:
{% set data = trigger.getCustomEventData() %}
S No | Merge Tag | Sample Value | What does this Populate? |
|---|---|---|---|
1. | {{data.eventTime}} | 2024-01-31T21:12:19Z | When was this event triggered |
2. | {{data.imageURL}} | https://cdn.shopify.com/s/files/1/0700/0722/6674/products/18k-rose-diamond-earrings_620x620.jpg?v=1672732521 | URL of the product image |
3. | {{data.listName}} | My Wishlist | Name of the Wishlist |
4. | {{data.productBrand}} | Supply Dark | Product Brand |
5. | {{data.productId}} | 8076431786290 | Unique product Identifier on the Merchant’s store |
6. | {{data.productName}} | 18k Bloom Earrings | Descriptive Product Name |
7. | {{data.productCurrentPrice}} | $495.95 | Current Price |
8. | {{data.productURL}} | https://swym-integrations-smsbump-staging.myshopify.com/products/the-collection-snowboard-oxygen?empi=8648095203628&epi=46752749191468&sw-rfr=4e20&swid=cdc6699a-1d5d-4076-87a9-0fb6efc10b39&variant=46752749191468 | Product URL on the Store Front |
9. | {{data.productQuantity}} | 1 | Product Quantity |
10. | {{data.SKU}} | sku | Stock Keeping Unit: A distinct type of item for sale, purchase, or tracking in inventory, including all attributes that distinguish it from other item types. |
11. | {{data.variantId}} | 44339644399922 | Unique Id for a Variant of a Product on the Merchant’s Store |
12. | {{data.variantInfo}} | arch | Variant Description |
13. | {{data.user}} | ||
13a | {{data.user.medium}} | The medium shopper has opted for (sms/email) | |
13b. | {{data.user.mediumvalue}} | someone@swymcorp.com | Phone Number/Email of the User |
- Currently, Sendlane doesn’t support conditional splits based on custom event properties to select the channel (viz SMS/ Email). This means sending email or SMS based on custom properties from Swym payload is not possible (this would come from the medium field in the payload).
- Consequently, if you wish to use the email channel to reach the shopper, you would need to create a separate automation for it (e.g. Add to Wishlist (email)) for each of the Swym triggers separately. However, allowing for conditional split by the user-preferred-medium (email /SMS) is on Sendlane’s roadmap and will be accomplished soon.
- Some of the more complex use-cases relate to sharing information related to a range of wishlisted products with users, when triggered
- by certain Wishlist Plus or Back in Stock events such as Share a Wishlist, a Wishlist Reminder or Save of Later (SFL) Reminder. However, the good news is that such events are also supported by the Sendlane<>Swym Integration using arrays (of products).
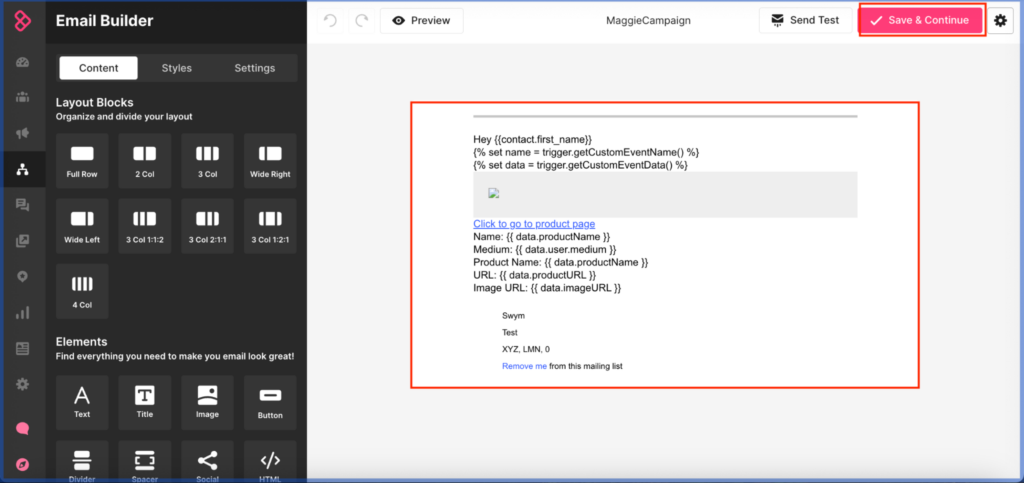
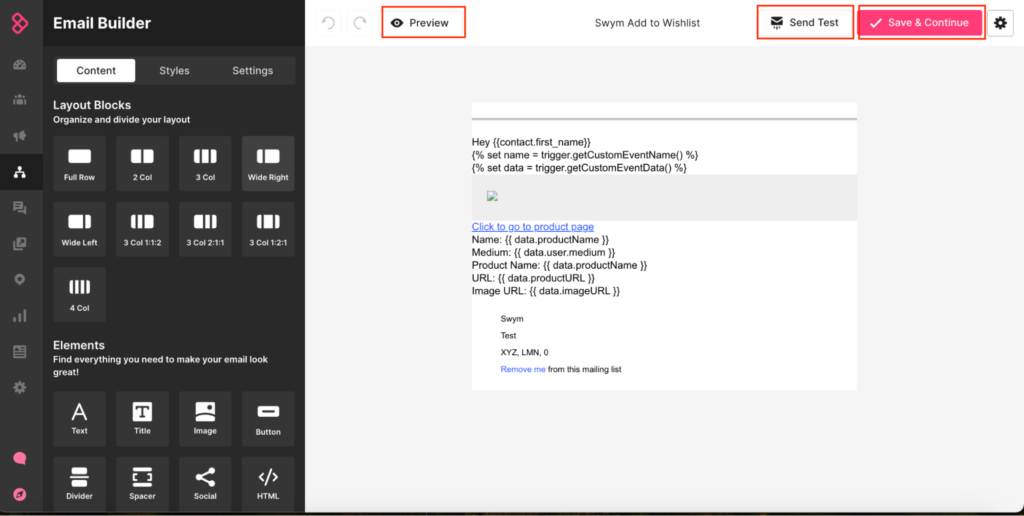
- It is in no way necessary to always use all the listed merge tags. You may find that a functional subset can often meet your need quite adequately, e.g. the merge tags used in the Add to Wishlist Email in this playbook are as shown below:-
Hey {{contact.first_name}}
{% set name = trigger.getCustomEventName() %}
{% set data = trigger.getCustomEventData() %}
Click to go to product page
Name: {{ data.productName }}
Medium: {{ data.user.medium }}
Product Name: {{ data.productName }}
URL: {{ data.productURL }}
Image URL: {{ data.imageURL }}
					<p style="text-align: center; font-family: verdana, geneva, sans-serif;">Hey {{ contact.first_name }}</p>
{% set data = trigger.getCustomEventData() %}
<p style="text-align: center; font-family: verdana, geneva, sans-serif;">
    <a href="{{ data.productURL }}">{{ data.productName }}</a> has been added to your wishlist
</p>
<p style="text-align: center;">
    <noscript><img decoding="async" src="{{ data.imageURL }}" alt="Product Image" /></noscript><img class="lazyload" decoding="async" src='data:image/svg+xml,%3Csvg%20xmlns=%22http://www.w3.org/2000/svg%22%20viewBox=%220%200%20210%20140%22%3E%3C/svg%3E' data-src="{{ data.imageURL }}" alt="Product Image" />
</p>
* Quantity not included for the “Swym Back in Stock Subscription” event.