")
Setting Up the Swym Back in Stock Alerts App On Your eCommerce Store
Thank you for installing the Swym Back in Stock Alerts app on your e-commerce store. We’ve made it simple to set up the app via a wizard.
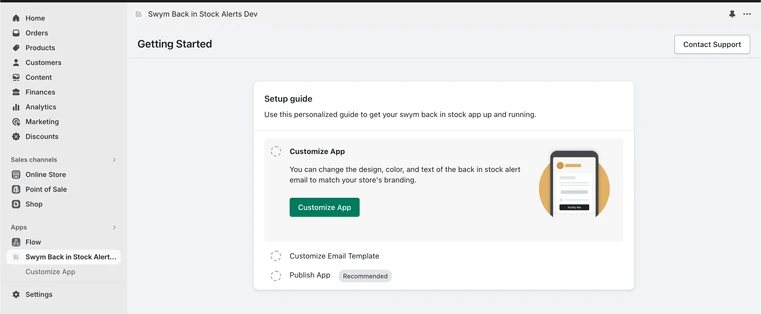
Once you’ve completed the onboarding as outlined below, you’ll be taken to our Quickstart page, to help you get the app set up and running in no time.
For the first 30 days, you’ll be on the free trial of all our Premium features, so you can experience everything that the app has to offer. At the end of your trial, you can pick a plan that best suits your needs.
Wizard walkthrough for Non-Shopify Stores
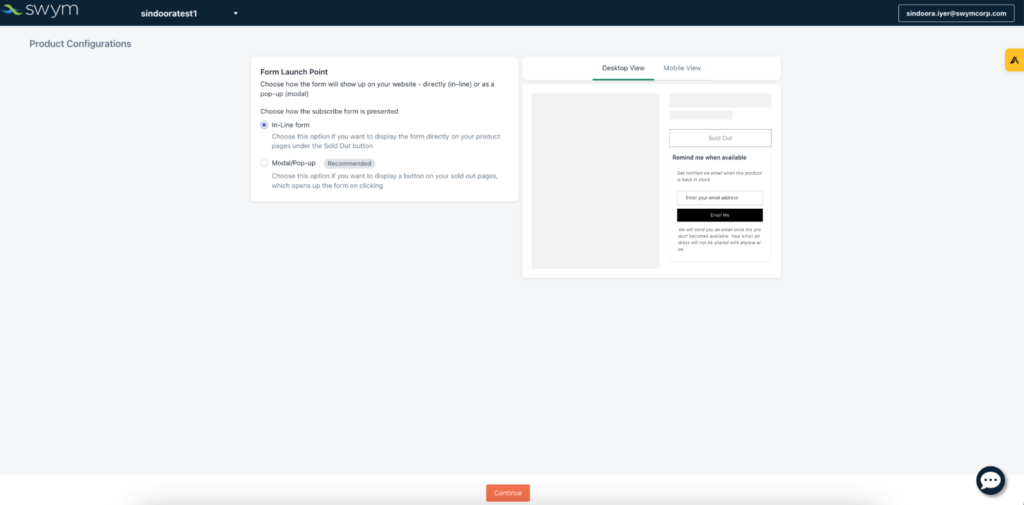
Step 1: Product Detail Page Configuration
The first step is to determine how you want to present the subscribe form for out of stock products. Choose between a button that triggers a modal / popup or an inline form.
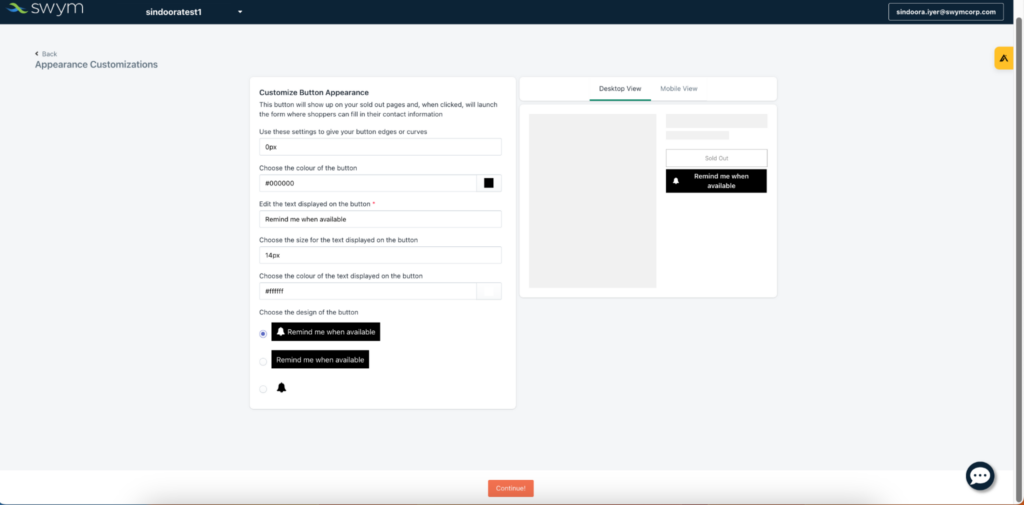
If you choose the modal / popup option, the product page will show a button when your product is out of stock and the form will pop up on clicking this button. This step will determine how the button should be styled.
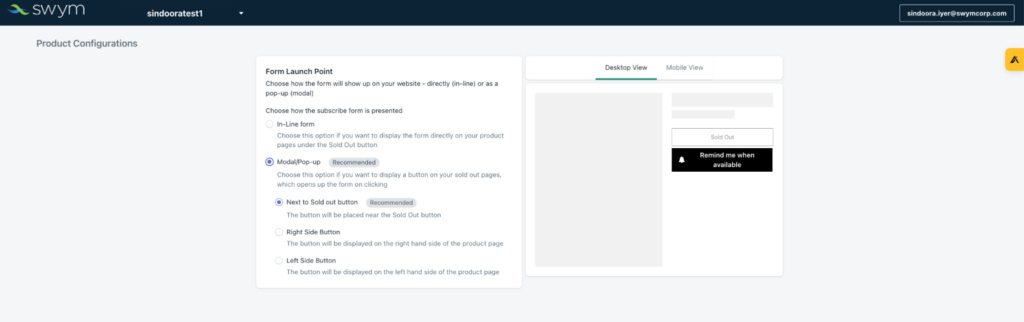
You can define the text you want to display on the button and how you want it styled.
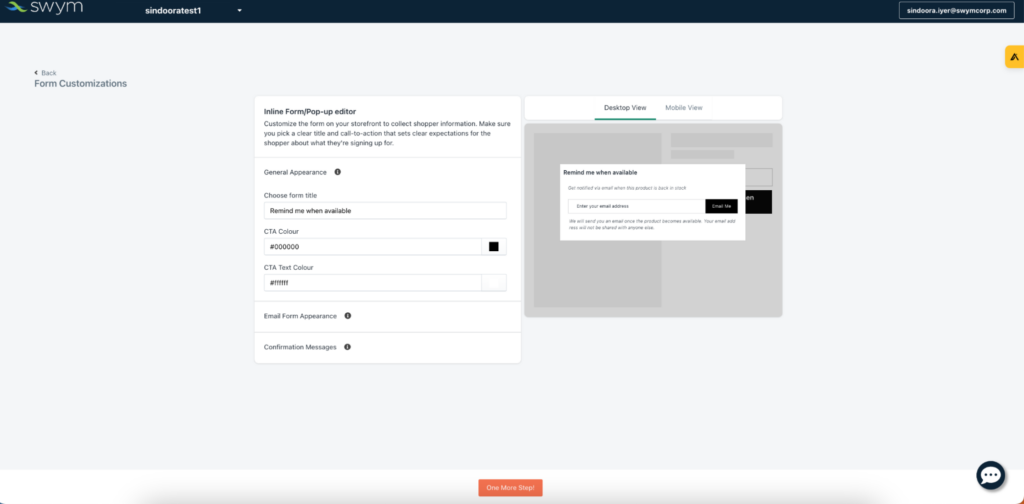
The next step is to customize the appearance of the form shoppers will fill in to sign up for alerts. The text is completely customizable, offering support for languages other than English as well. The color and text of the form button can also be adjusted to match your brand colors.
Step 2: Email Service Provider Details
Once a product is restocked, as long as you’re in a trial or a paid plan, we will send automatic emails to all the shoppers who have subscribed to an alert for that product. This step in the wizard is for configuring who that email will be sent on behalf of. (Note: If you choose our Free forever plan after the trial, you will have to trigger alerts manually after a restock.)
- FROM NAME – This will be the FROM name of the sender
- REPLY-TO EMAIL – This will be the email address that we will be set as the “Reply to” in all emails.
- You will need to validate your email. This is to ensure that someone else is not using your email ID by mistake.
- You will receive a confirmation email on the login that you have logged into the store with
- Just click on the confirmation link and you are all set.
- If you have chosen an Email Service Provider, this address will be set as the FROM email address
- If you have chosen Swym to send the email then it will be sent from “YourStoreName@swymrelay.com”
- You will need to validate your email. This is to ensure that someone else is not using your email ID by mistake.
- CHOOSE EMAIL SENDER OPTIONS – Depending on which plan you’ve selected, you can configure the app to use your own Email Service provider or marketing tool (like Klaviyo or MailChimp) to send these emails. If you don’t use an email service provider, you can also configure Swym to send these emails on behalf of your store.

We currently integrate with the following ESPs:
- Mailchimp/Mandrill
- Klaviyo
- HubSpot
- Retention Science
- Optimizely
- Sailthru
- Cordial
- Listrak
- DotDigital
- SendGrid
- Amazon SES
This was the last step of the setup wizard. Clicking on the ‘Finish Setup’ button will take the app live on your store!
Wizard walkthrough for Shopify Stores
If you’re a Shopify Store, the wizard will take you through the onboarding as per the steps mentioned below.
Step 1: Share your contact information
Please update your name and email address in this step and then click on ‘Get Started’. This will help us connect with you for product updates and information that will help you get the most value from the app.

Step 2: Customize how the app looks on your product pages
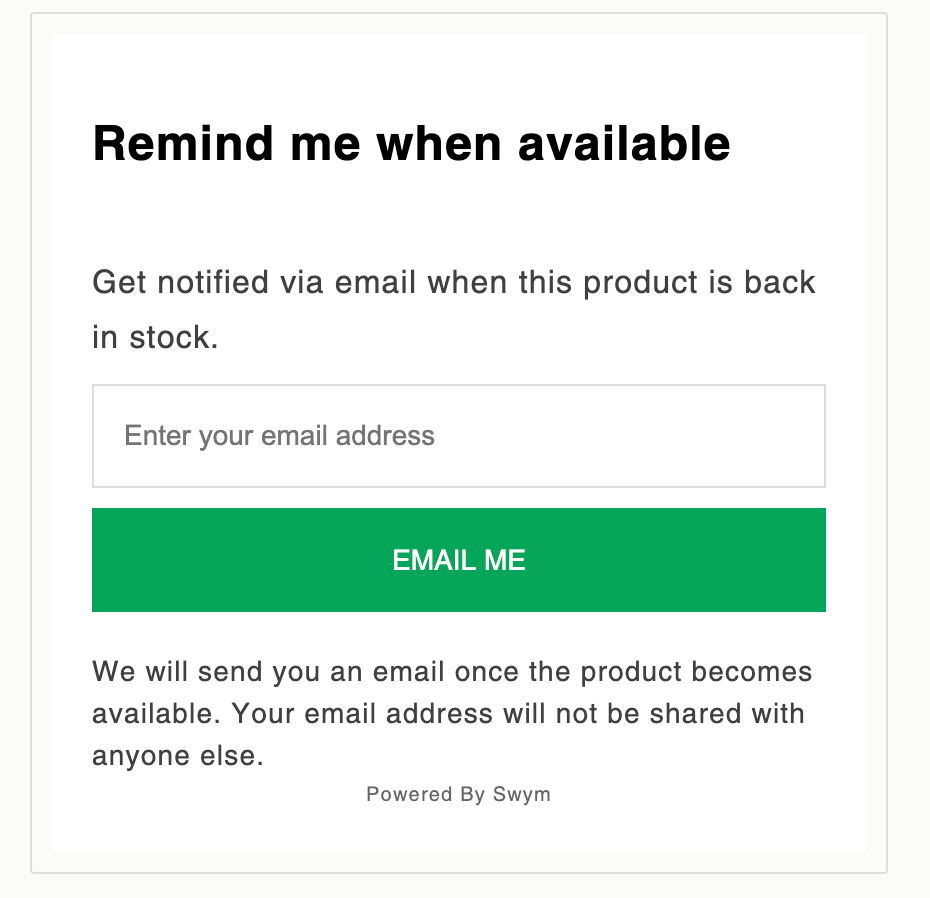
The next step is to customize the form and button that appears on your product details page. If you choose not to customize, the form will show up on your product pages as per the below image:
If you want to make changes to this, you can click on the ‘Customize App’ button.
You can customize the form in many ways including:
Choosing between a button that triggers a modal / popup or an inline form
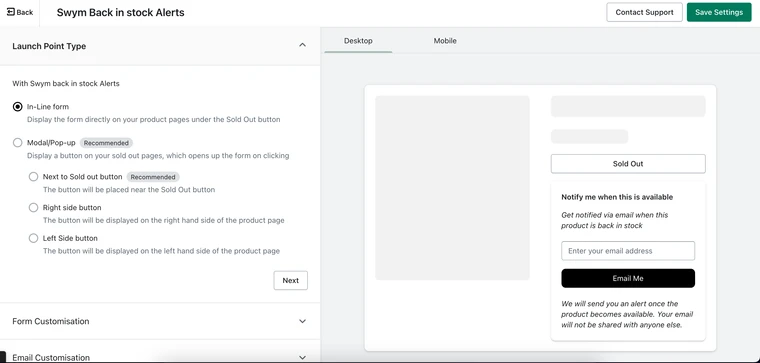
Changing the default text on the form, the success messages and the style and colors
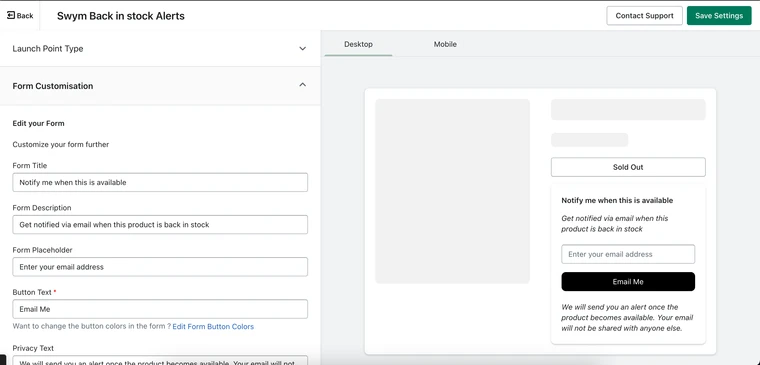
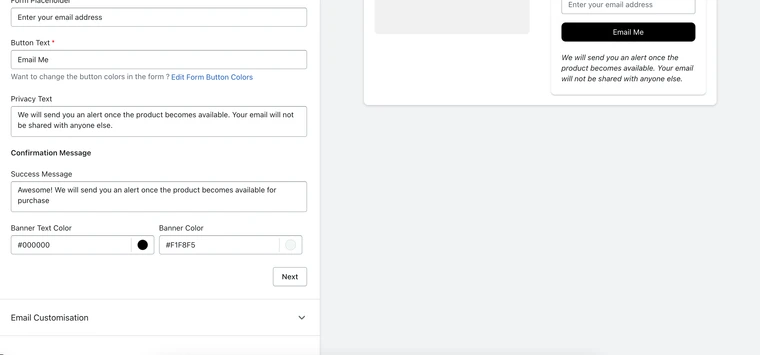
You will be able to see the changes you make in the preview section on the right side of the screen. Once you’re happy with the changes, click on the ‘Save Settings’ to the top right of the screen.
You can then either click on ‘Next’ to the bottom of the screen to move on to the next step or click on the ‘Back’ button to the top left of the screen to go back to the setup wizard.
Step 3: Email Customization & sender information
The next step is to customize the email template and the sender details. If you choose not to customize, the email will look like the image below:
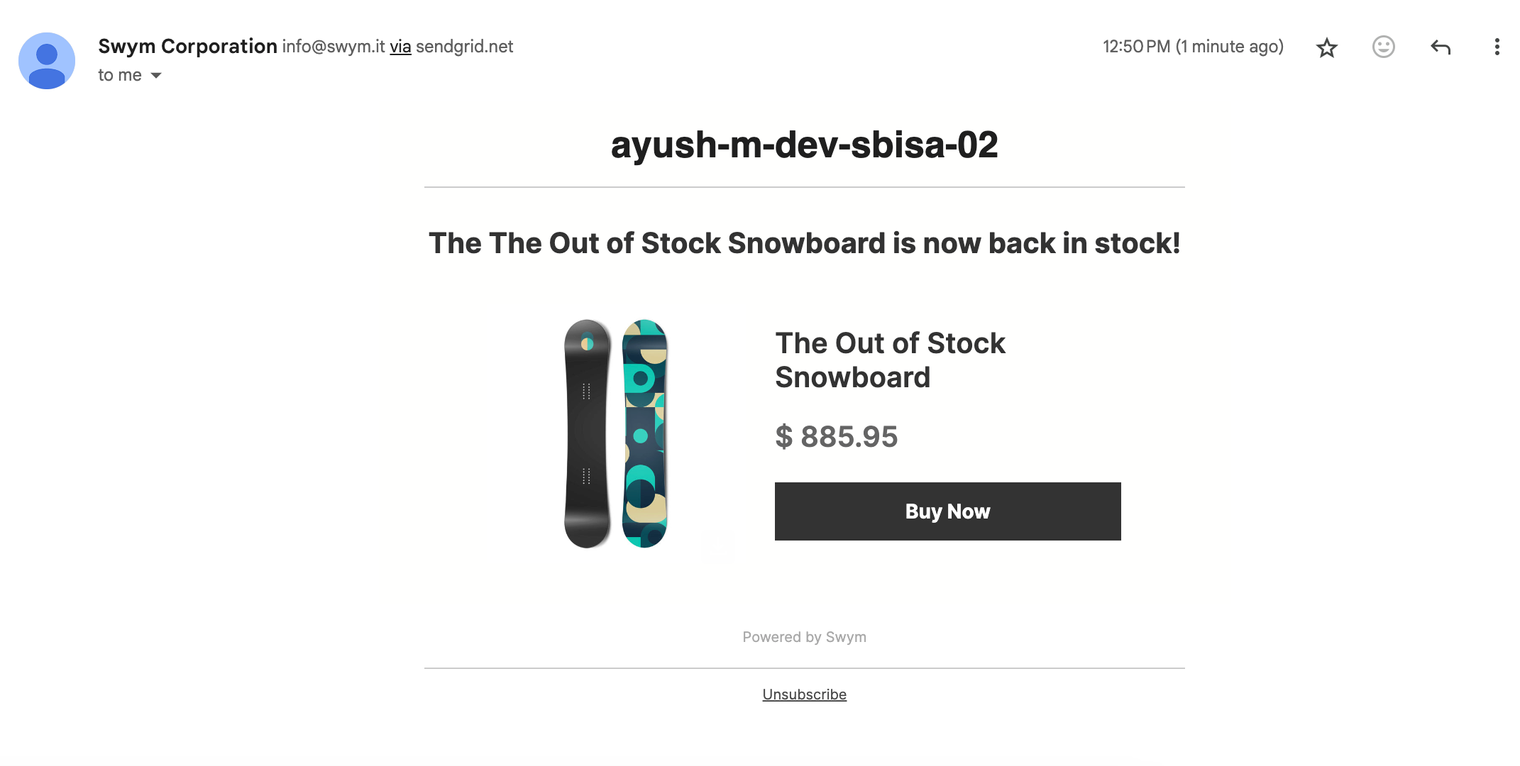
The header will be the name of your store, the email sender name will be Swym Corporation and the replies from your customers will be sent to info@swym.it.
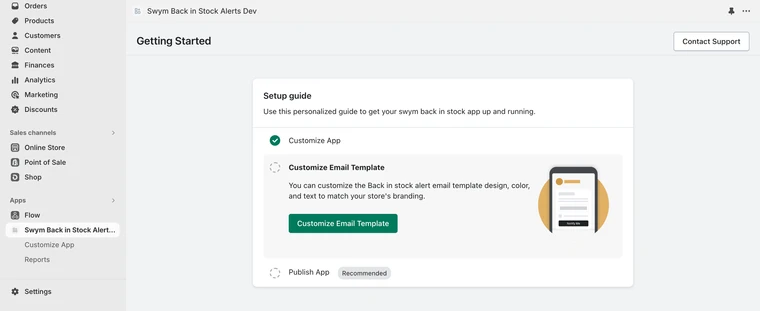
If you want to make changes to the default settings, click on the ‘Customize Email Template’ button in the setup wizard or ‘Next’ in the previous step.
You can customize the email in many ways including:
Changing the sender name and “reply to” email ID
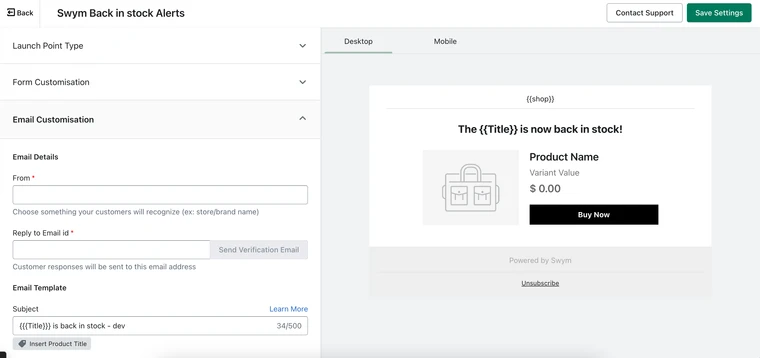
Editing the email subject and email body text, fonts and colors, header and footer
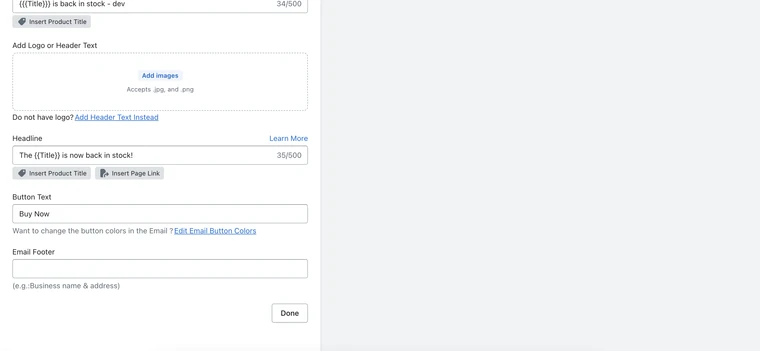
You will be able to see the changes you make in the preview section on the right side of the screen. Once you’re happy with the changes, click on the ‘Save Settings’ to the top right of the screen or ‘Done’ to the bottom of the screen.
Then click on the ‘Back’ button to the top left of the screen to go back to the setup wizard.
Step 4: Publish via Shopify Theme Editor
In this last step, our onboarding wizard will take you to Shopify’s 2.0 Theme Editor to publish our app on the theme you choose.
On clicking the ‘Publish app’ button, a new page will open and where you can access the App Embeds section on the Theme Editor. All you need to do is check if the button is toggled on and click on the ‘Save’ button on the top right of your screen. (Don’t worry, we have prompts guiding you through this step on Shopify’s Theme Editor as well!)
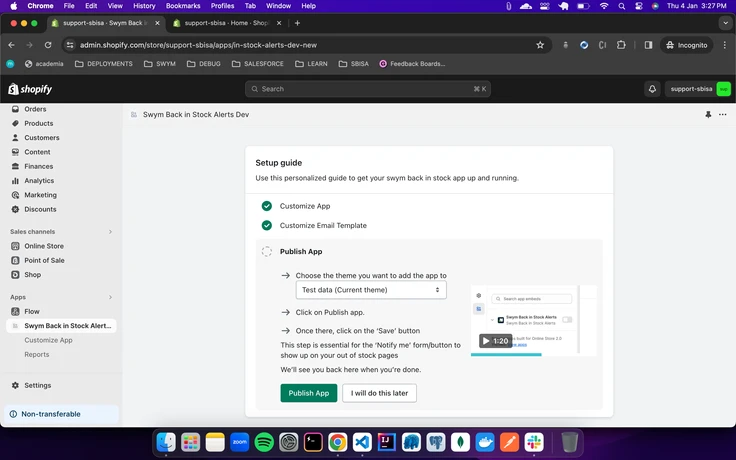
That’s it! Our app will now be live on the chosen Shopify theme!
Testing your Back in Stock Alert emails (Paid Plans)
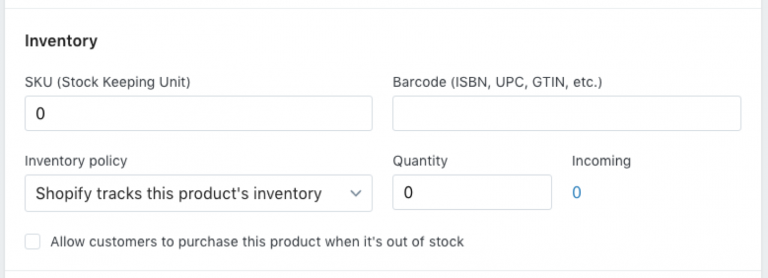
To test the Swym Back in Stock Alerts app on your e-commerce store, you will need to find an out-of-stock product to test out the entire flow on. Visit this product page and sign up for an alert using the “Email me when available” button. Next, you will have to replenish stock for that product to trigger an alert. We suggest using a test product so as to not disturb the current inventory or pricing setup.
- Ensure that the product has the ‘Quantity’ set to ‘0’ in the ‘Inventory’ section
- From the product details page, click on the “Email me when available” button and provide the email address to receive the back in stock alert
- Now from the Shopify product section, increase the ‘Quantity’ for that Product and ‘Save’ settings
- You should receive a back in stock alert at the email address you had provided
Note: If you are on the free plan you will have to follow the steps as outlined in this help document to trigger manual back in stock alerts.
Bonus: Setting up back in stock SMS alerts (Paid Plans)
The Swym Back in Stock Alerts app also allows you to send back in stock alerts via SMS through integrations with Klaviyo, Twilio and Postscript.
You can manage these settings by going to Configure -> Swym Back in Stock Alerts -> Send back in stock SMS alerts in your Swym Admin, and choosing the platform you want to integrate with.

Next, follow the steps mentioned in our help documents for each of these integrations:
After Install: Tracking the performance of your back in stock alerts
Don’t forget to check the Dashboard section in your Swym Admin. The dashboard pulls together some smart insights about your website’s overall engagement as well as specific metrics for your Swym Back In Stock Alerts app, and you can use this data to further hone your online marketing strategies or make inventory decisions. Here is a help document that will walk you through all the reports available to you on the Swym Back in Stock App.
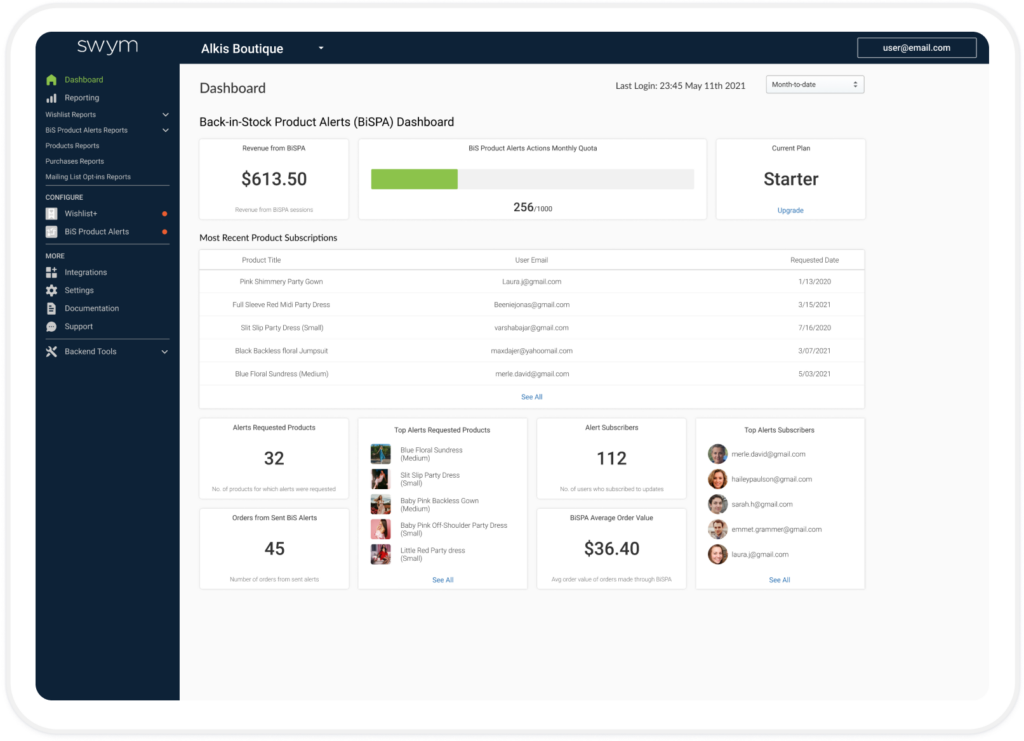
The cool thing about Swym Back in Stock Alerts app is that not only does it help send relevant emails and SMSes to your shoppers, you can also get visibility into which of your products are the most popular (based on the number of users that are subscribing to alerts for them), what kind of alerts are generating the highest engagement and who your most active users are. Sending back in stock and other product alerts can be an effective tool in your marketing armory, especially when you are looking to engage your customers in a cost-effective fashion.